Lyno Android Player Manual
Installation Instruction Tutorial
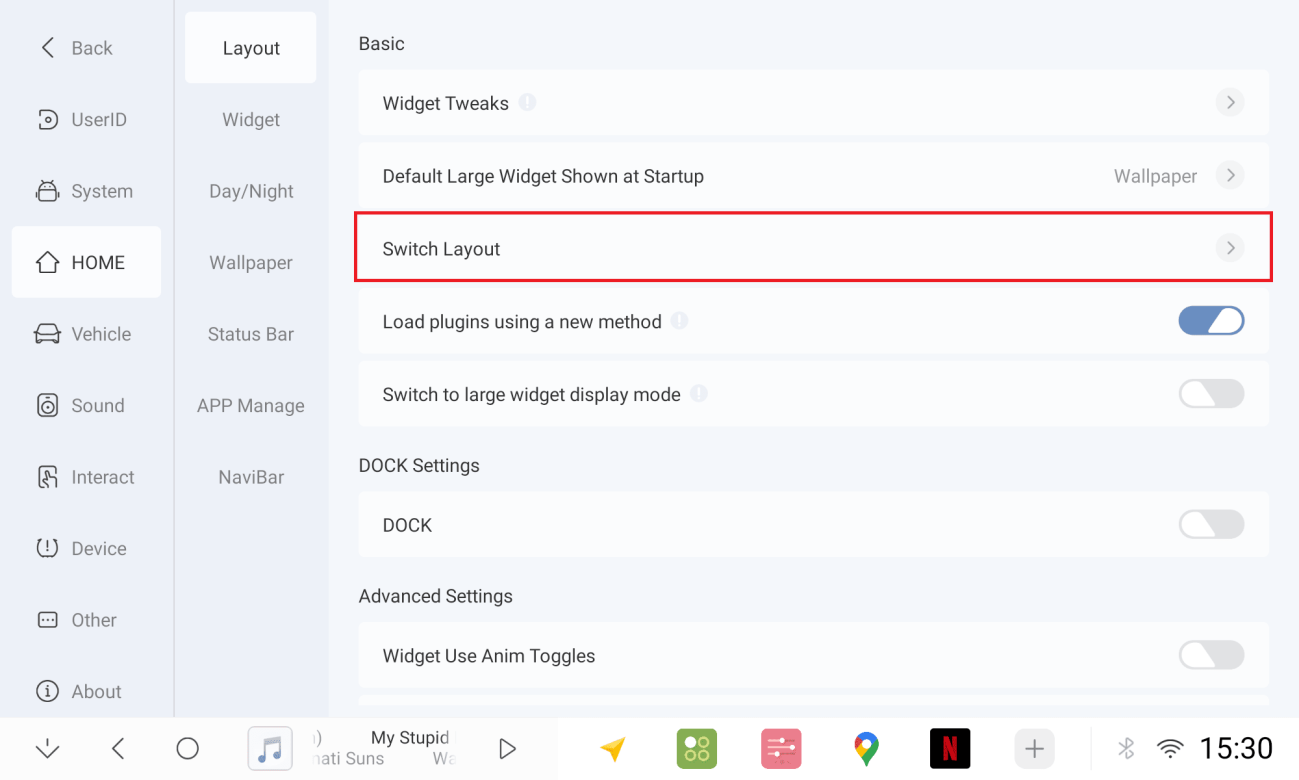
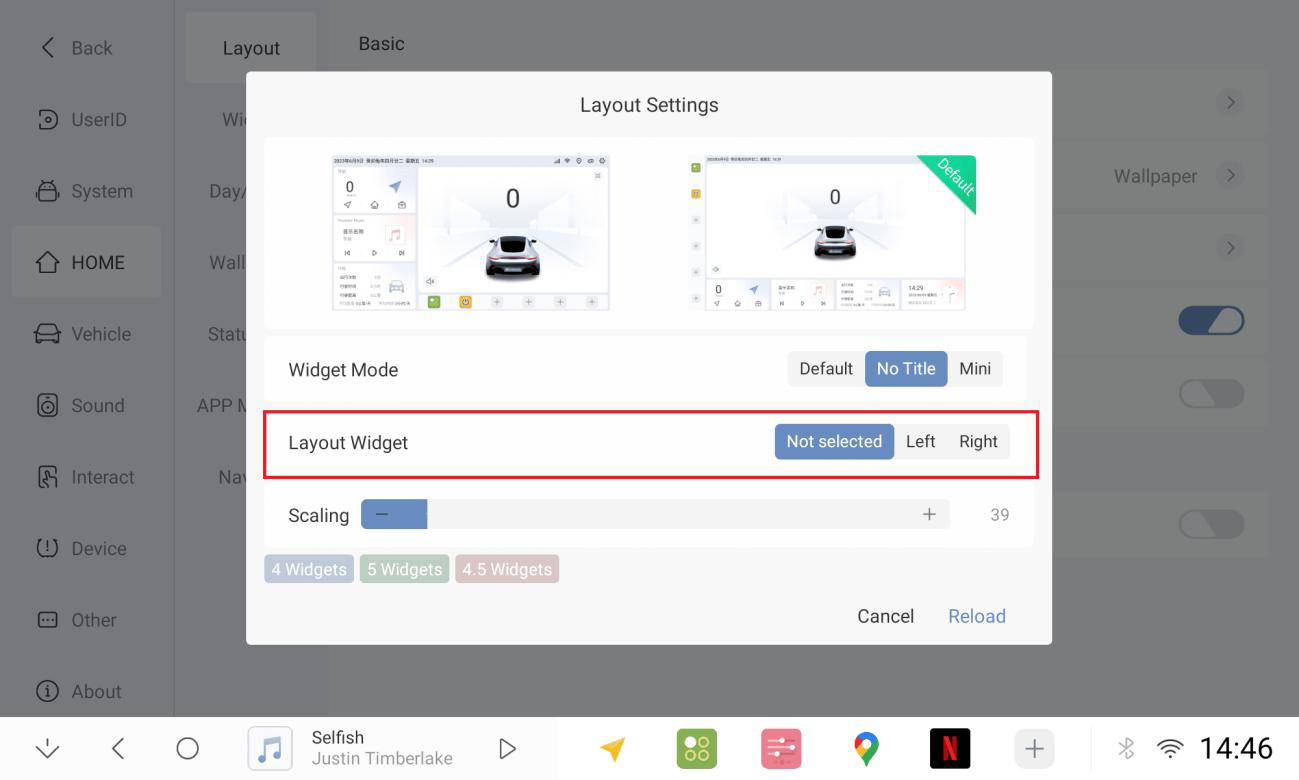
1.1 Layout Changes
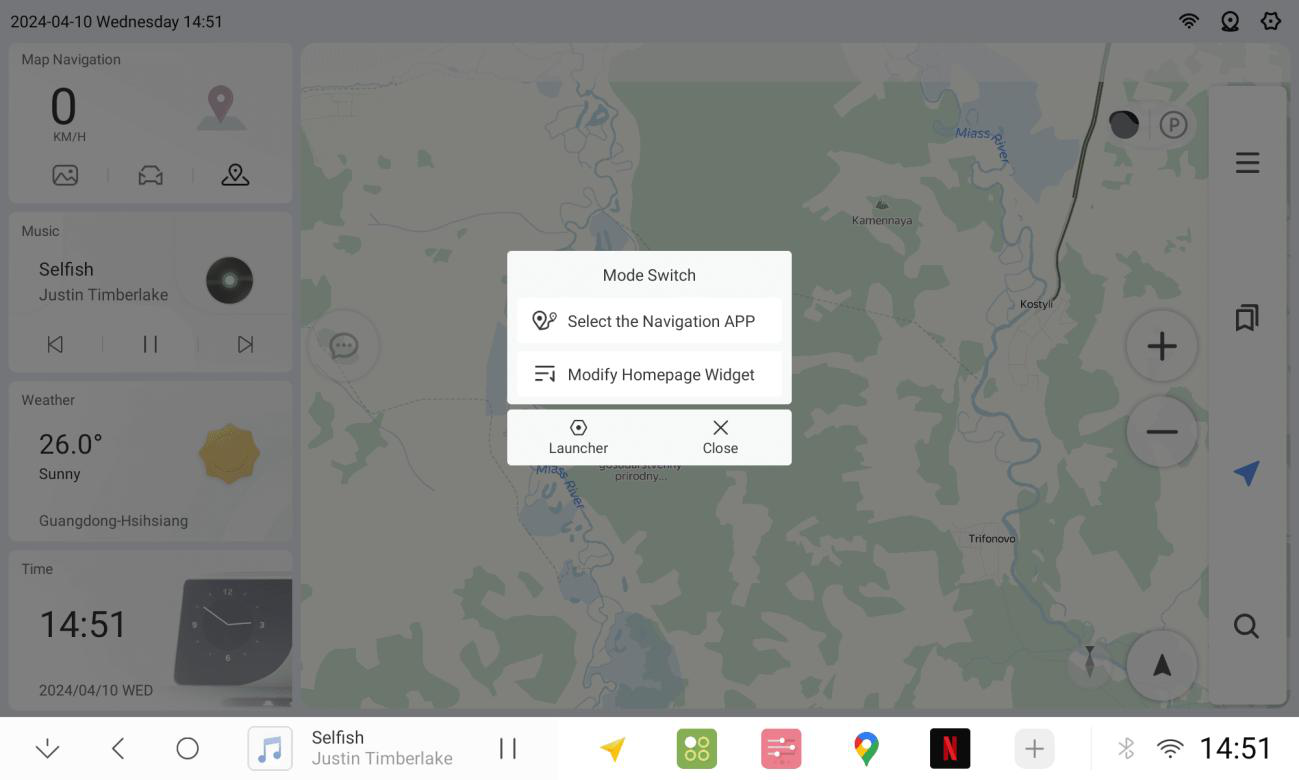
1.1.1 Click on the car settings desktop homepage layout settings to switch layouts
1.1.2 Two layout options available, top and bottom layout/left and right layout
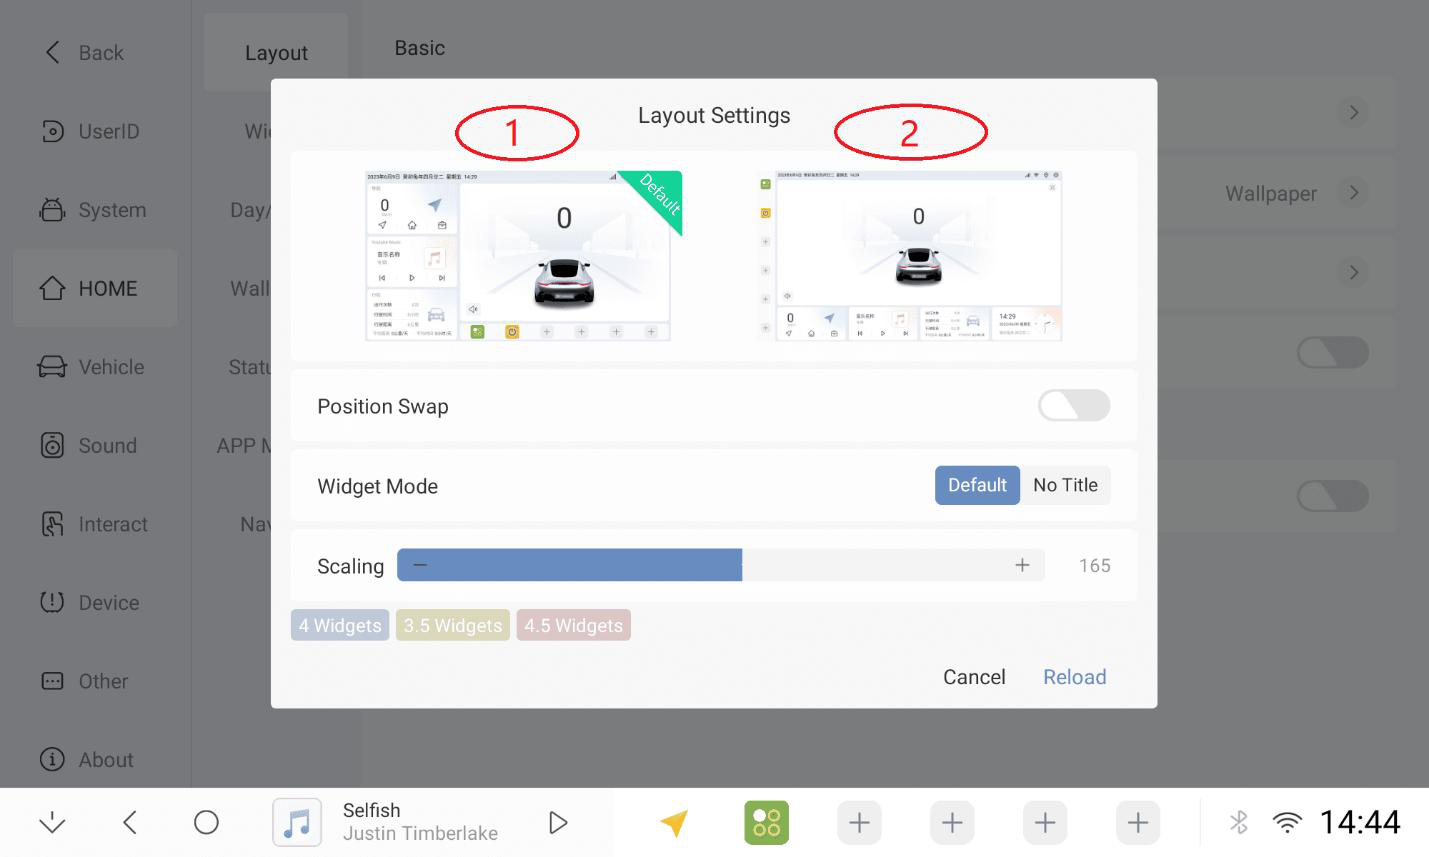
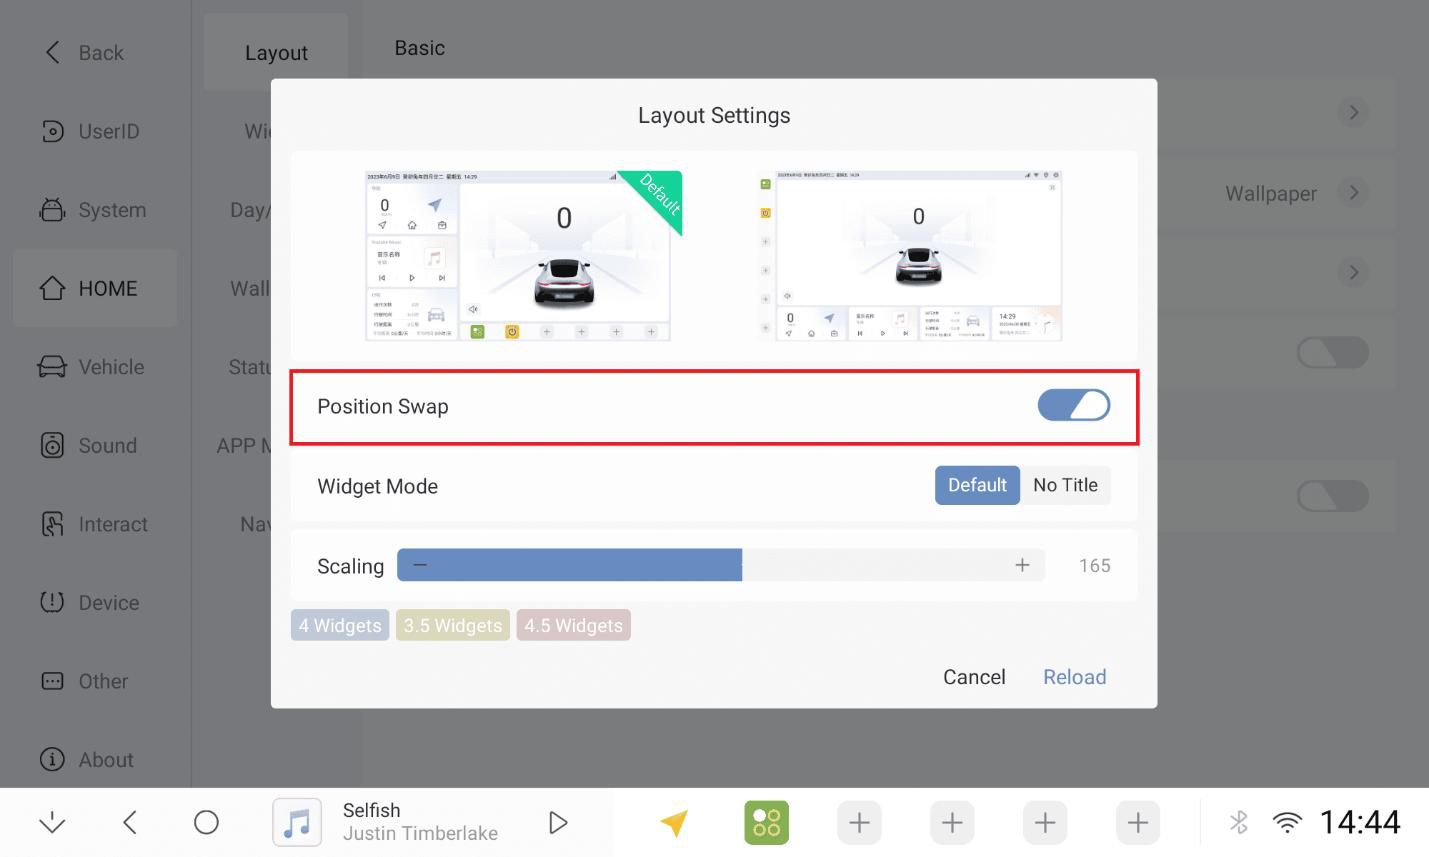
1.1.3 Layout 1 (left and right layout) Size plug-in can switch positions
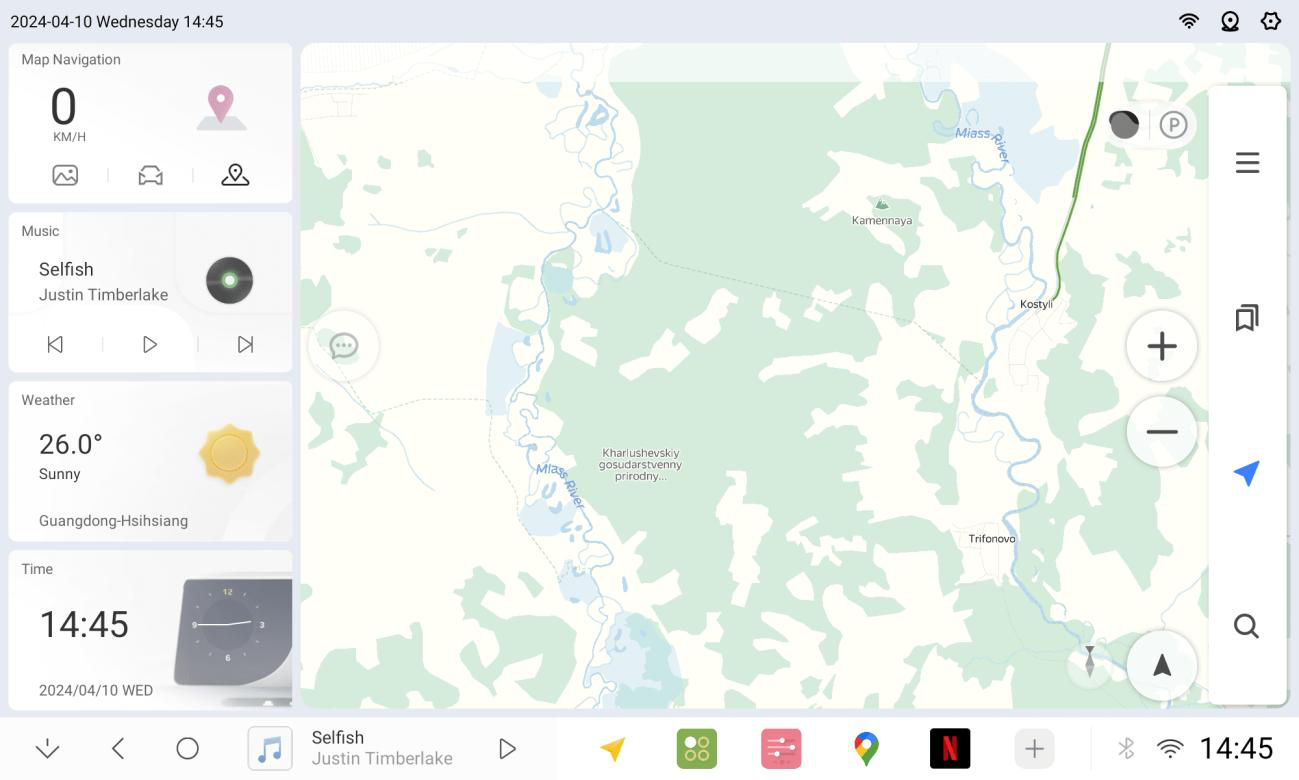
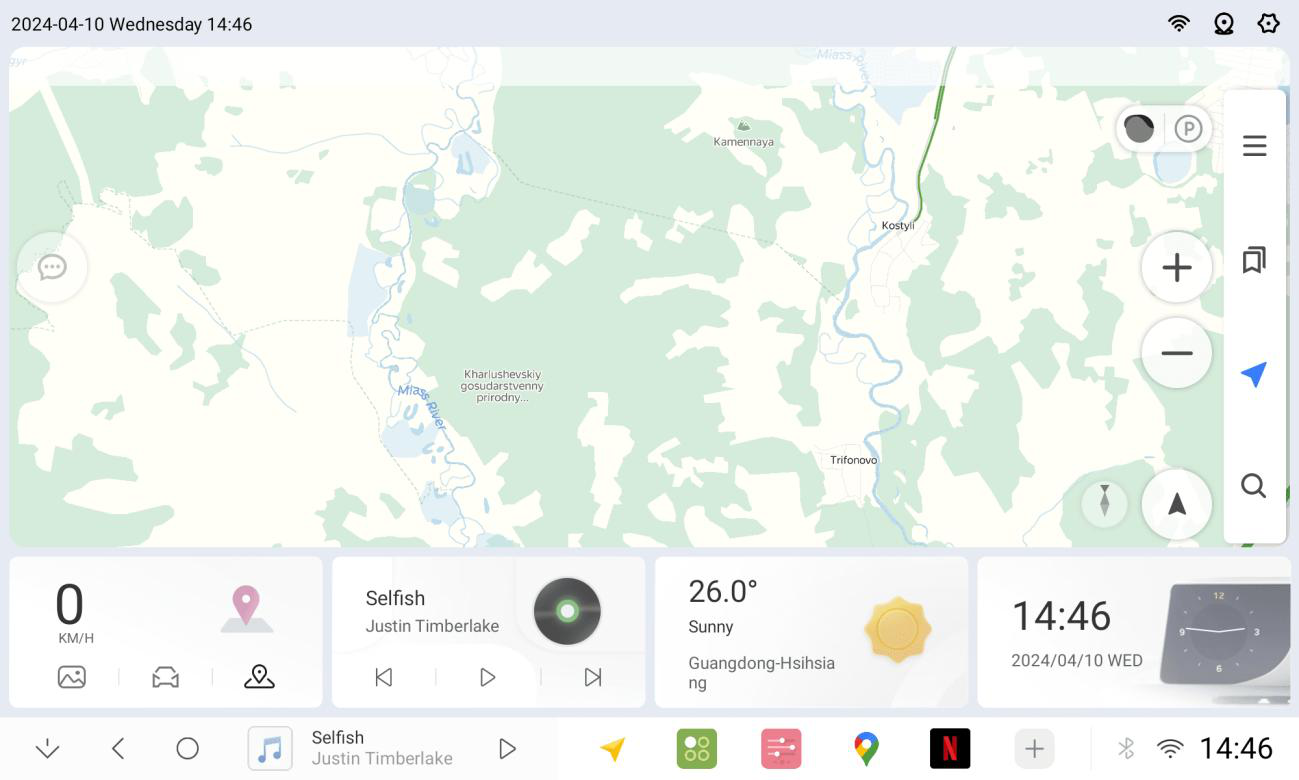
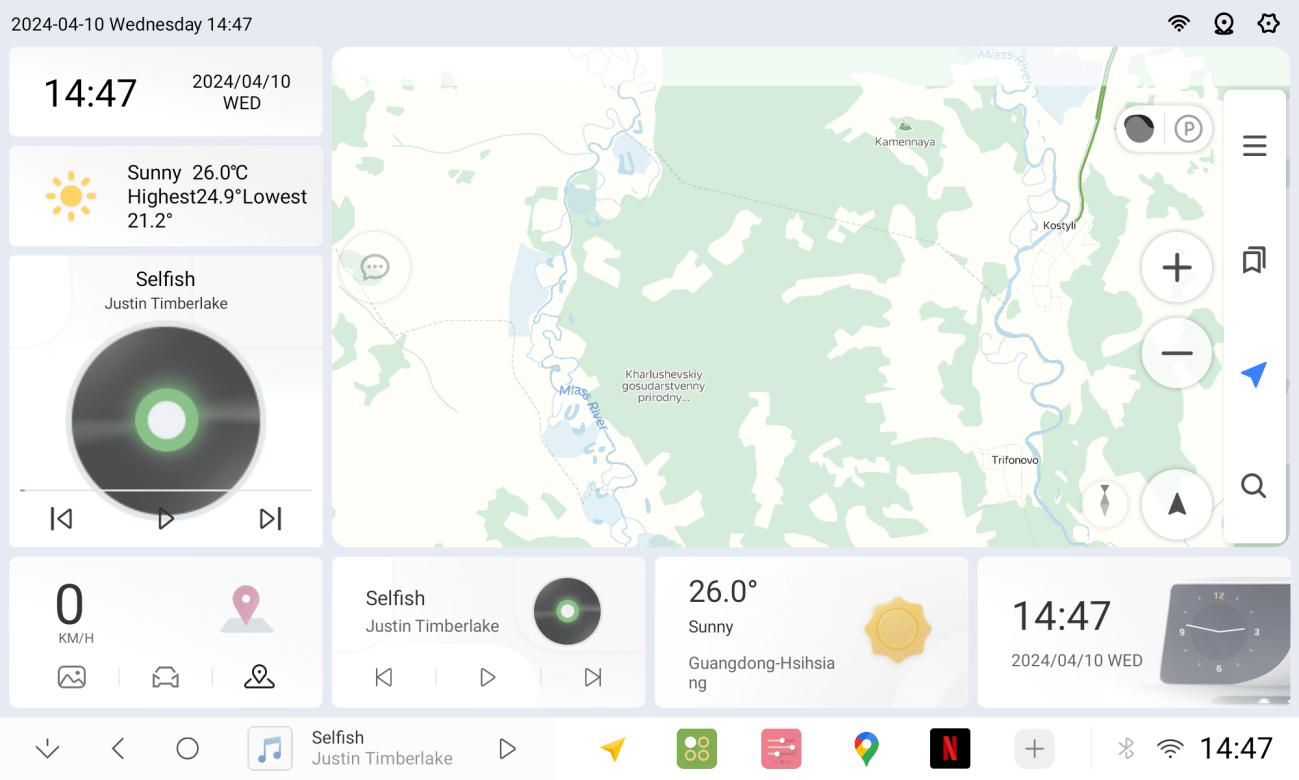
1.1.4 Left side effect
1.1.5 Right side effect
1.1.6 Layout 2 (Top and Bottom Layout) Layout pendants can be switched
1.1.7 Style 1 (without pendant)
1.1.8 Style 2 pendant on the left side
1.1.9 Style 3 pendant on the right side
1.1.10 And the plugin size can be set to mini in the settings

1.1.11 Pendant long press can be edited and adjusted
1.1.12 Modifying pendant can be checked or adjusted in position
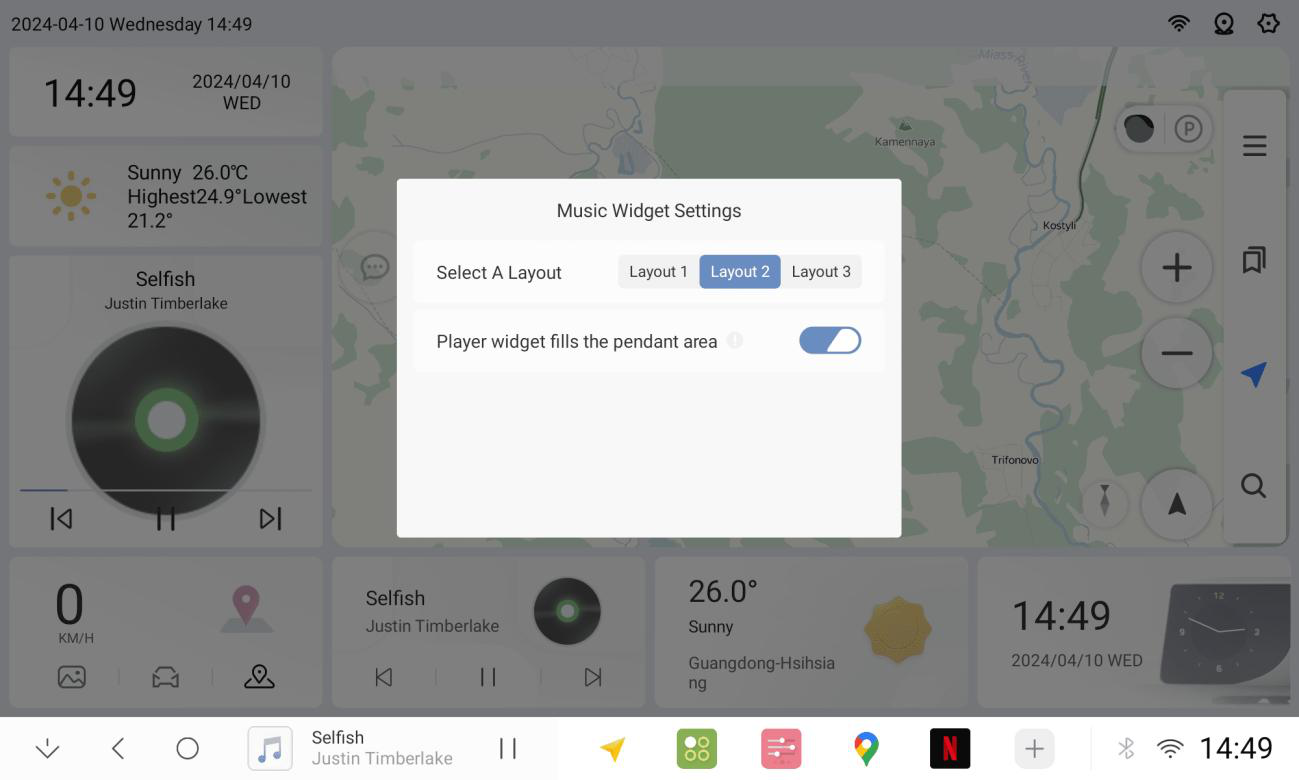
1.1.13 Music pendant settings multiple layouts
1.1.14 Complete
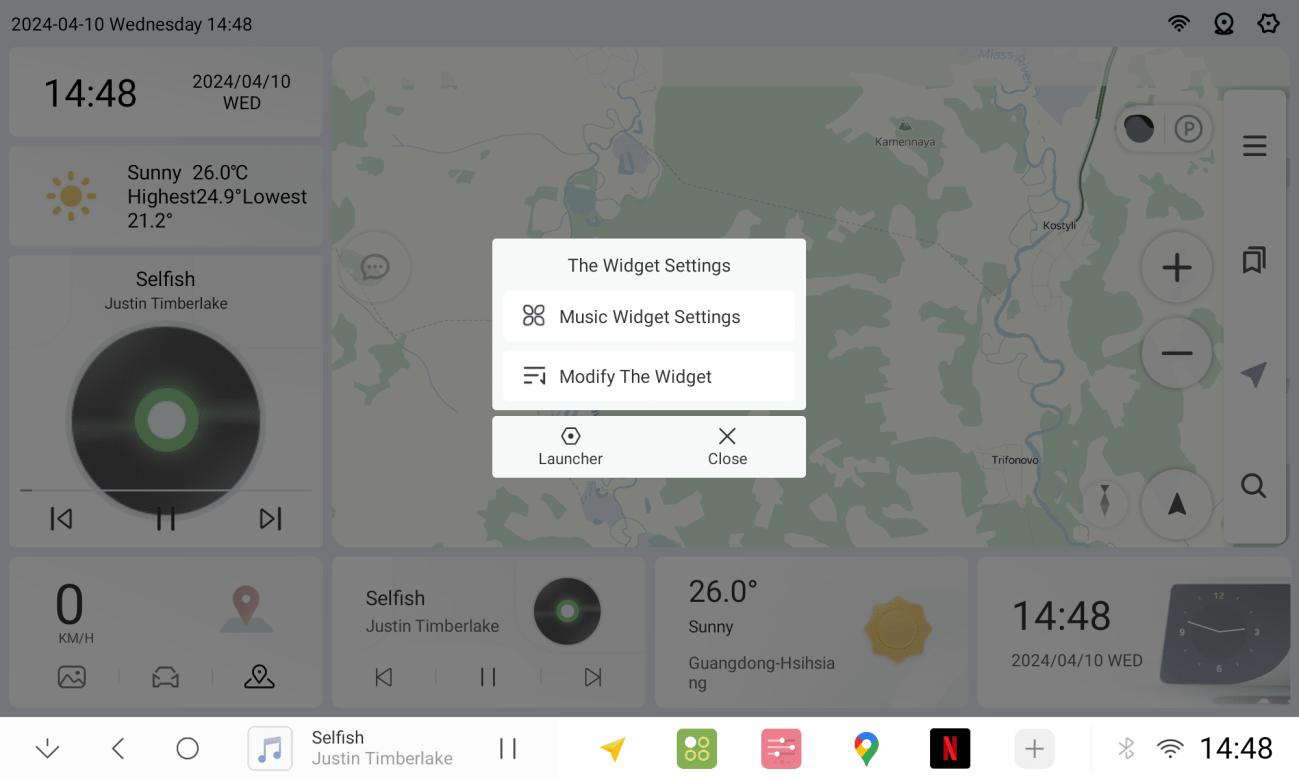
1.2 Plug-in Modifications
1.2.1 Plug-in Modifications
1.2.2 Long press on any plug-in (select modify home plug-in)
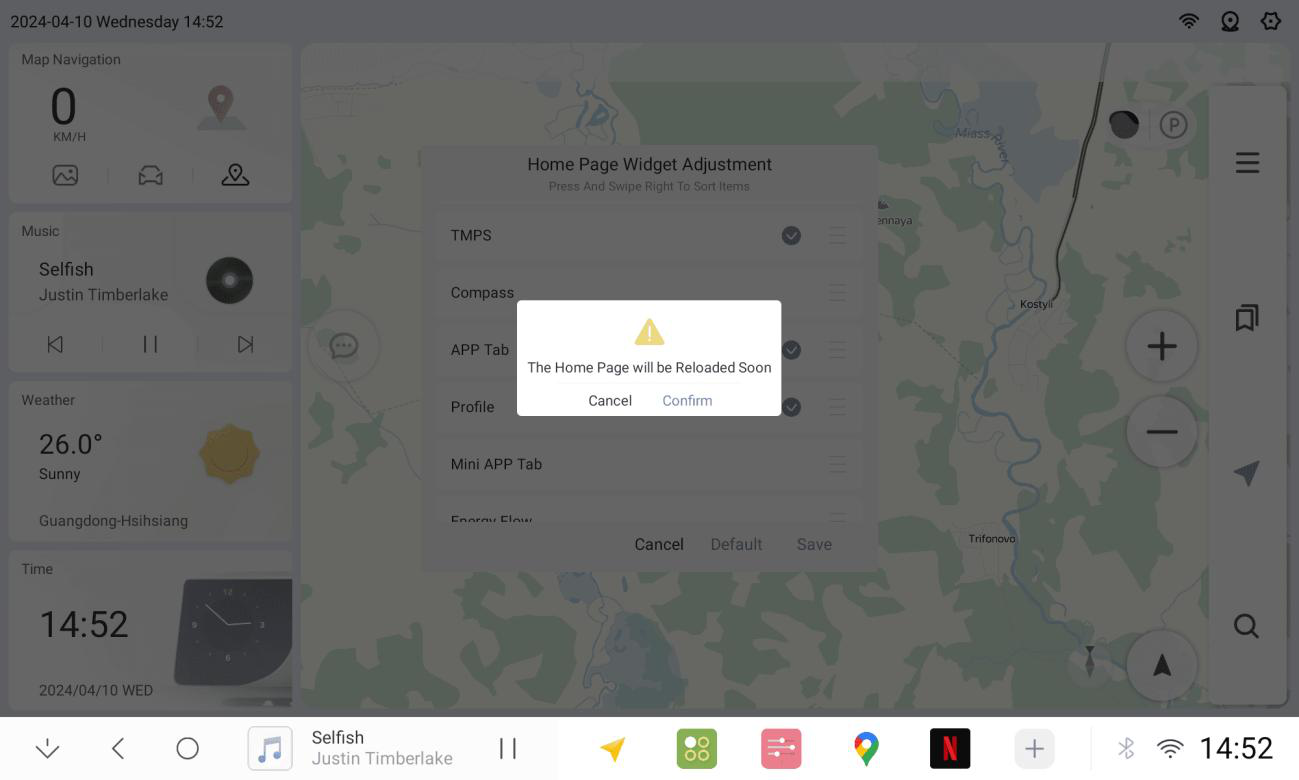
1.2.3 Tick to show or hide, or long-press to adjust plug-in position
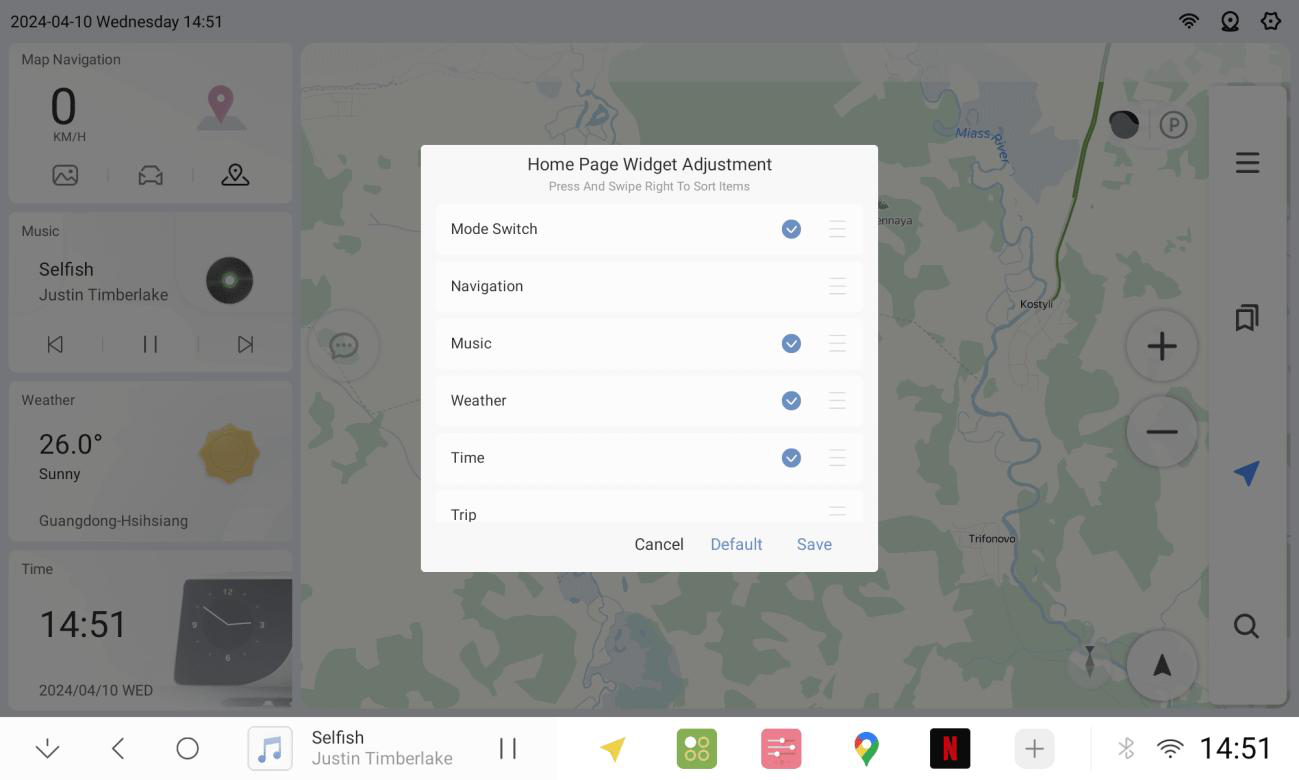
1.2.4 Click Save-Confirm after making adjustments.
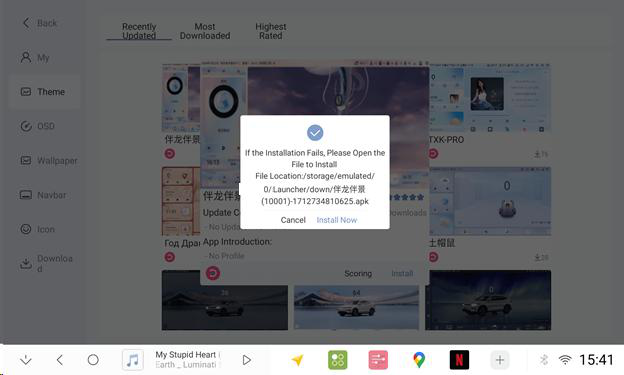
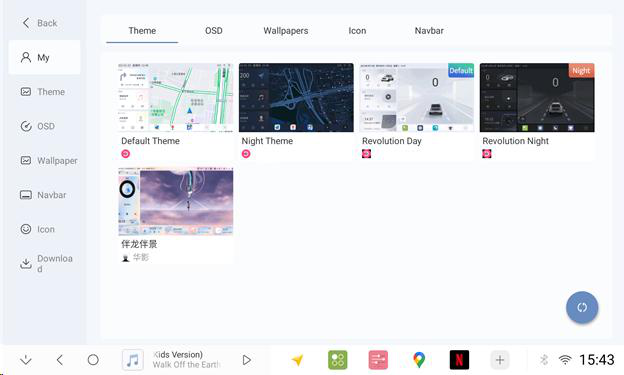
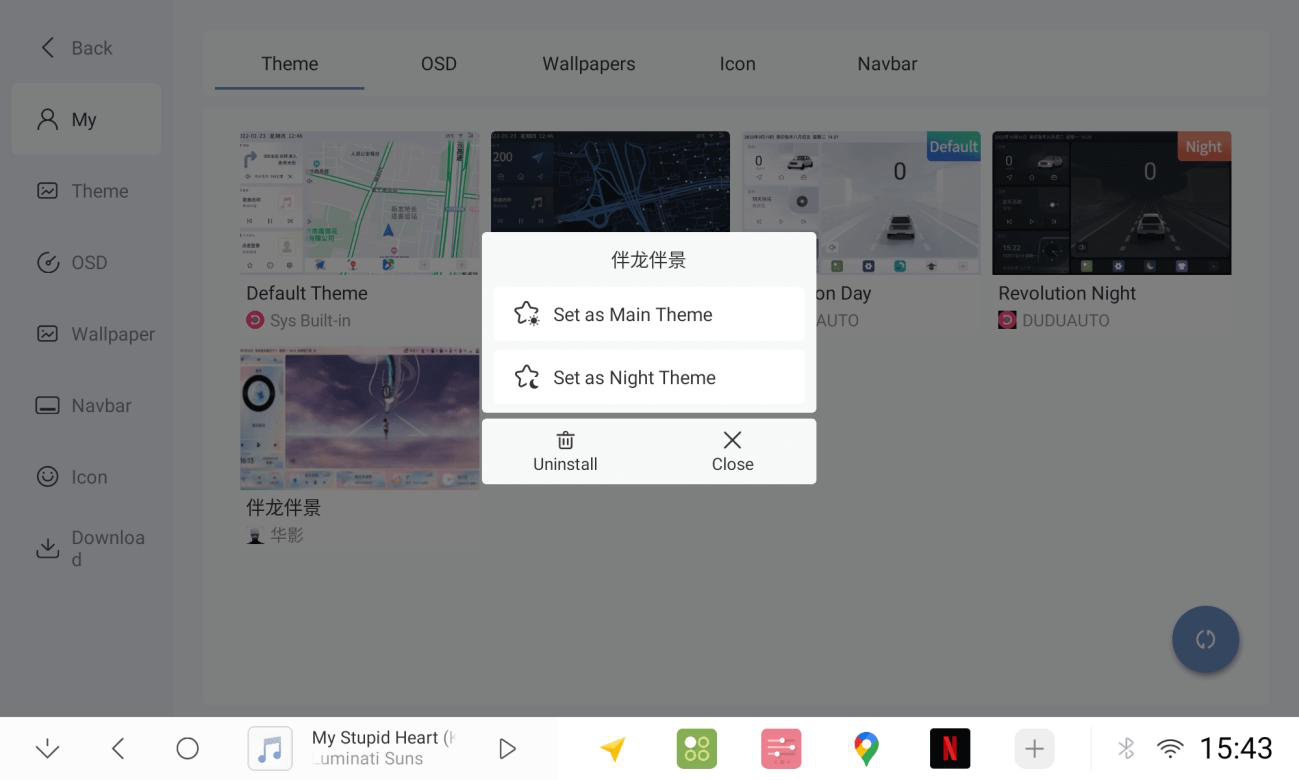
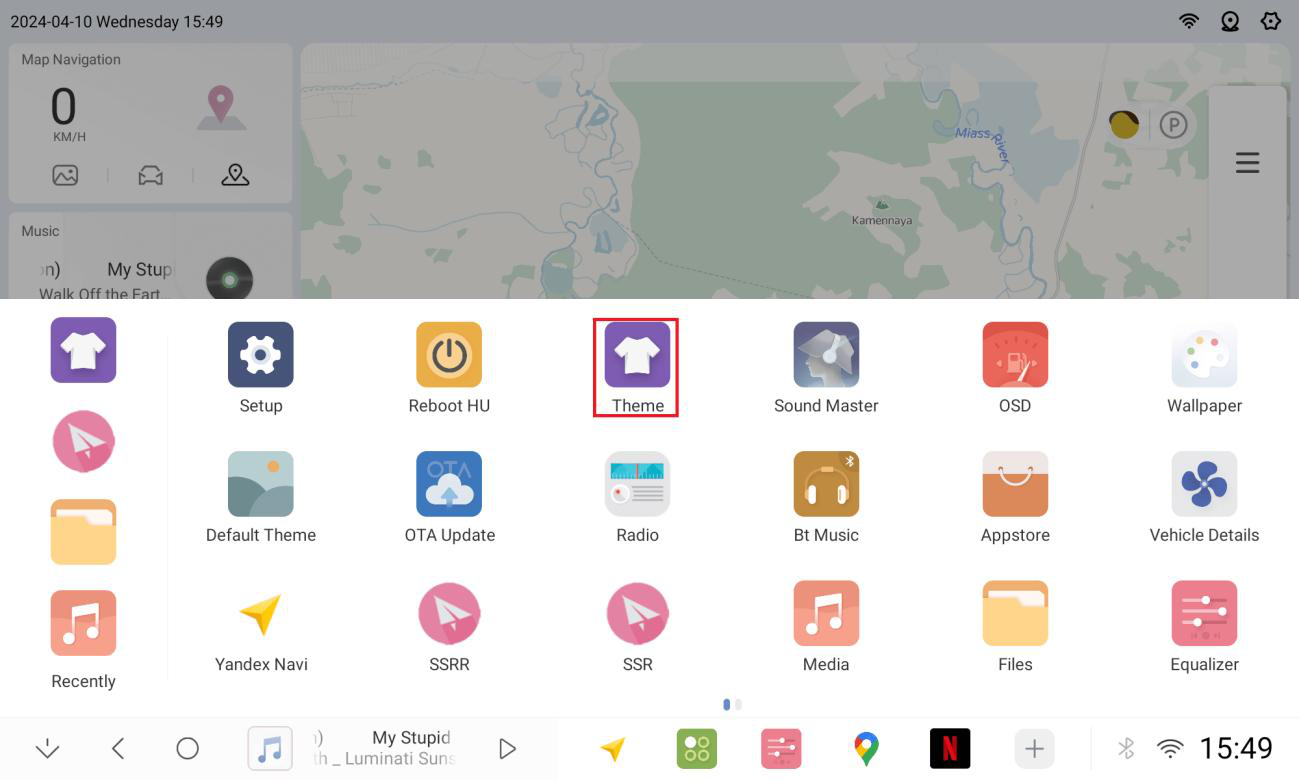
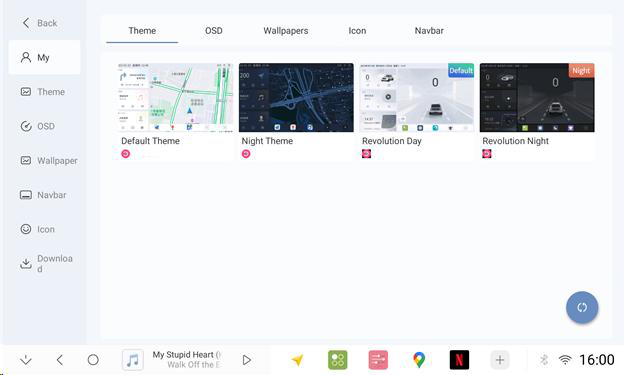
1.3 Theme Download
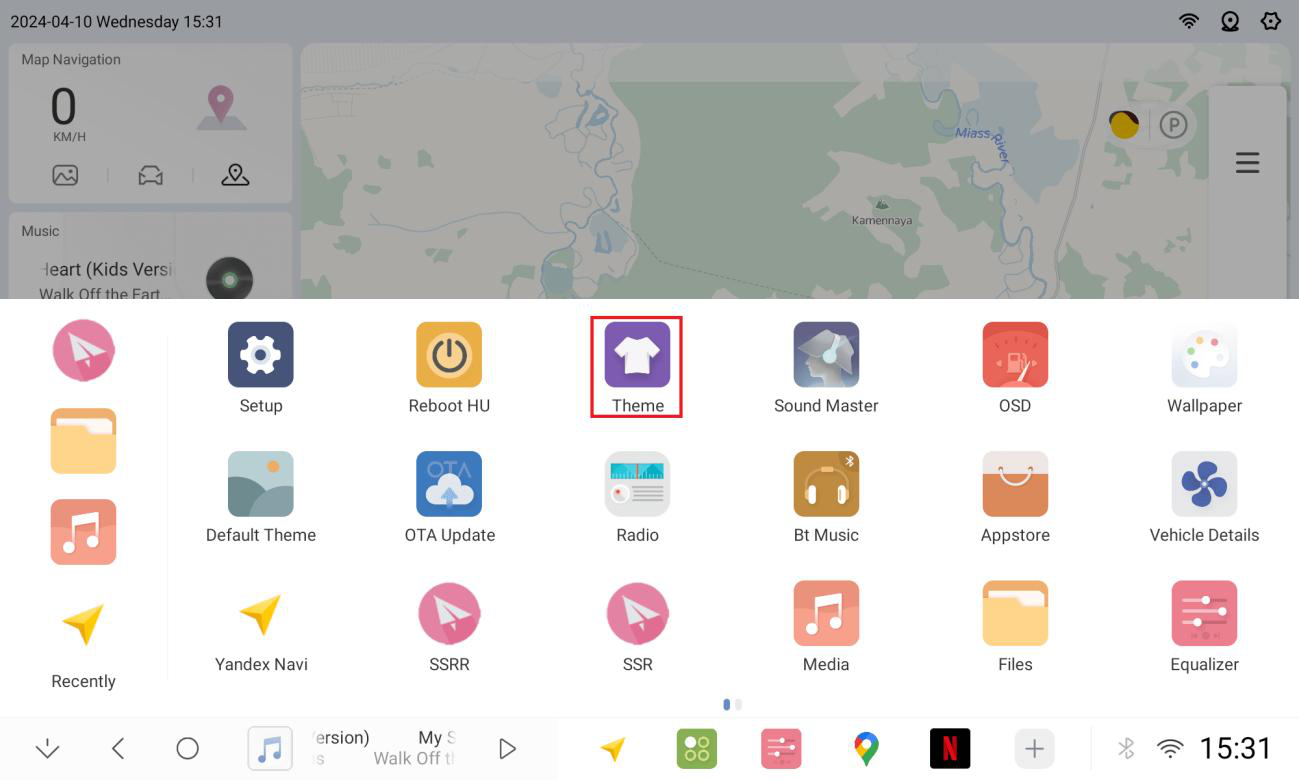
1.3.1 Go to Theme Center
1.3.2 Dozens of themes Free downloads (requires internet access to log in to your account)
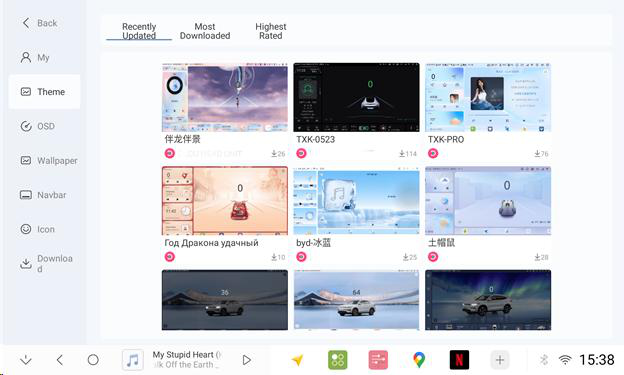
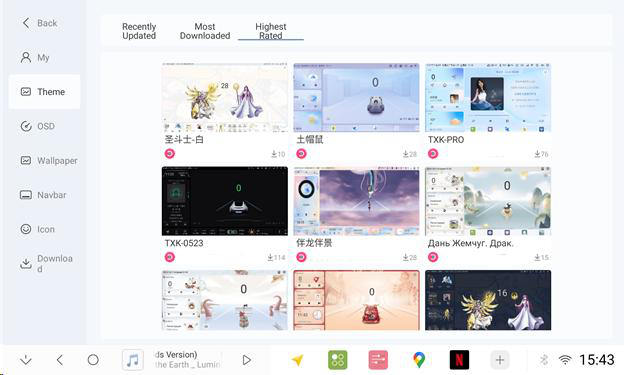
1.3.3 Choose your favorite theme and click install
1.3.4 After successful installation, check in "My Themes".
1.3.5 Set favorite theme as default/night theme (can be both)
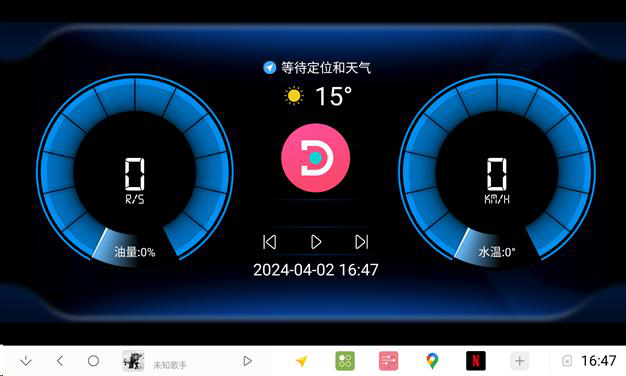
1.4 Digital Meter Download
1.4.1 Go to Theme center
1.4.2 Wide range of Digital Meter types to choose
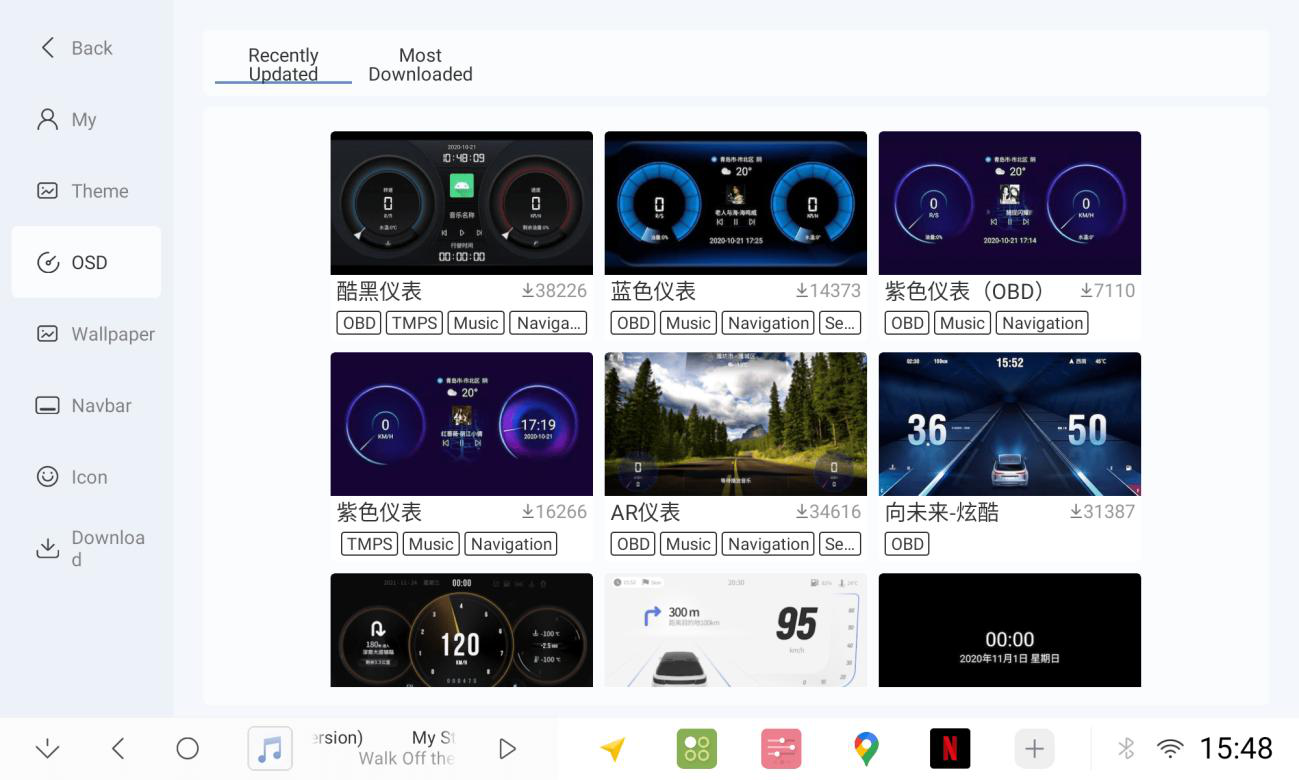
1.4.3 Select the Digital Meter to be switched, and click on Installation.

1.4.4 After successful installation, check in OSD.
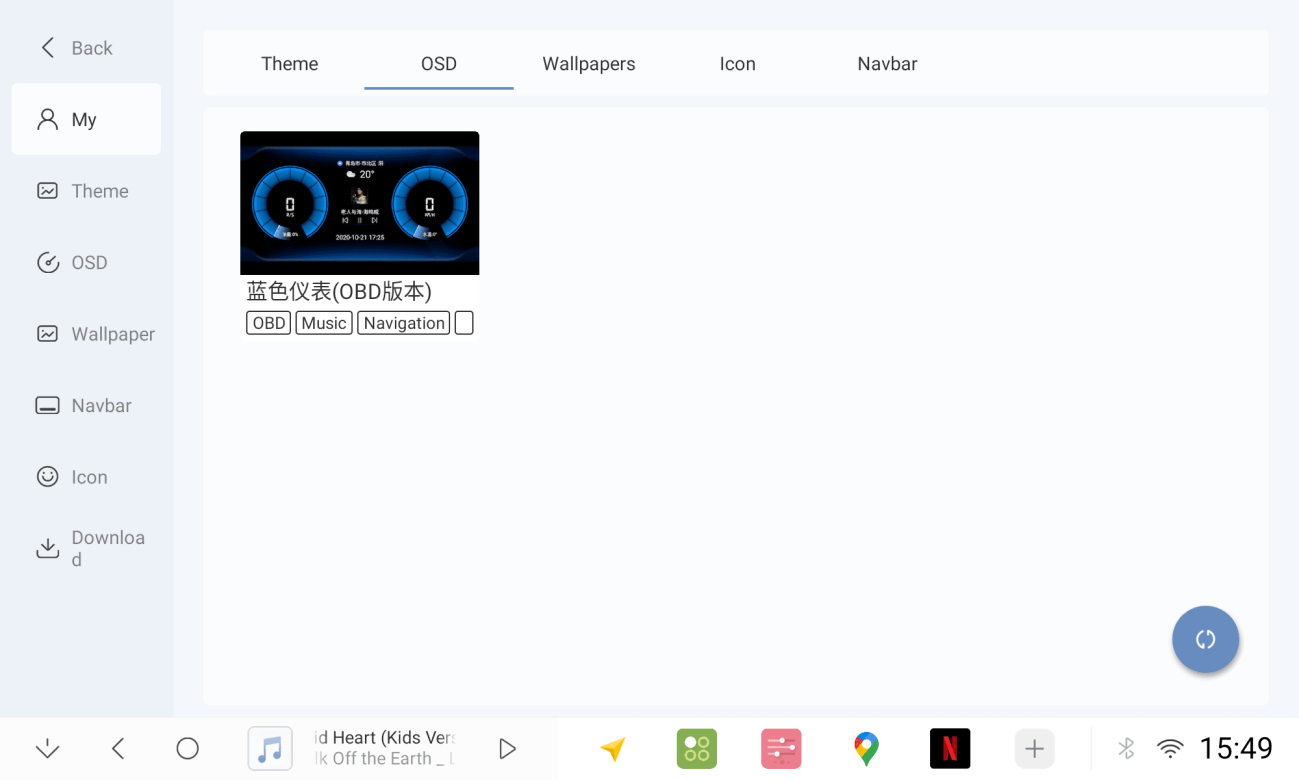
1.4.5 Click the favorite Digital Meter to use
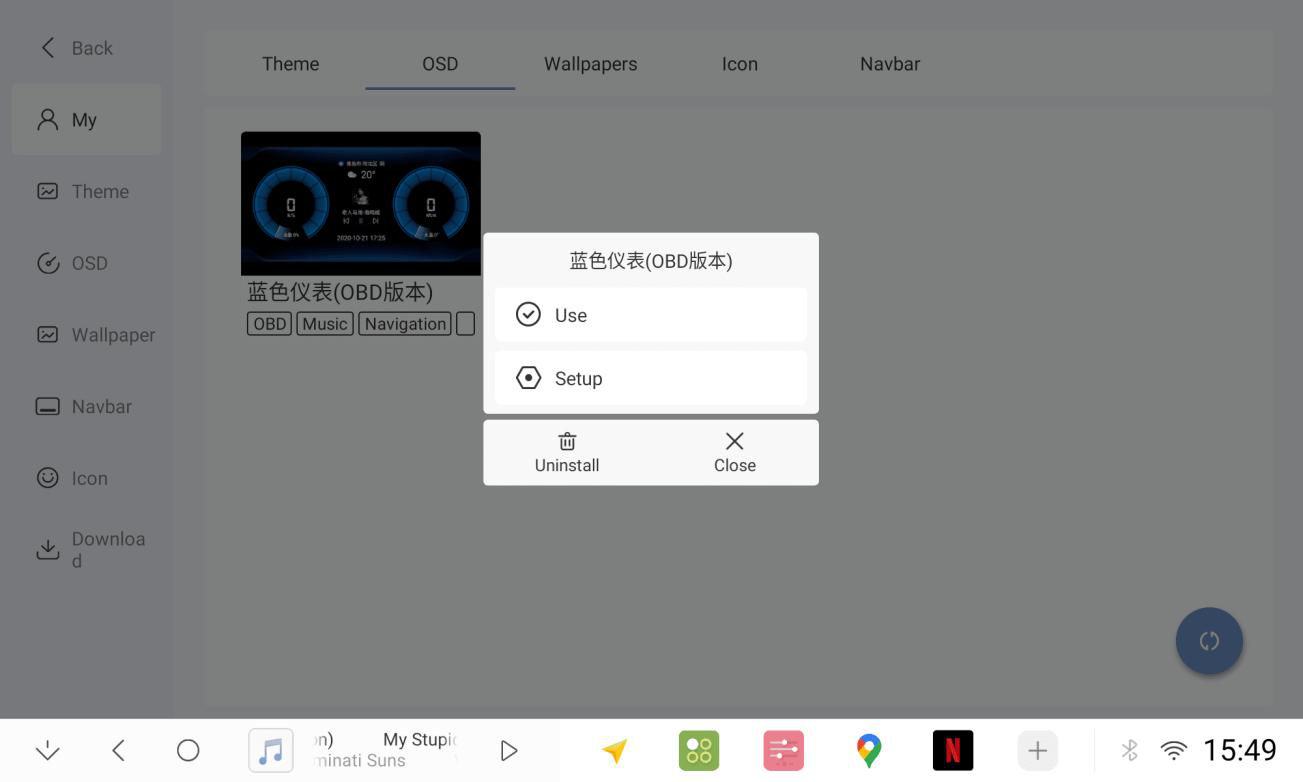
1.4.6 Open OSD APP
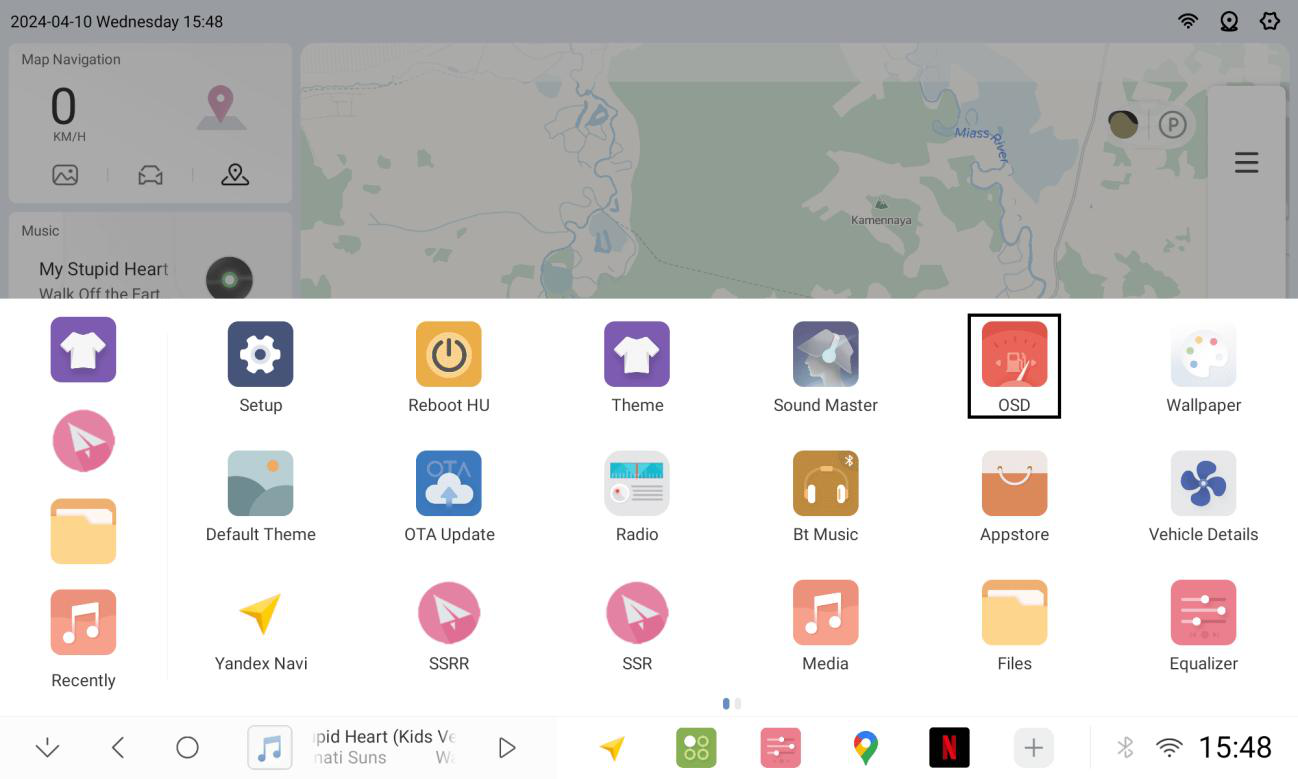
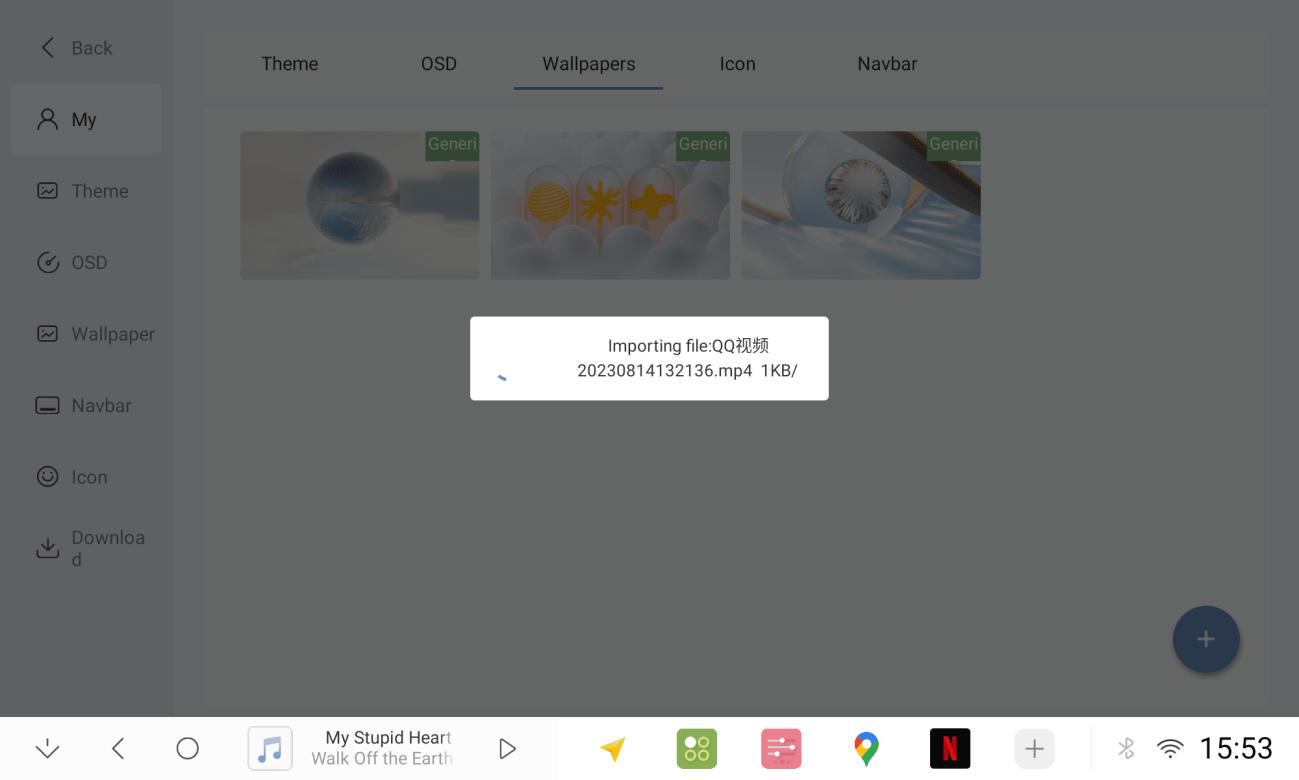
1.5 Wallpaper Mode Tutorial
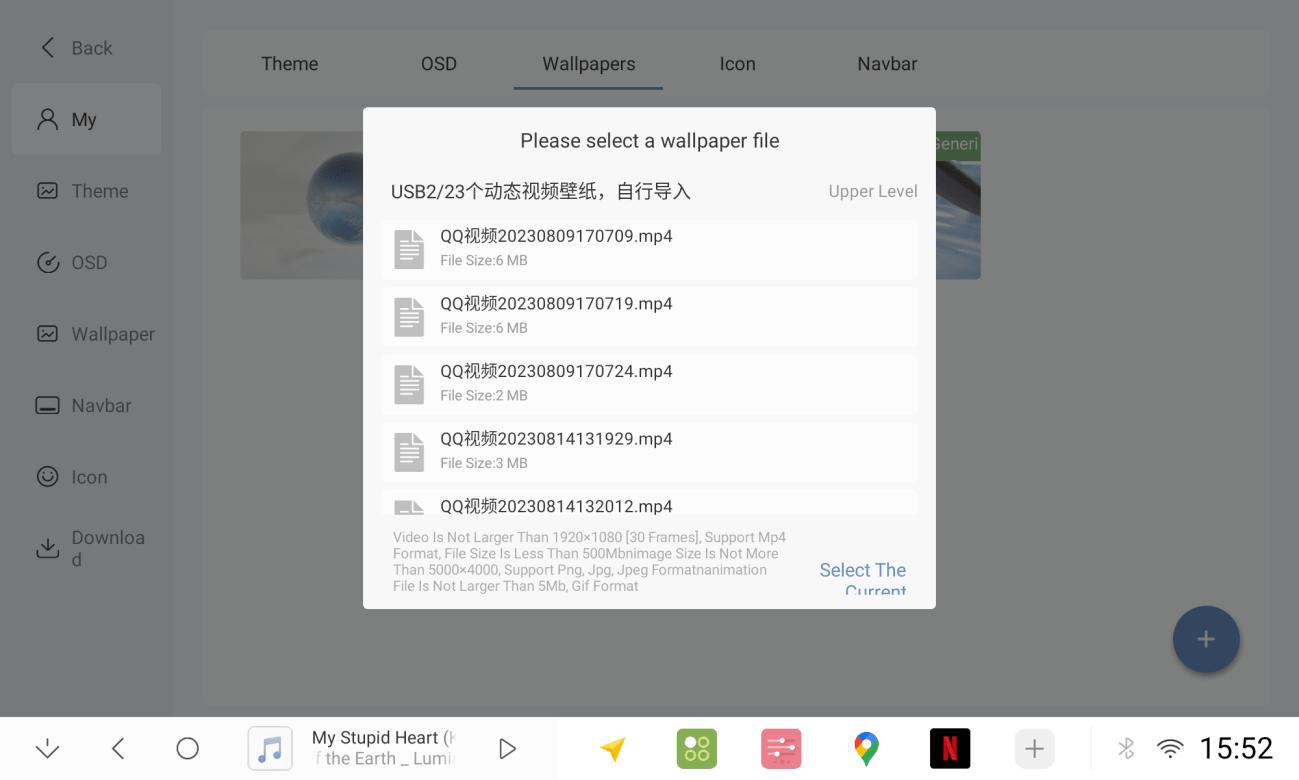
1.5.1 Click the + sign in the lower right corner to import wallpapers
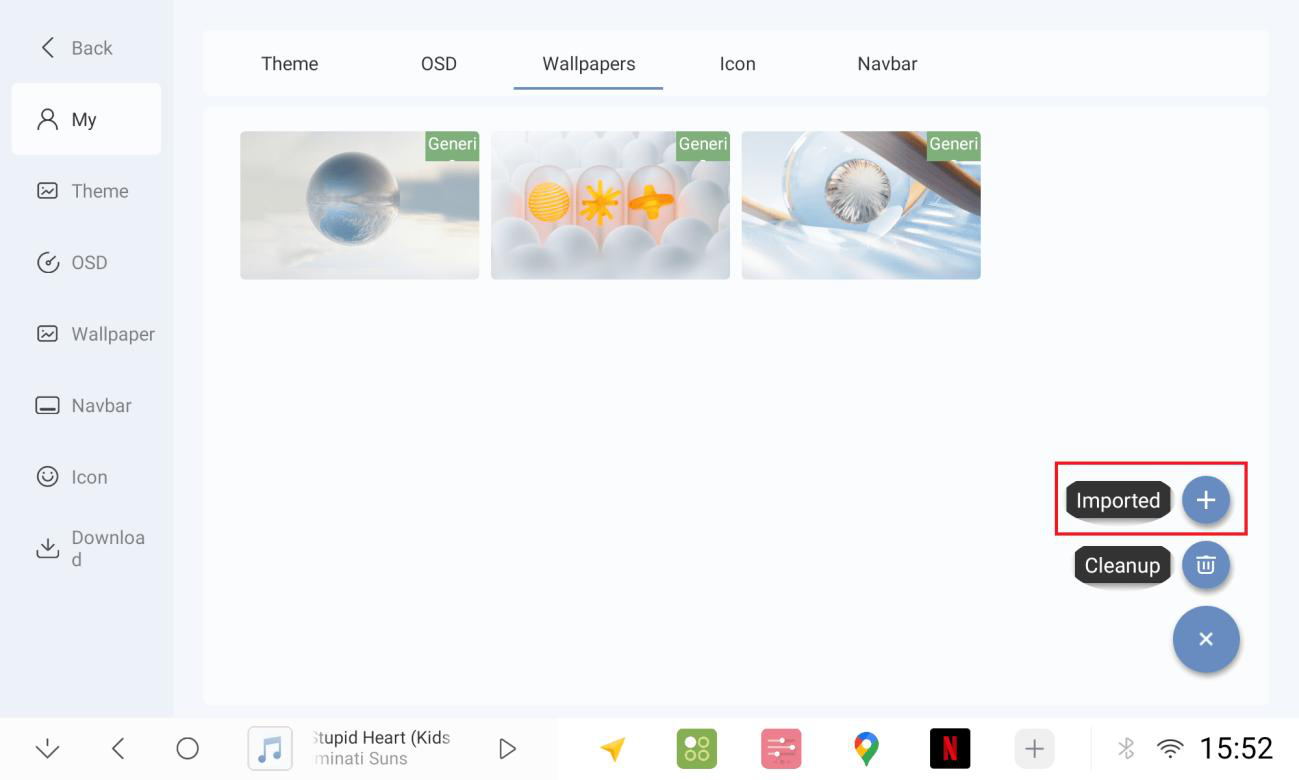
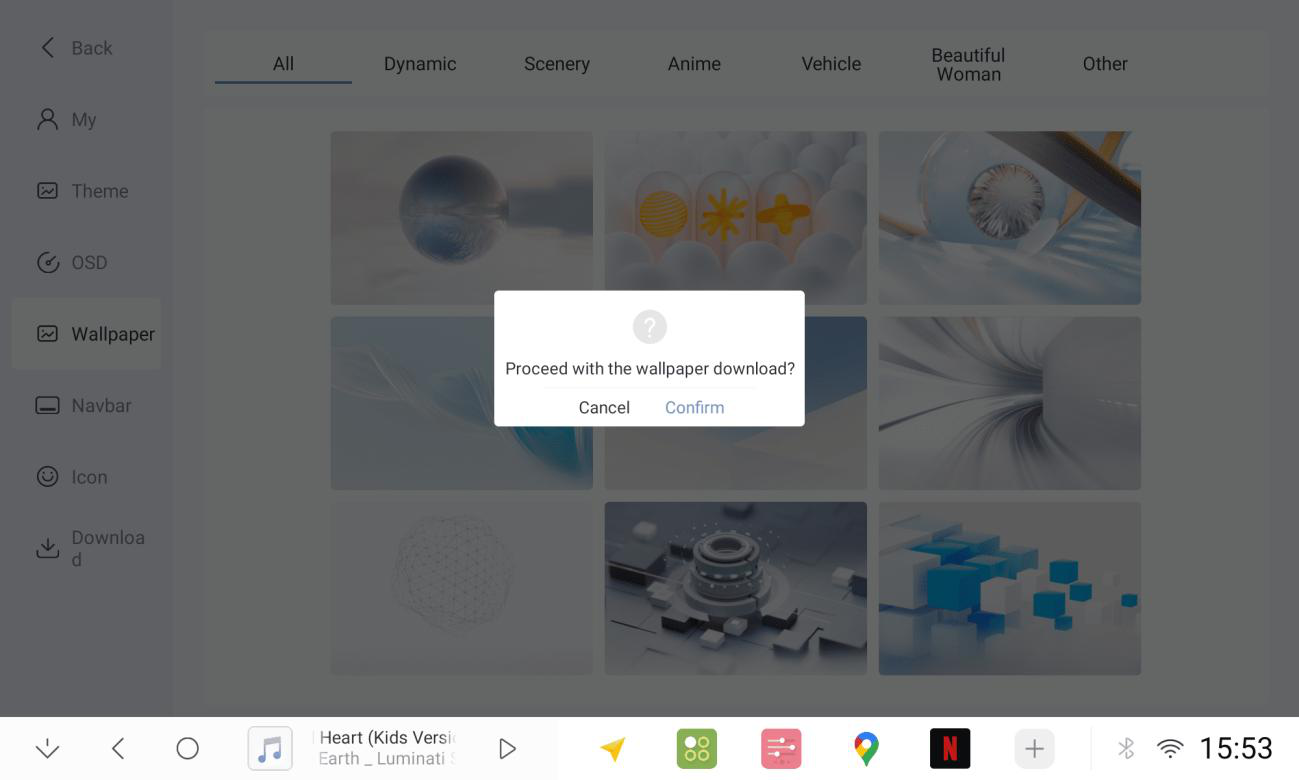
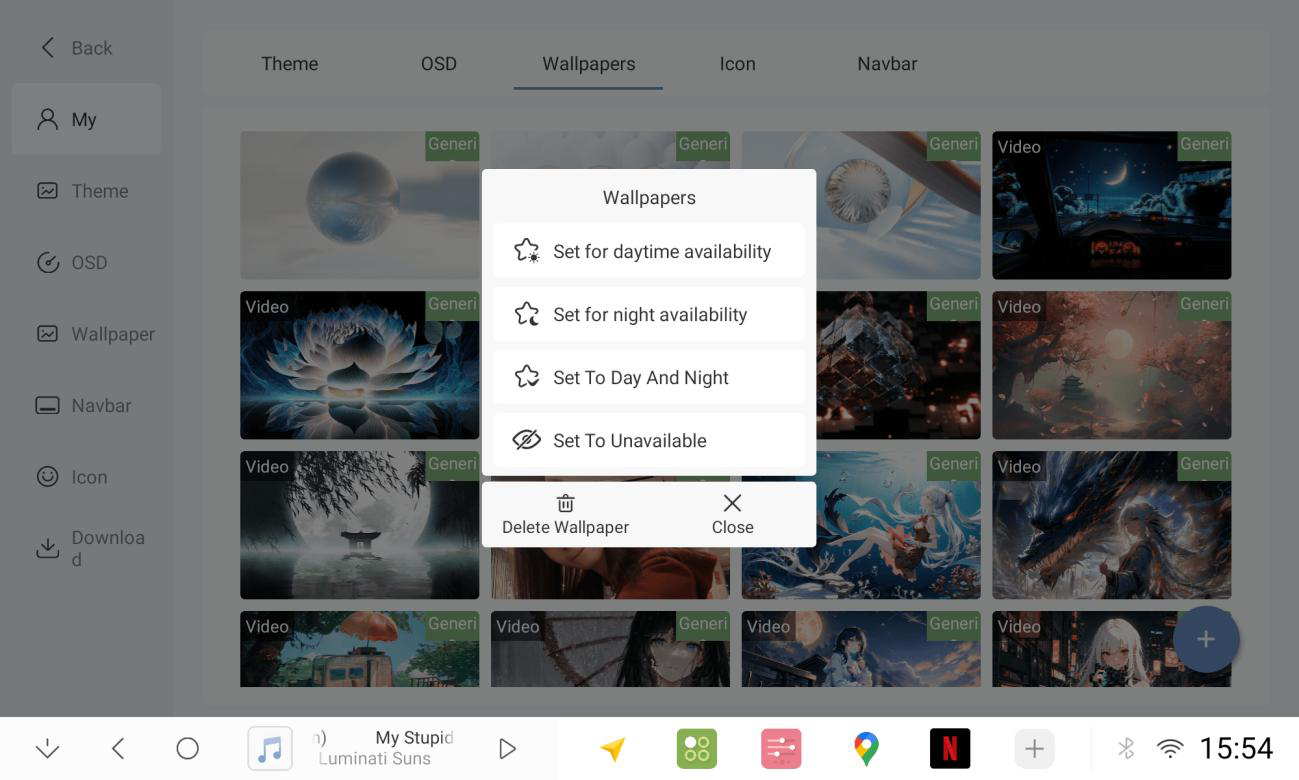
1.5.2 You can also download wallpapers from the Theme Center and set the wallpapers to be available at day/night.
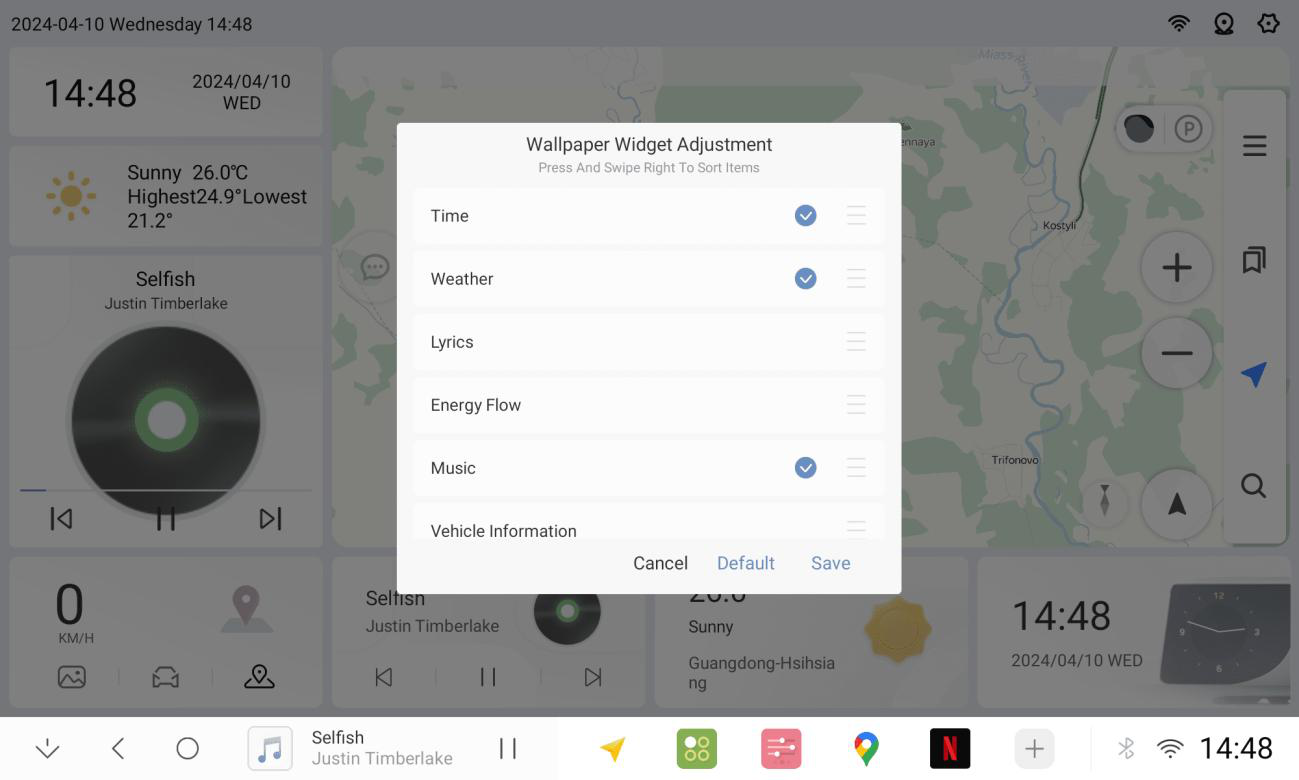
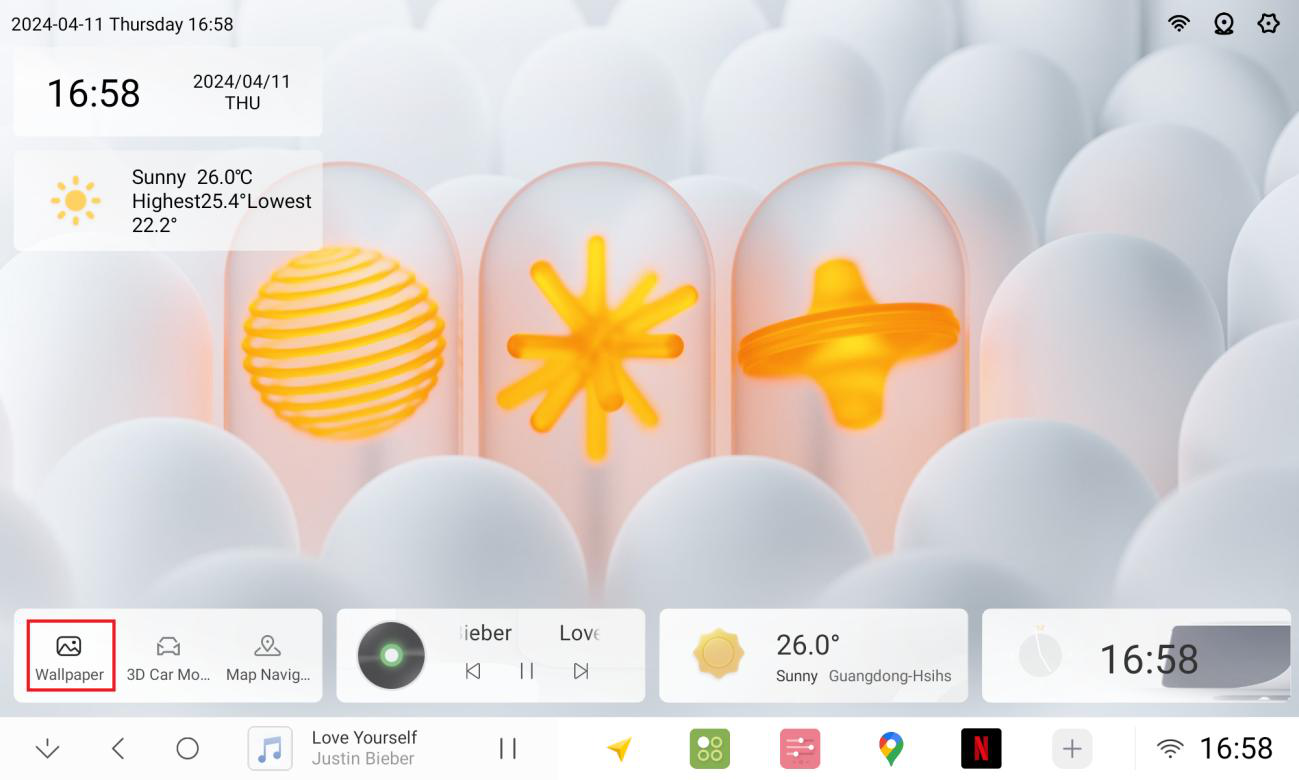
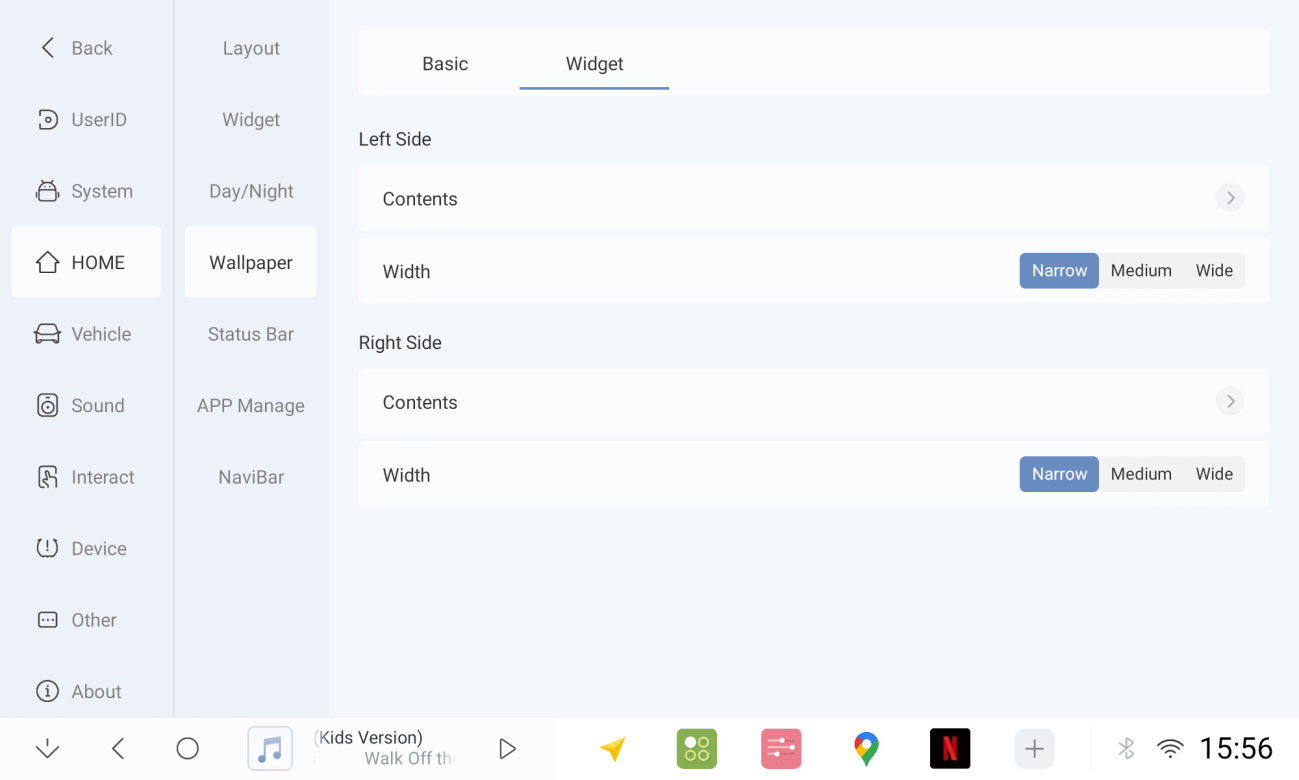
1.5.3 Home plug-in can switch to wallpaper mode
1.5.4 Long press wallpaper plug-ins can be adjusted / can also be adjusted in the settings - desktop - wallpaper mode - plug-in settings


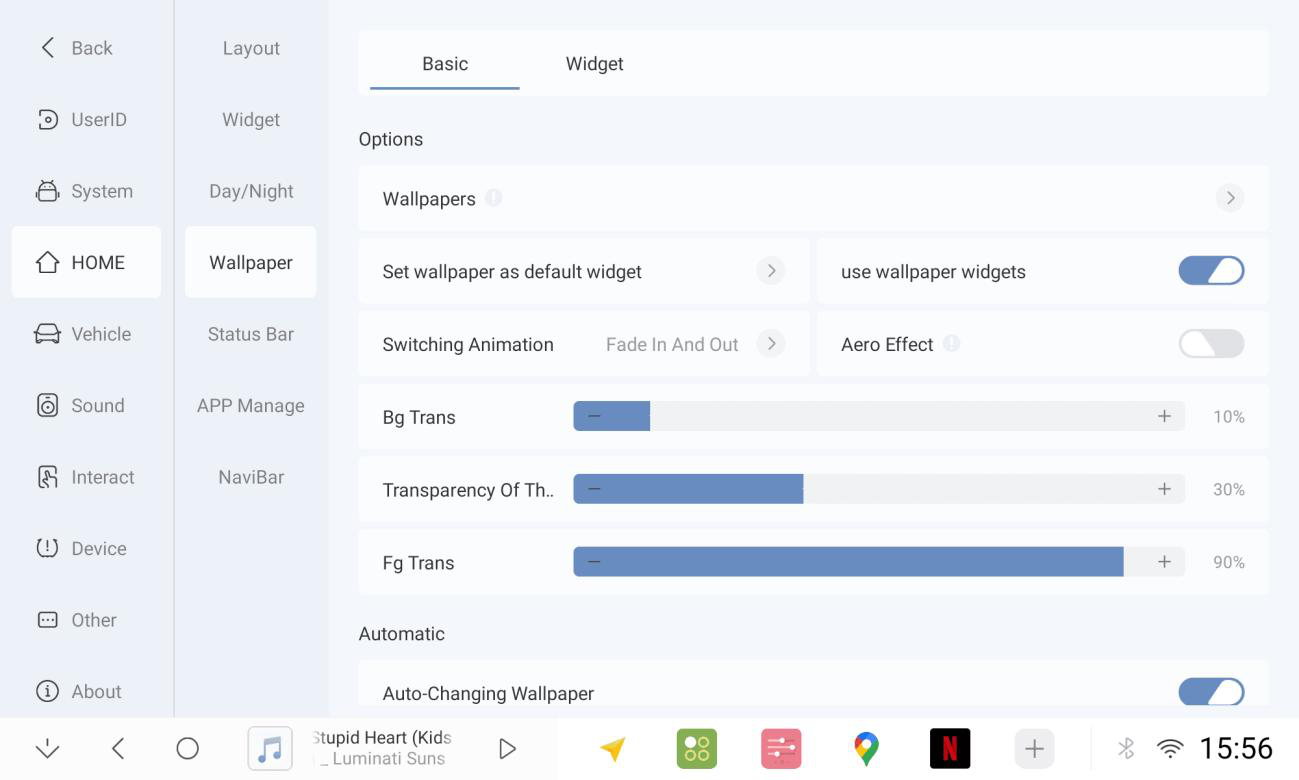
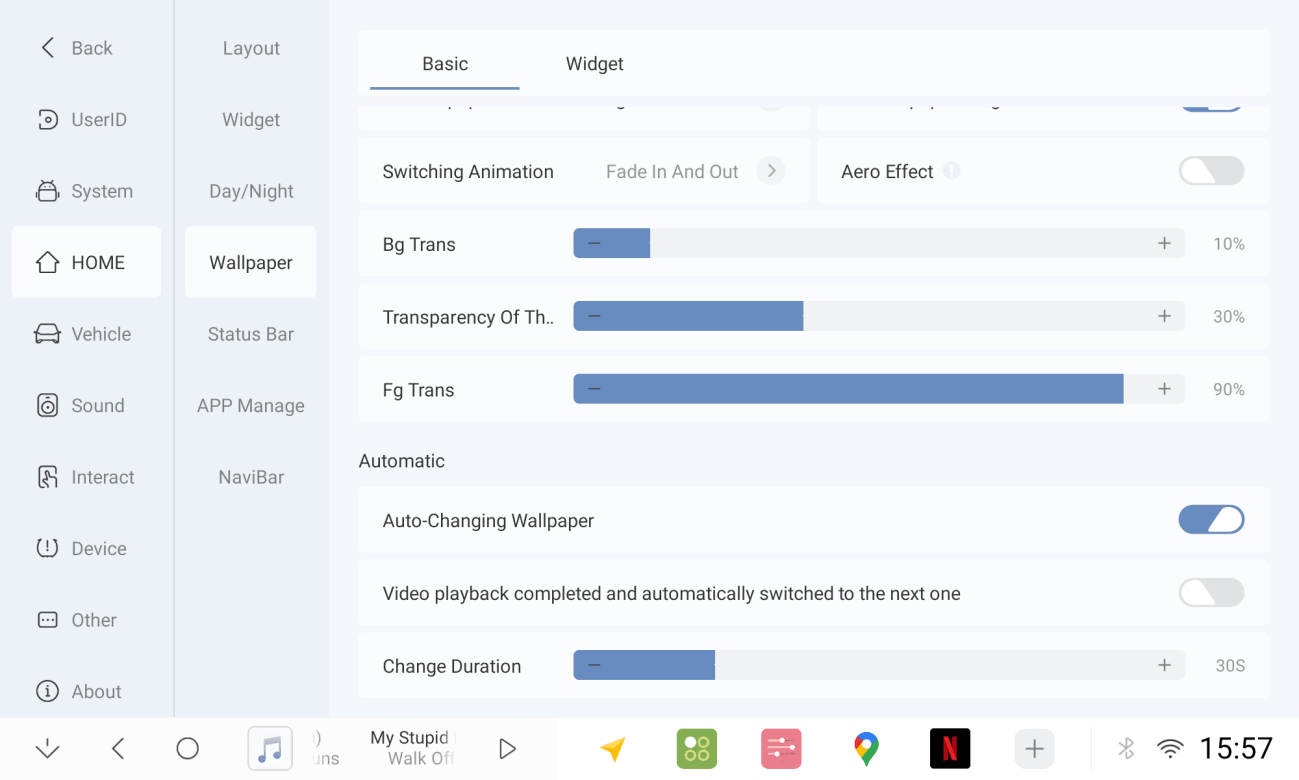
1.5.5 Basic Settings. You can adjust the transparency of widgets and plug-ins, as well as the automatic switching of wallpapers.
1.6 Circadian Mode Settings
1.6.1 Multiple switching modes to meet various needs
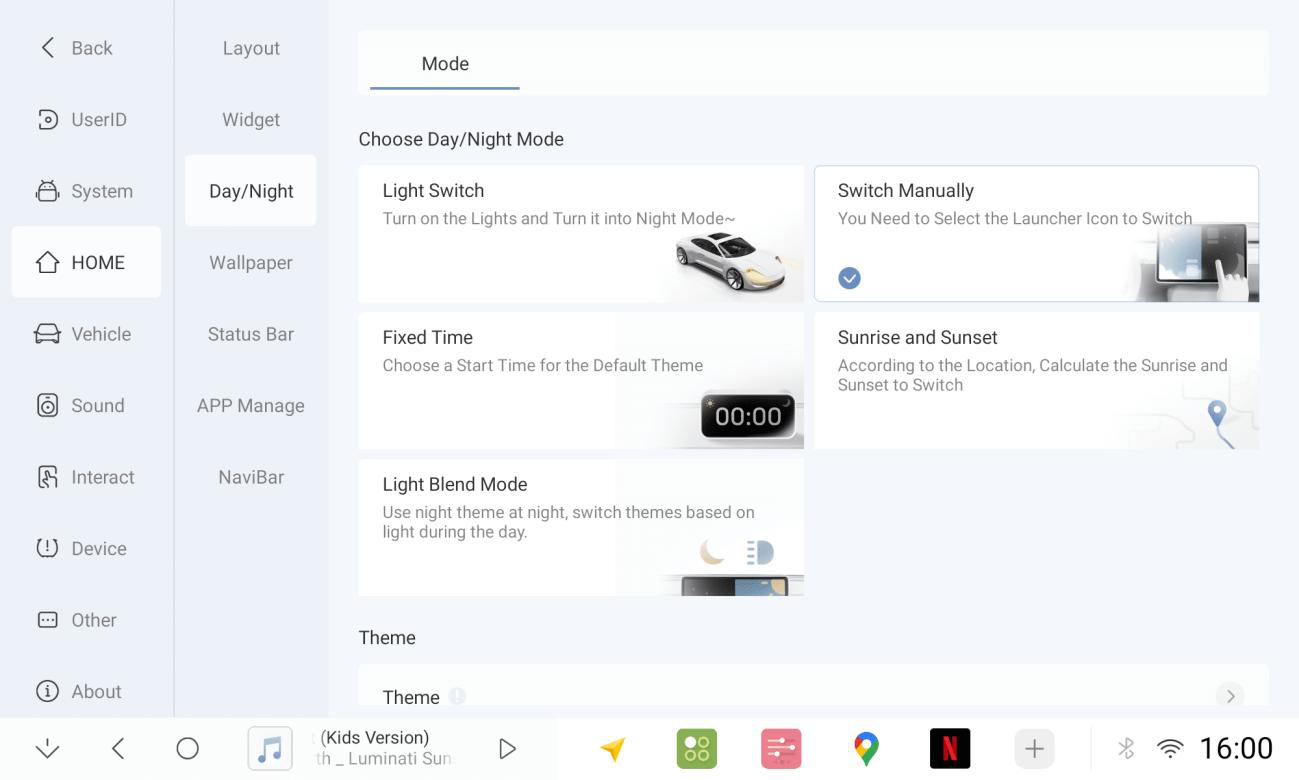
1.6.2 Theme Centre. Setting the default (daytime) and nighttime themes
1.6.3 Extreme Dark Mode: When turned on, the screen is less bright at night.
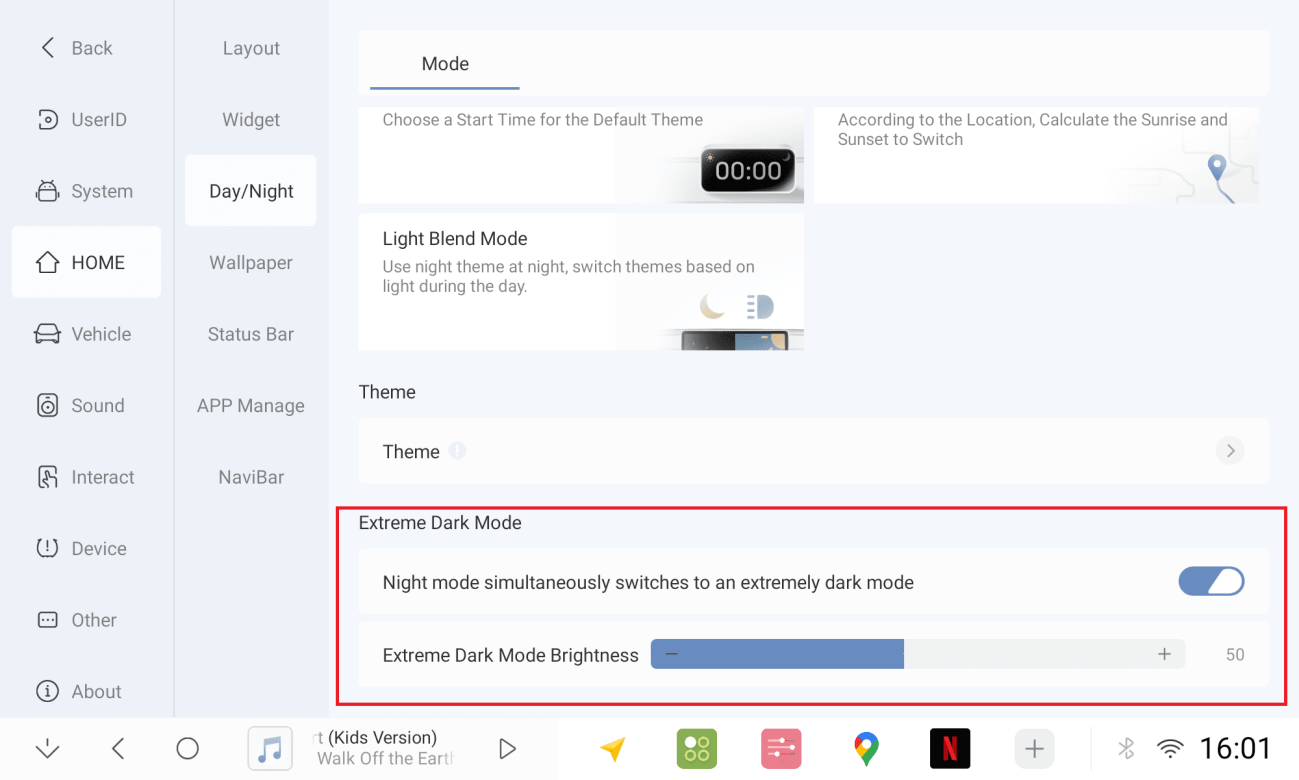
System Brightness Settings. Adjust the screen brightness parameters and the backlight control method. Finish
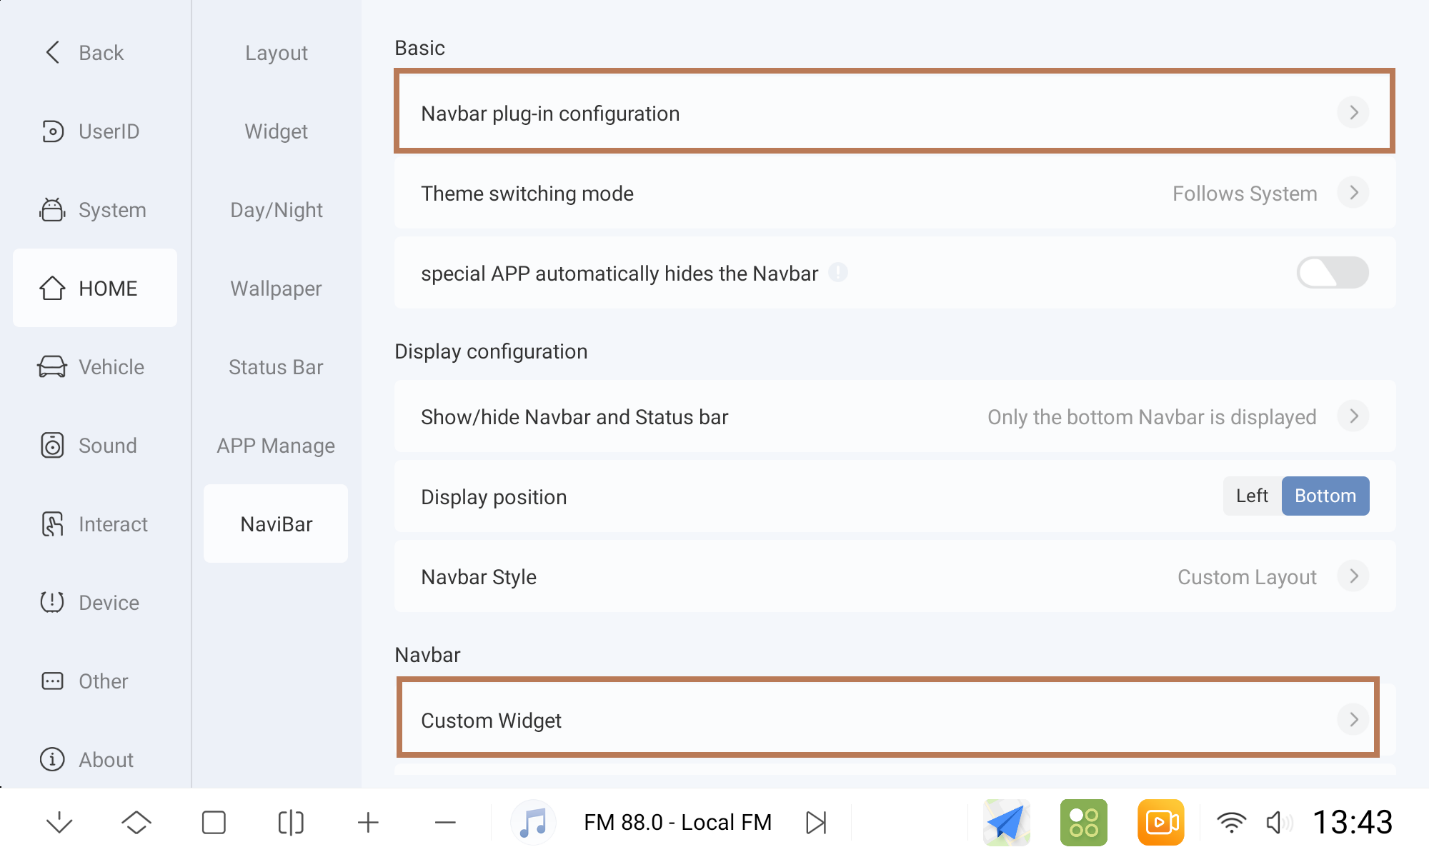
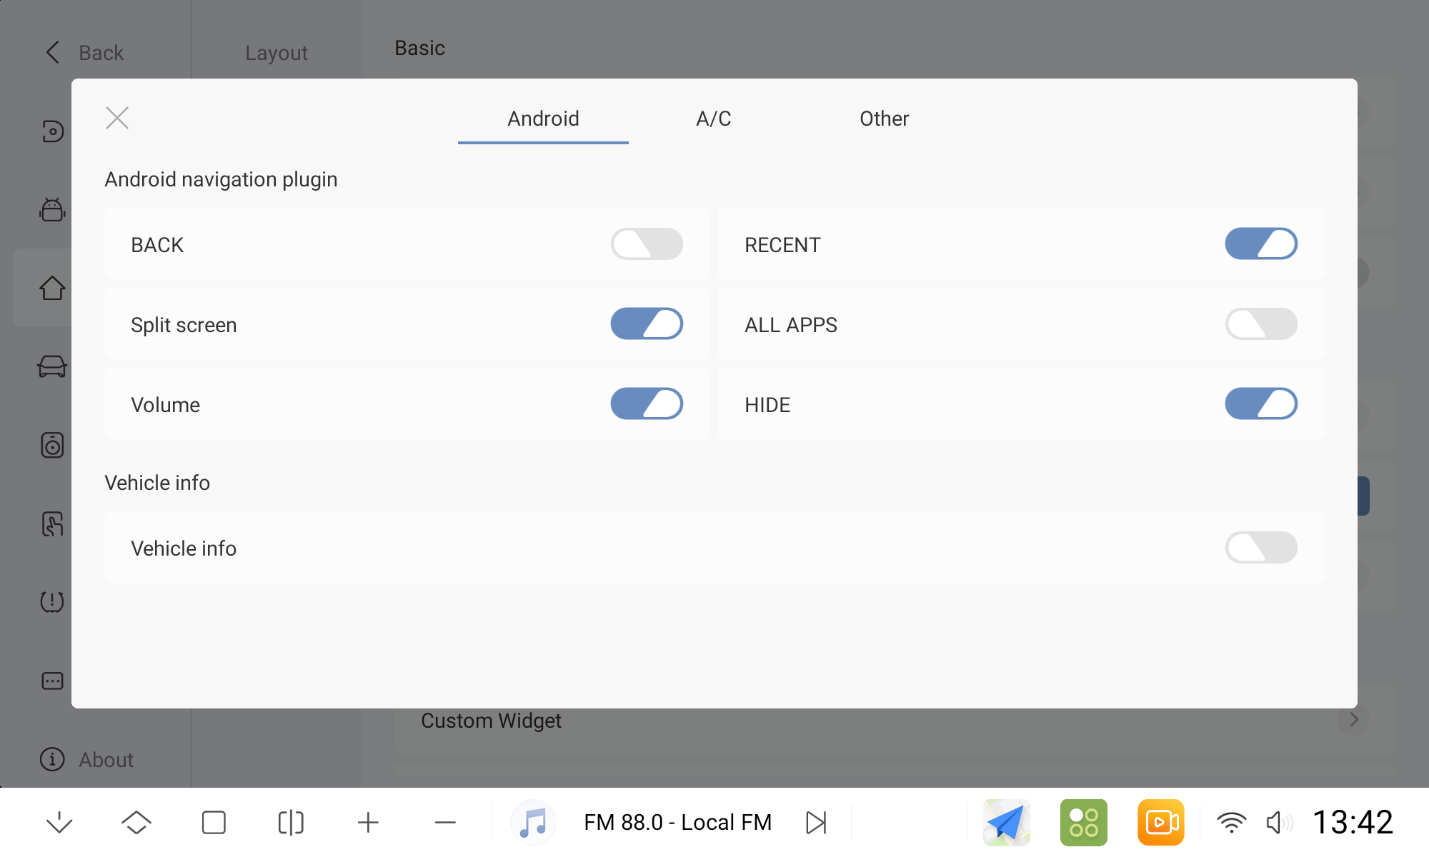
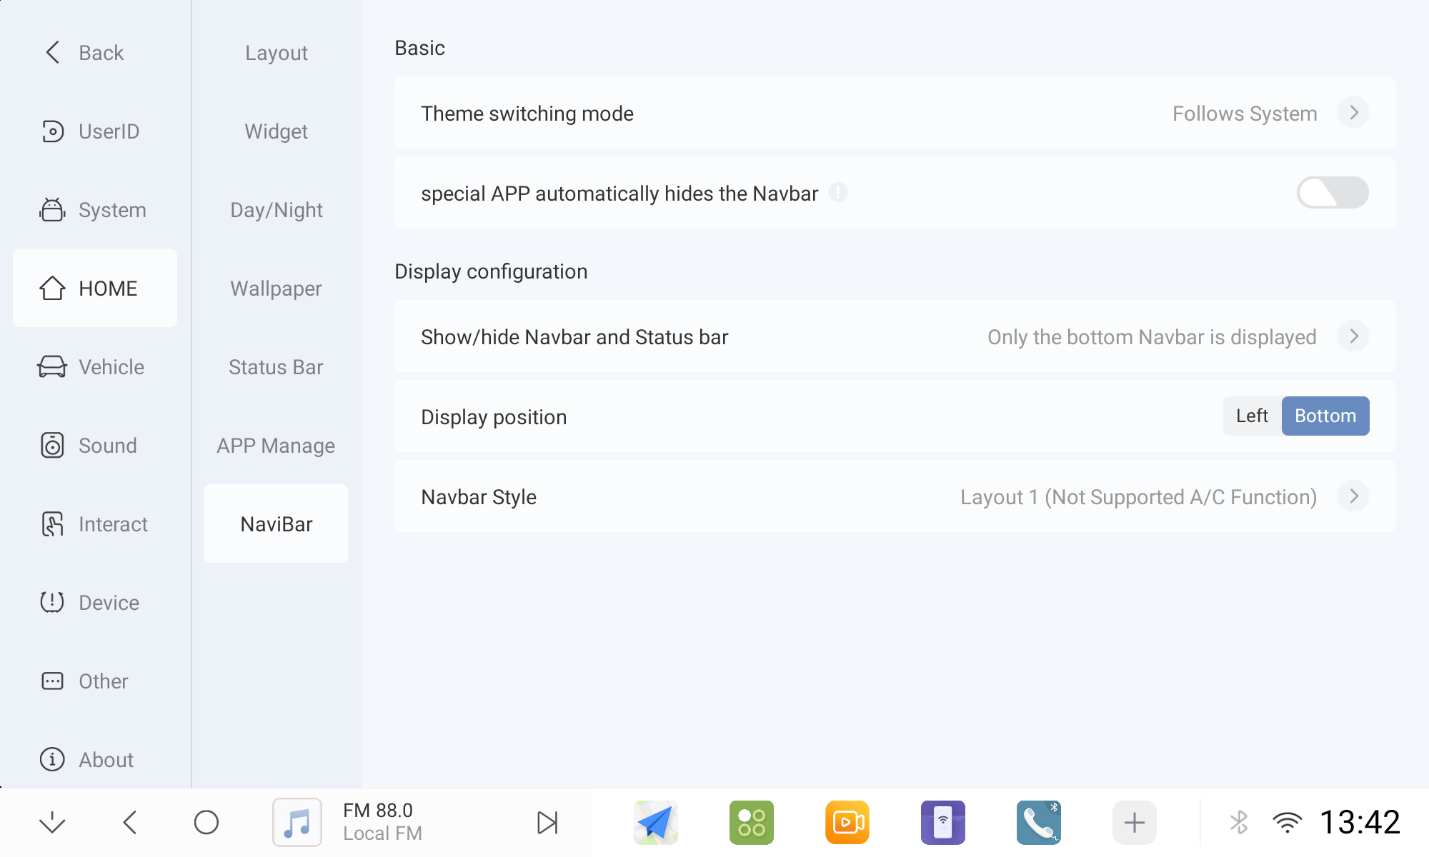
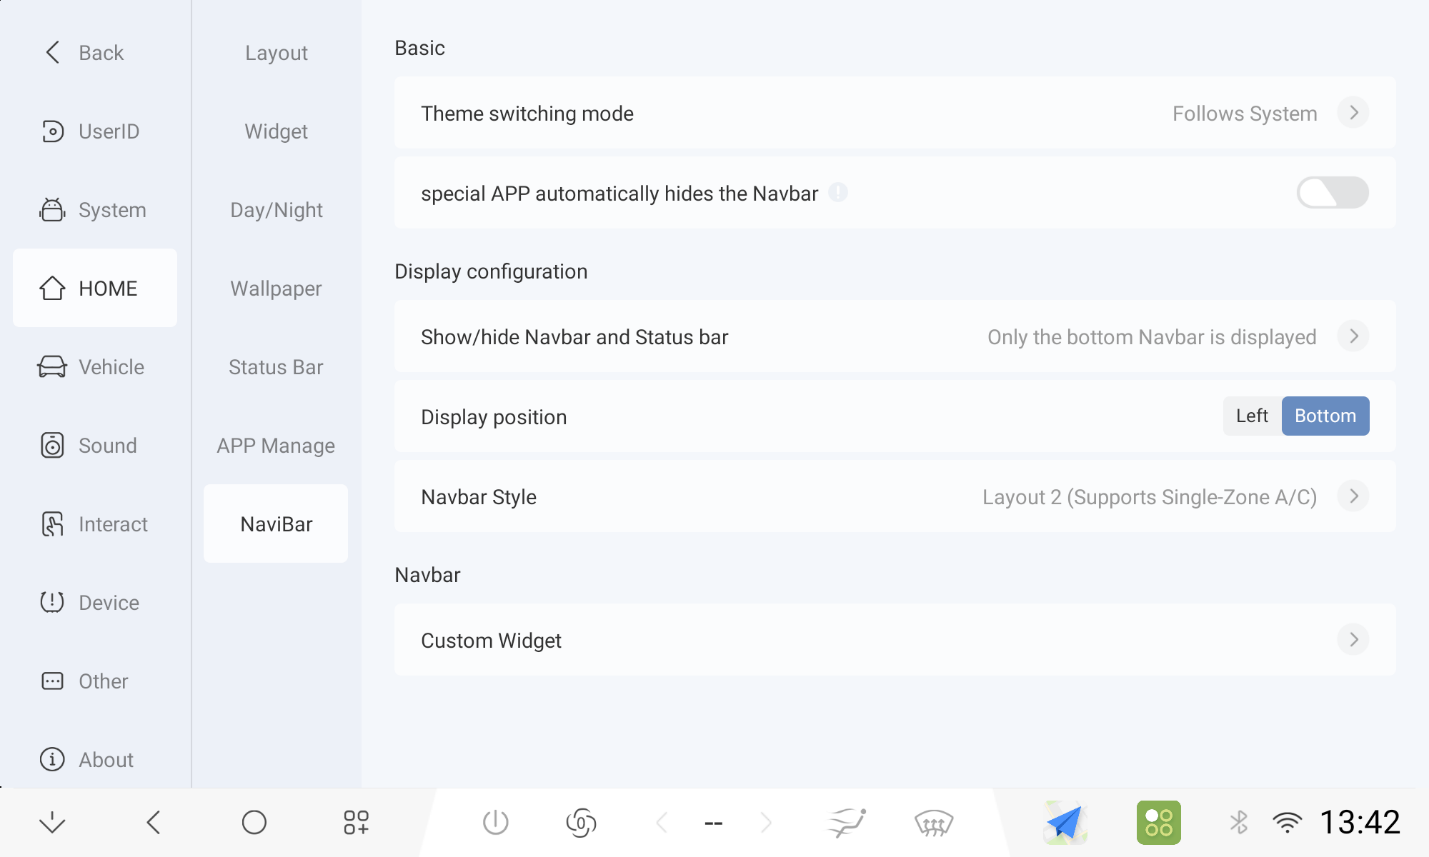
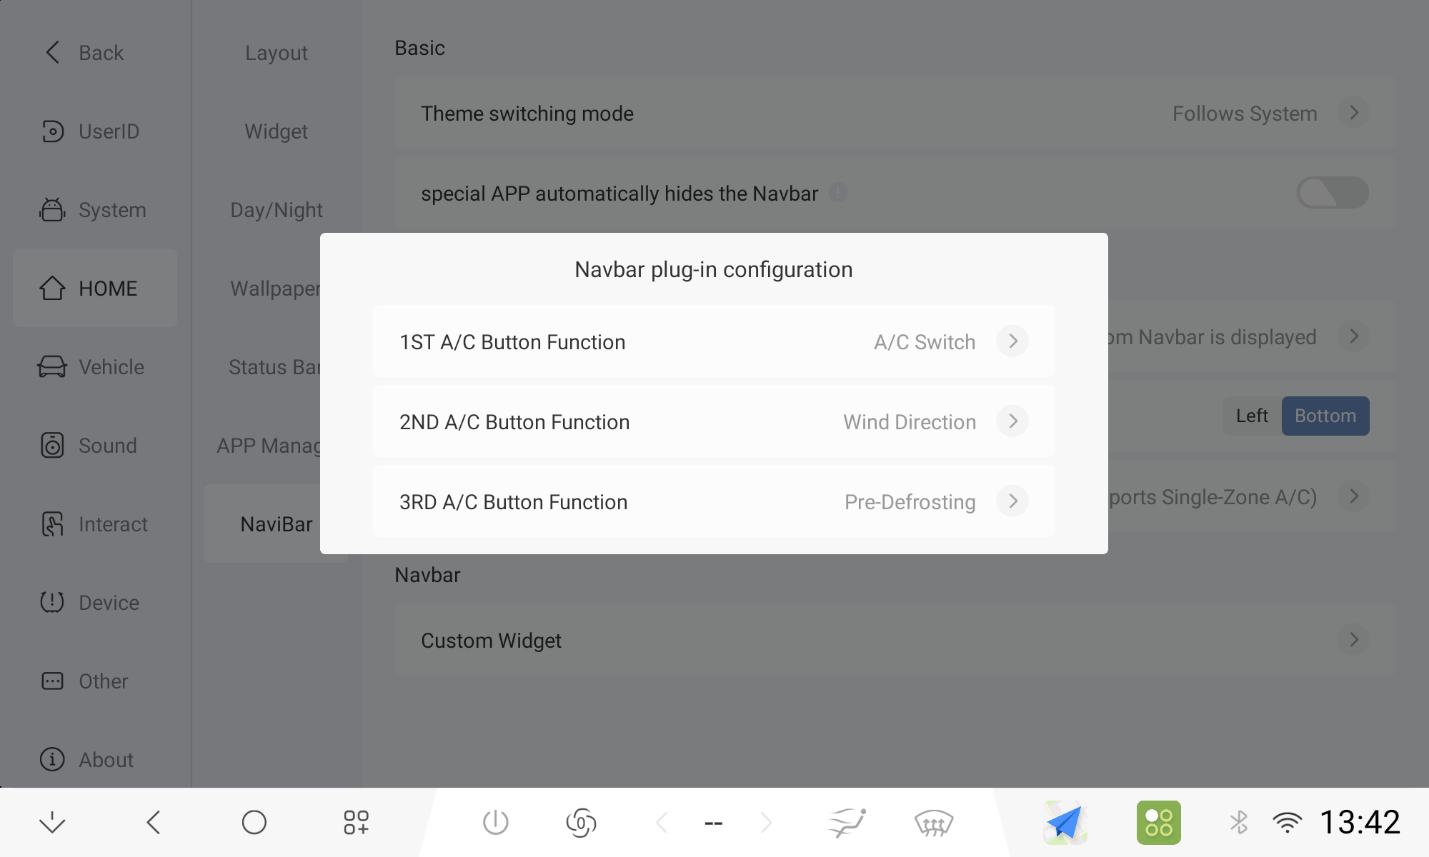
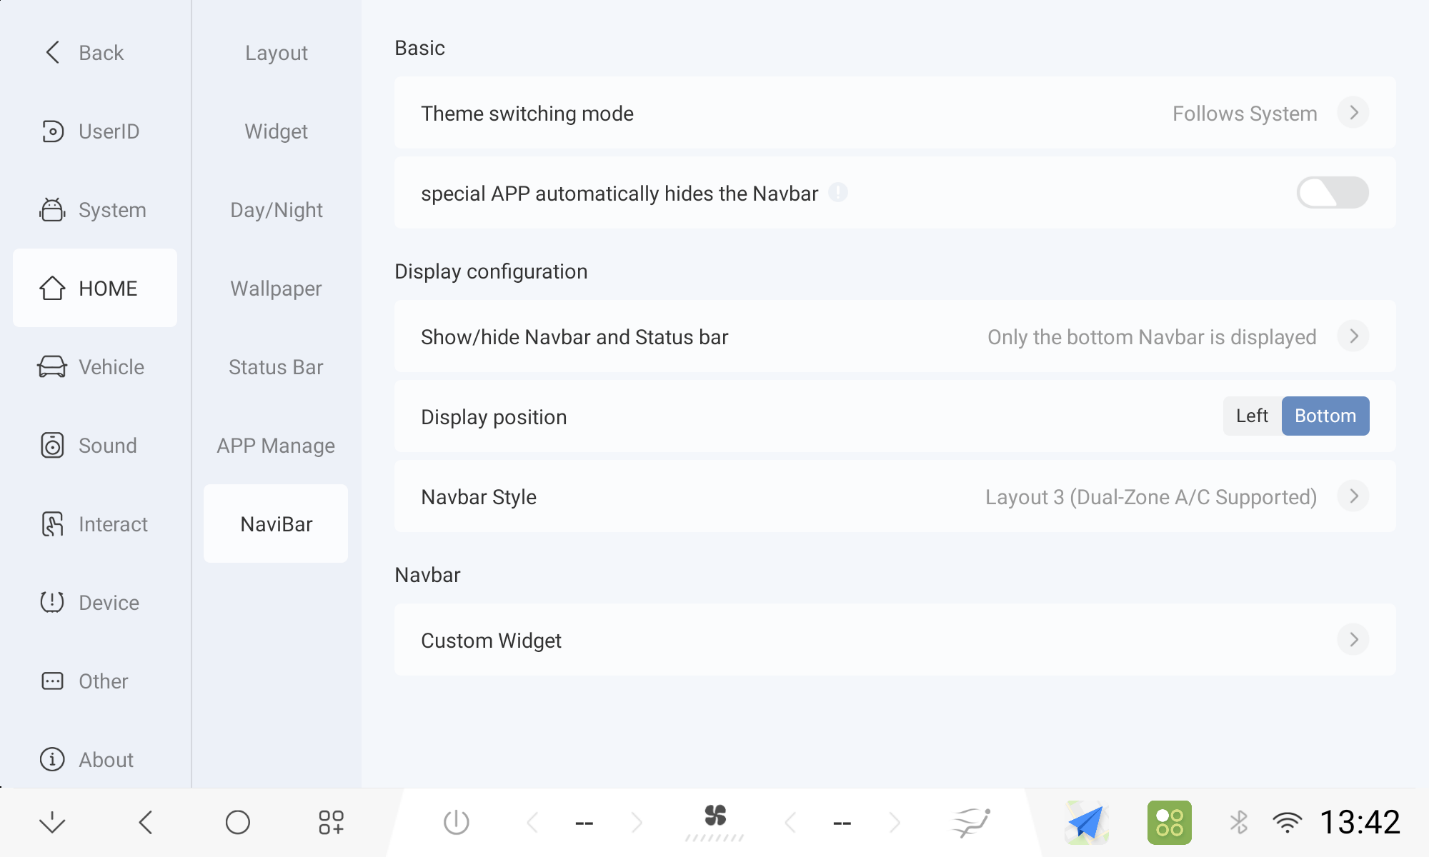
1.7 Enhanced Navigation Bar
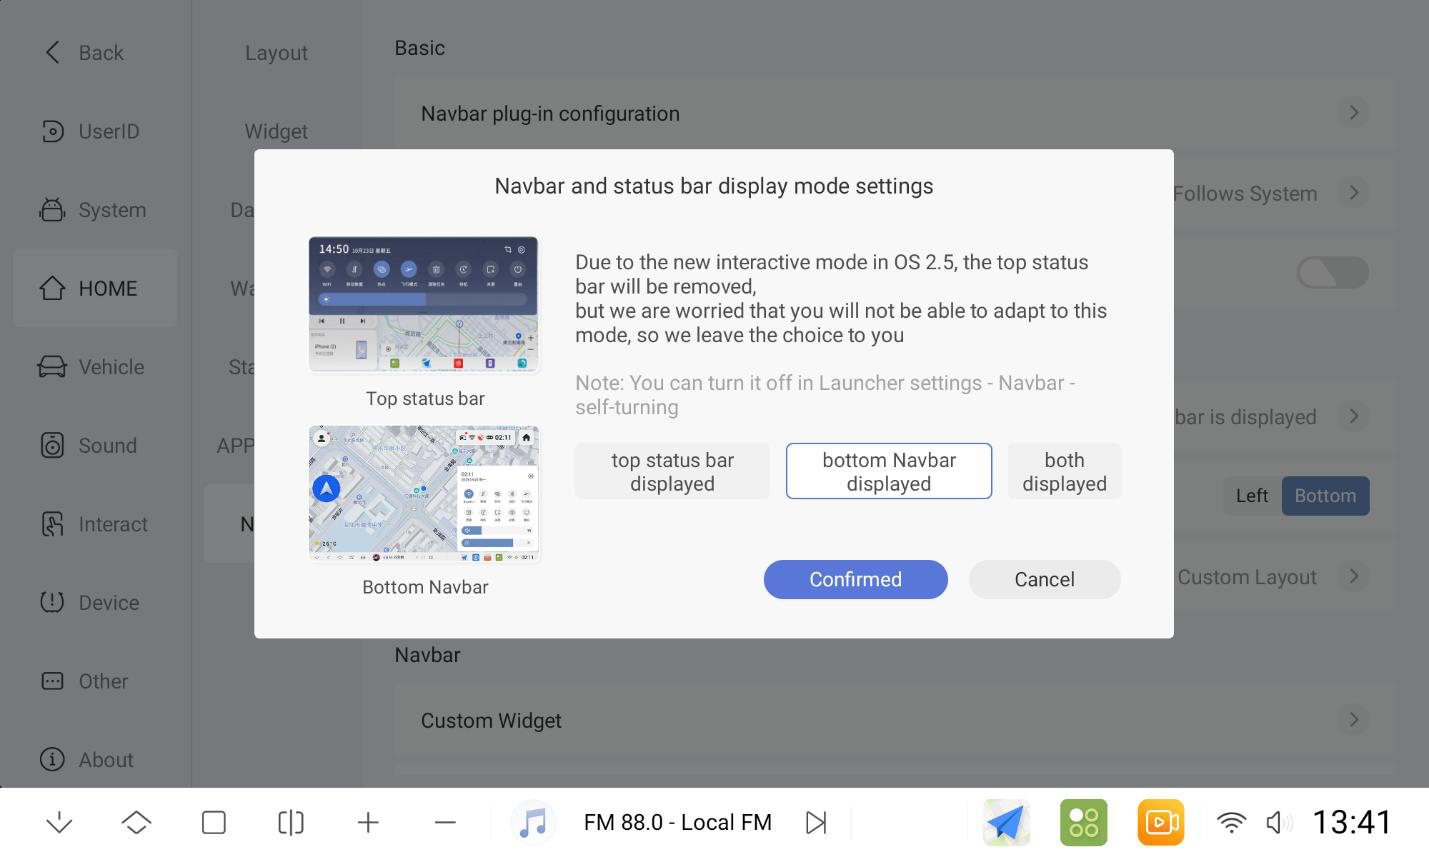
1.7.1 Navigation bar and status bar mode settings (top status bar, bottom navigation bar, both)
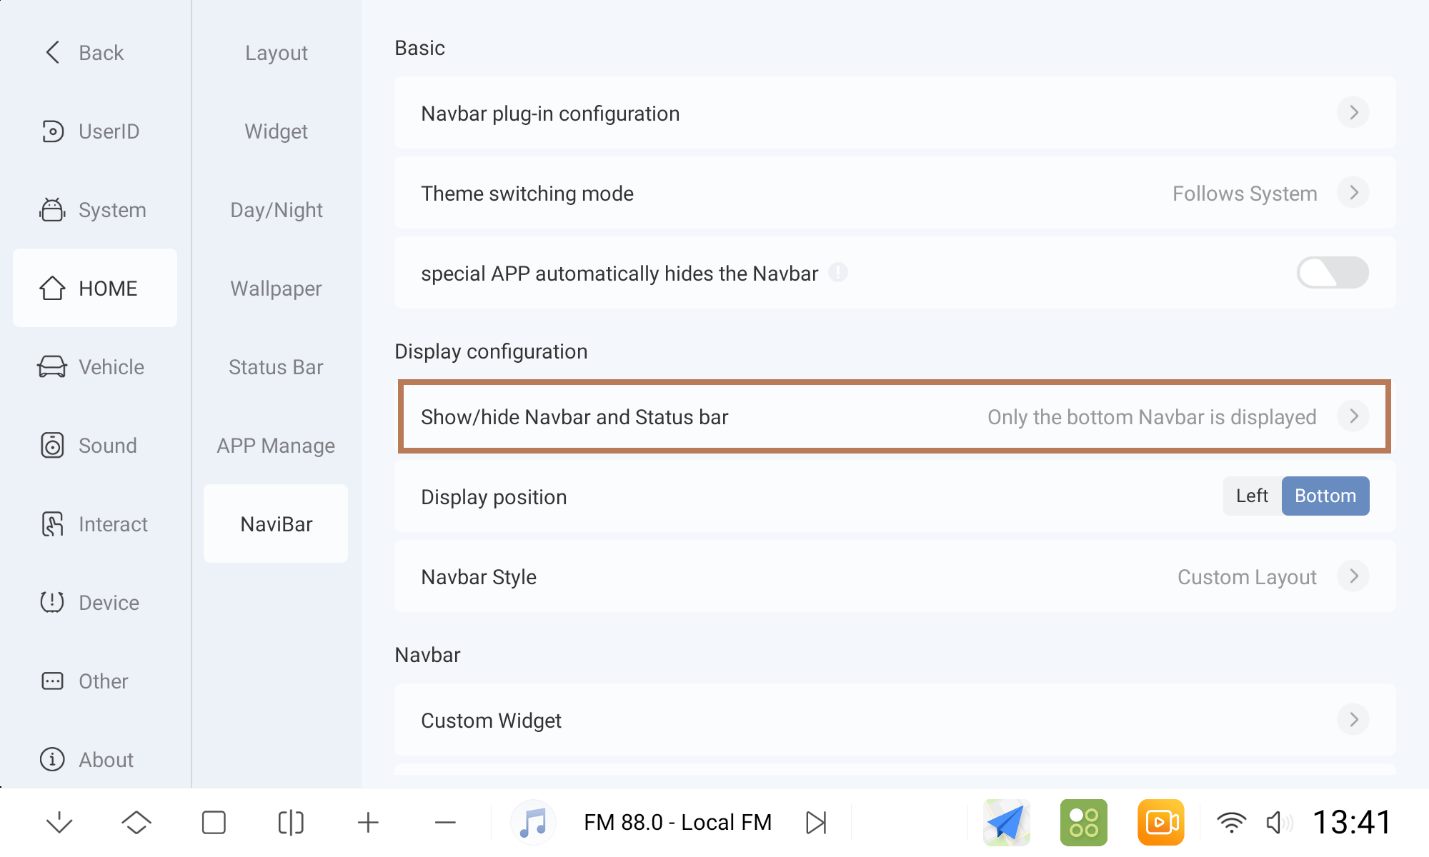
1.7.2 Bottom navigation bar supports 4 styles
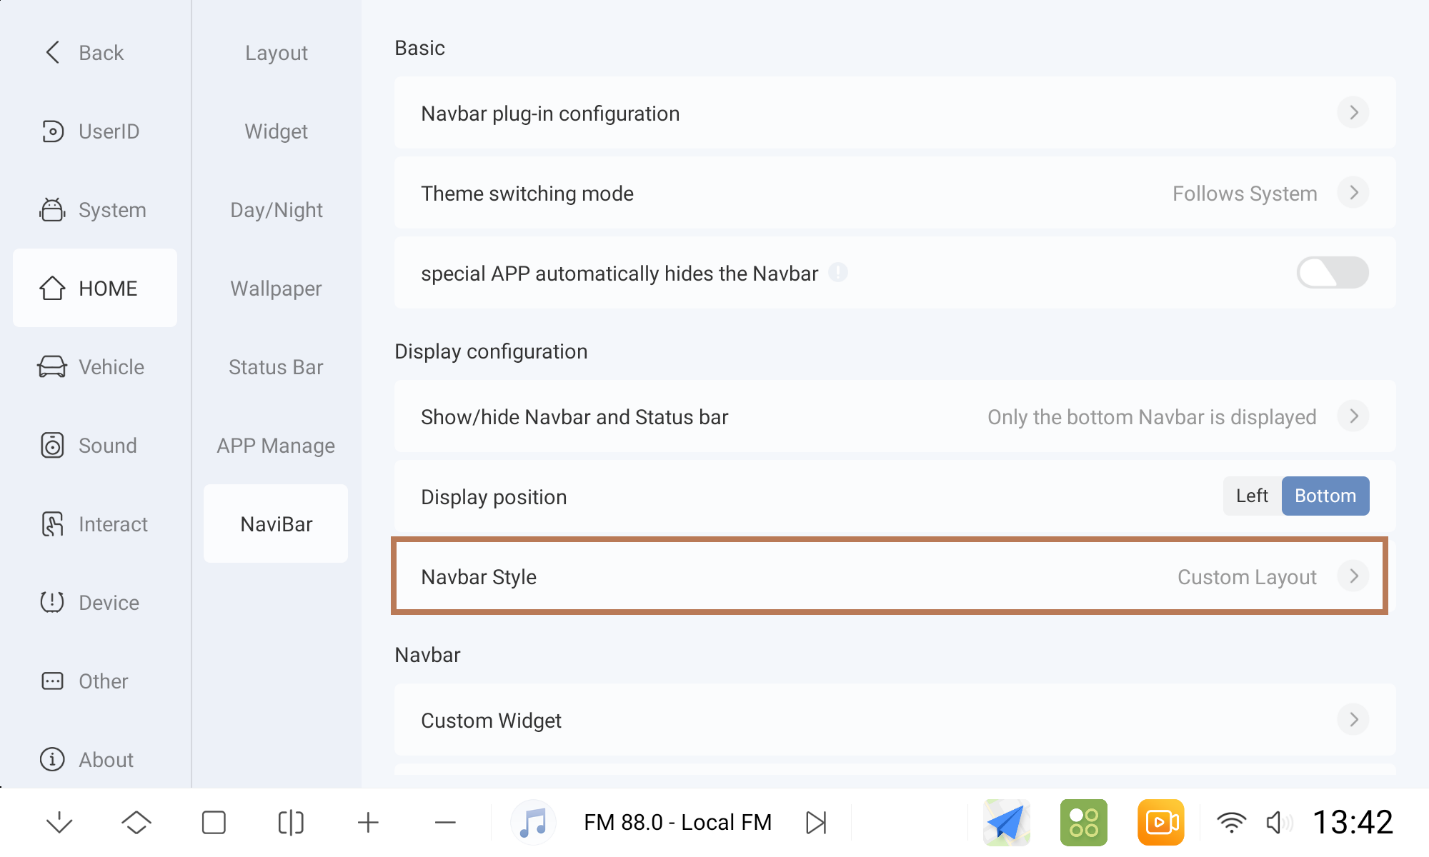
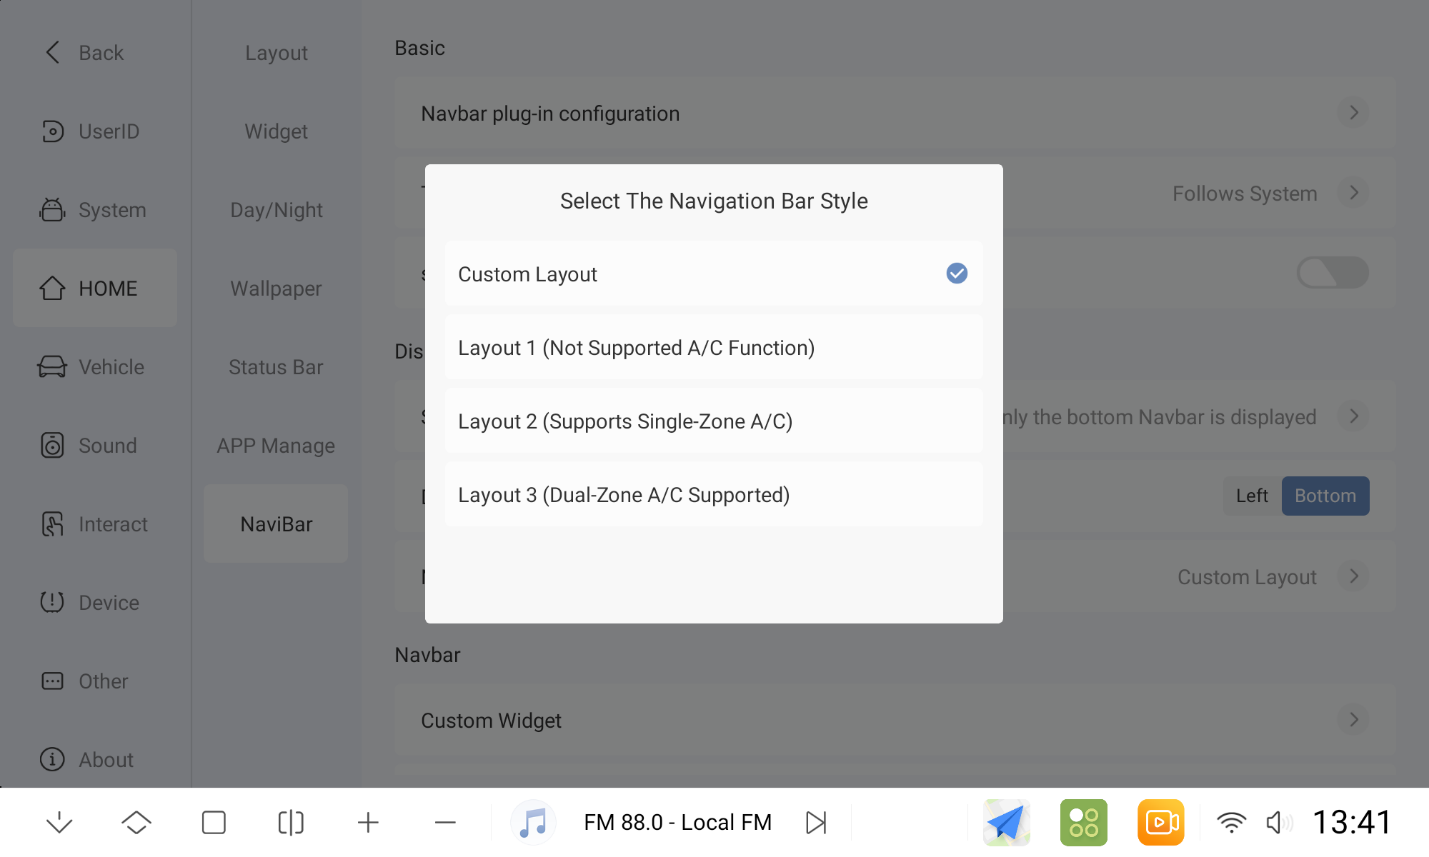
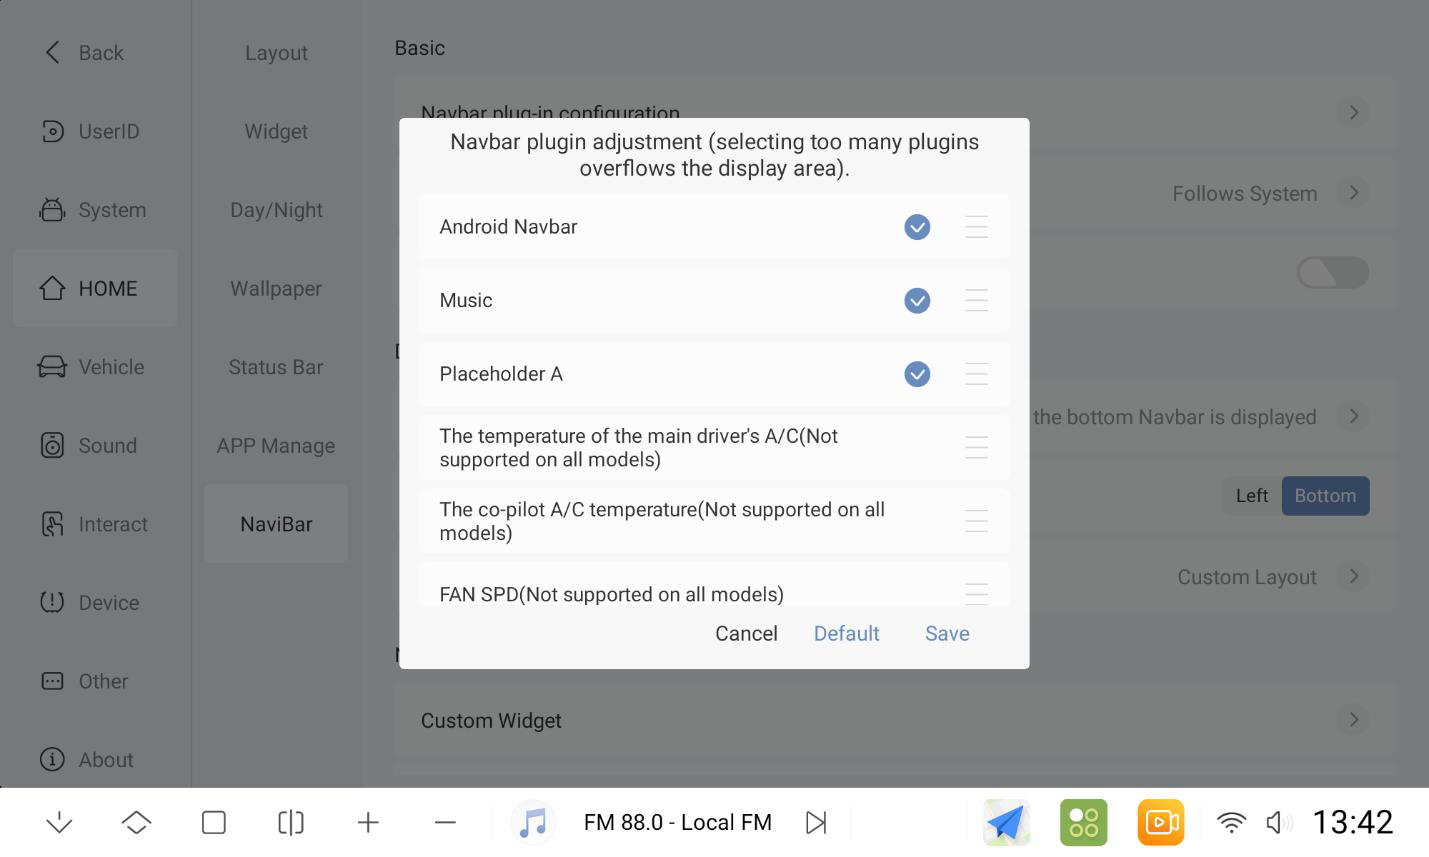
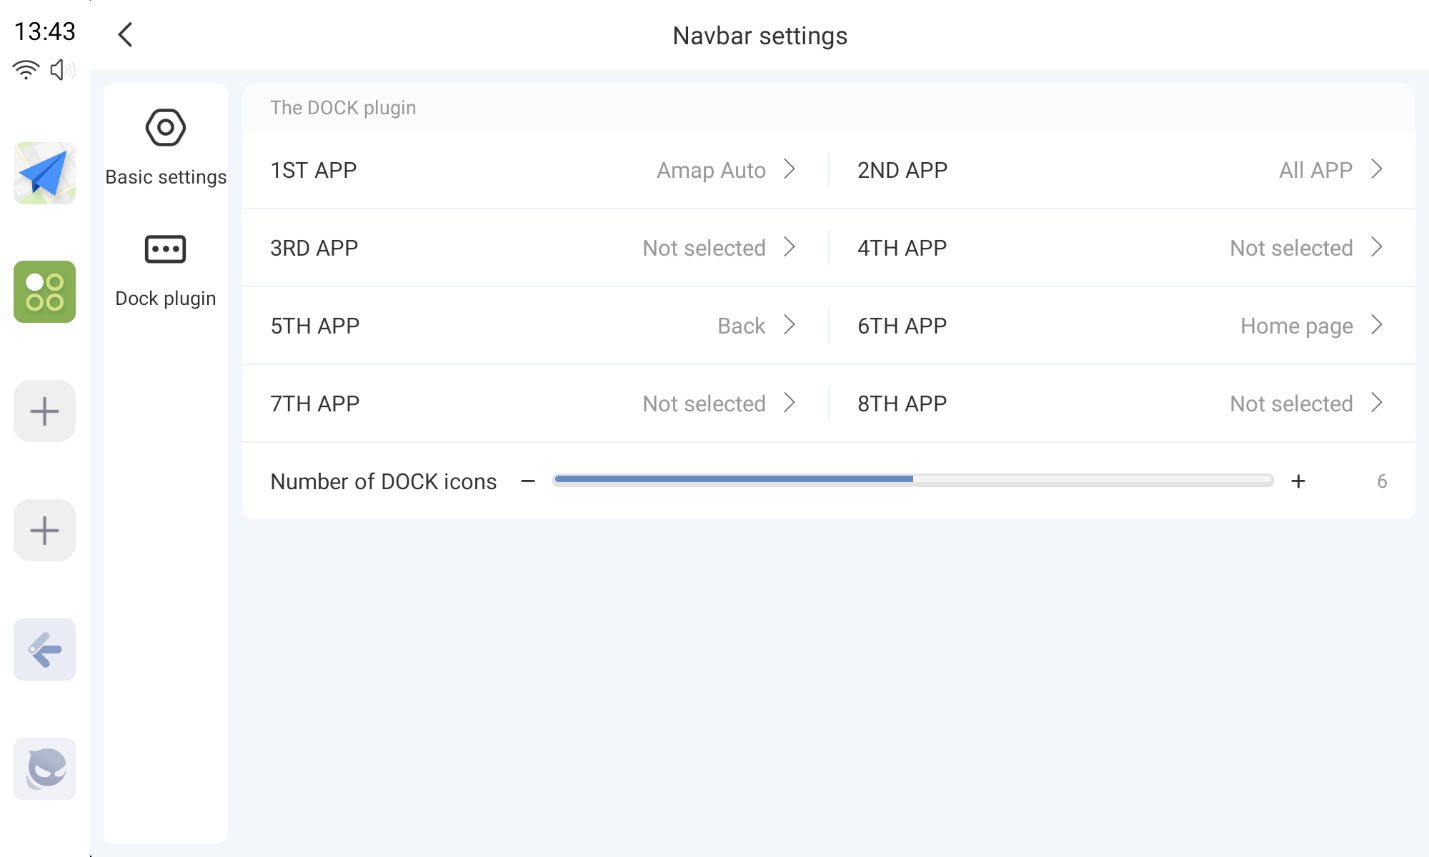
1.7.3 Custom styles (adjustable to add configuration plugins as well as plugin customisation)
1.7.4 Navigation bar style 1 (does not support plugin customization)
1.7.5 Navigation bar style 2 (only supports adjustment of air-conditioning plug-ins)
1.7.6 Navigation bar style 3 (only supports adjustment of air-conditioning plug-ins)

1.7.7 Navigation bar display position switches to the left
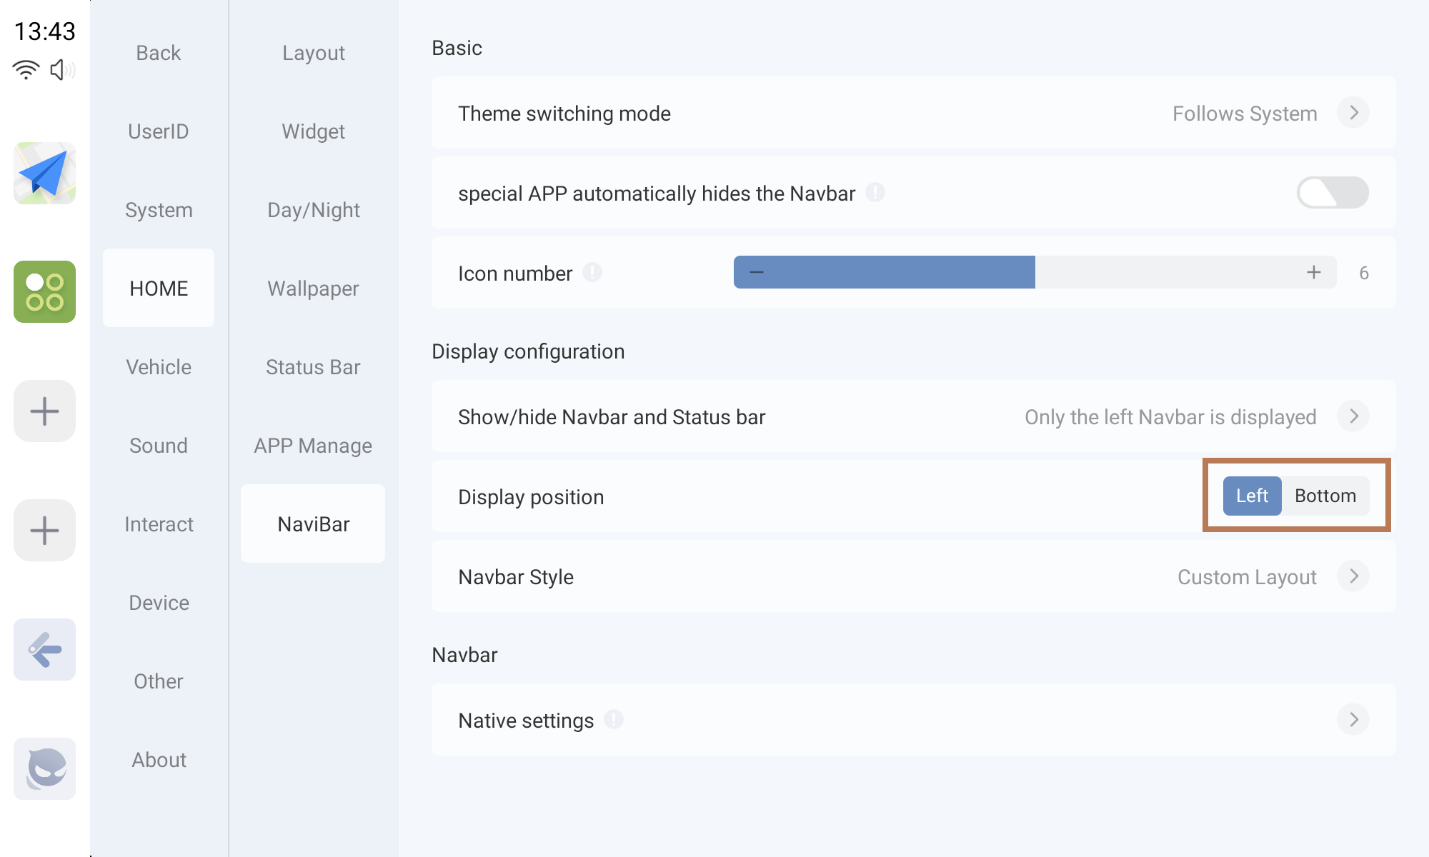
1.7.8 Left navigation bar supports 2 styles
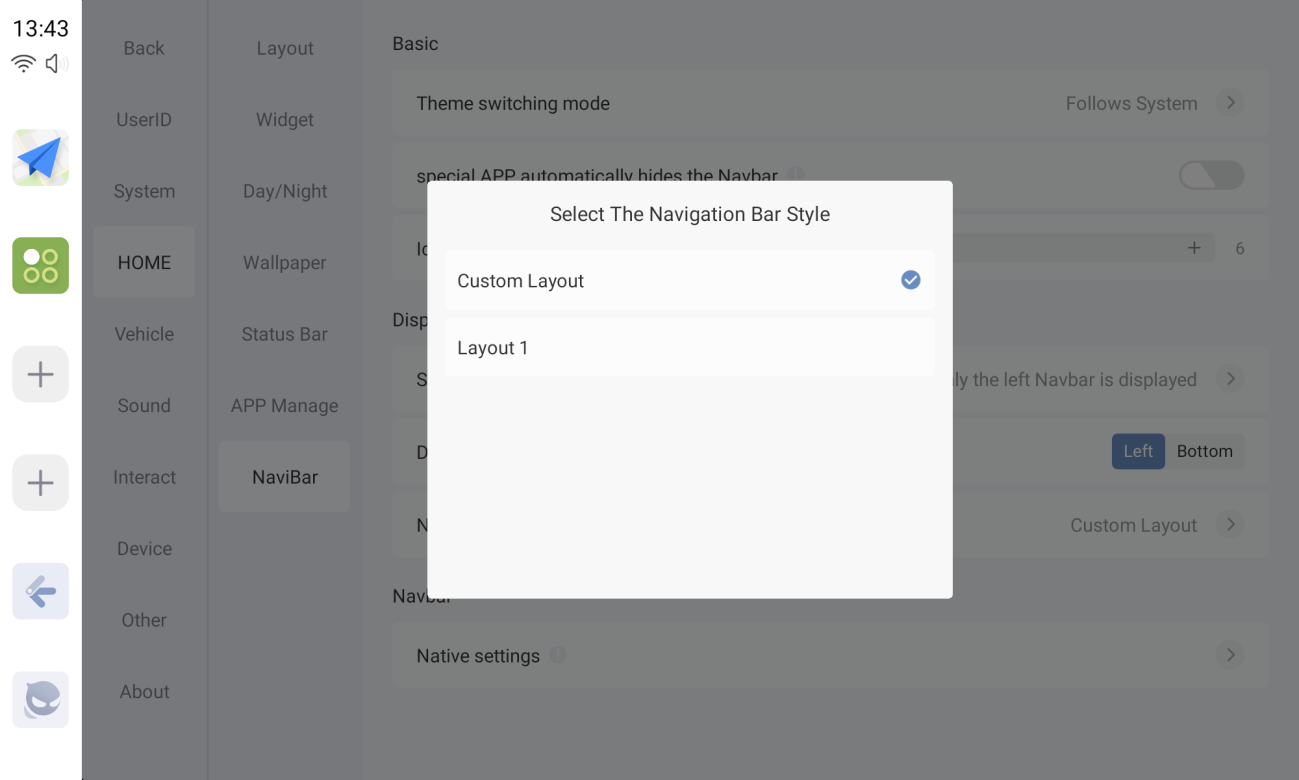
1.7.9 Customized style (adjustable DOCK bar)
1.7.10 Layout 1 (non-adjustable, fixed number of dock columns)

1.8 Picture In Picture
1.8.1 Setting up the Picture-in-Picture App
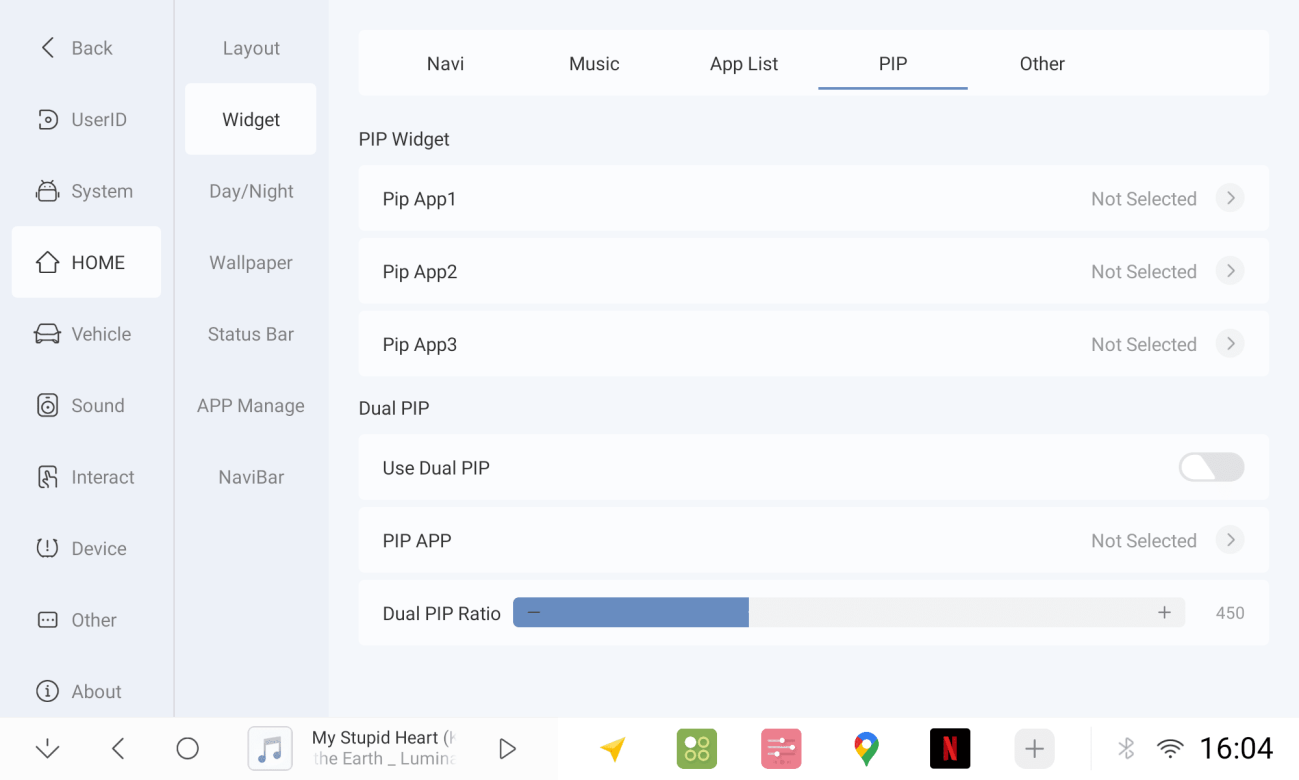
1.8.2 Modify homepage plug-in, add APP panel
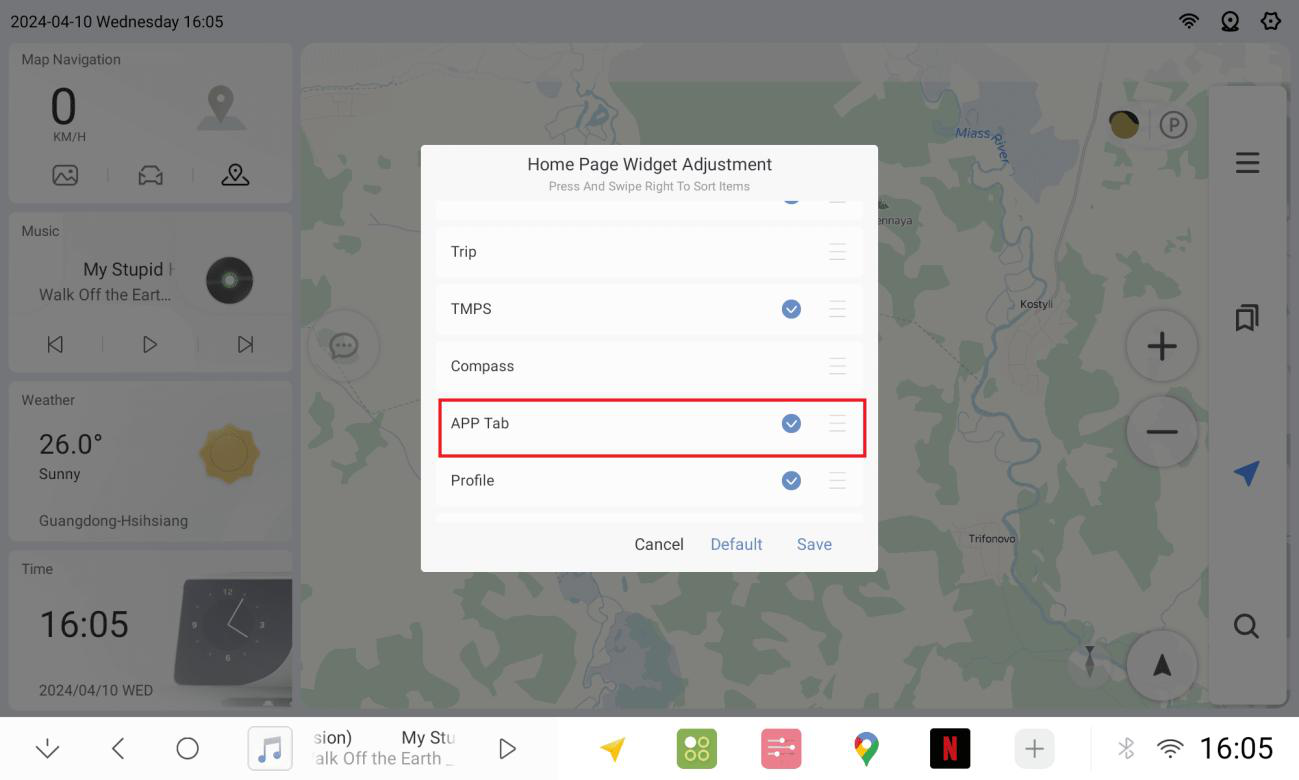
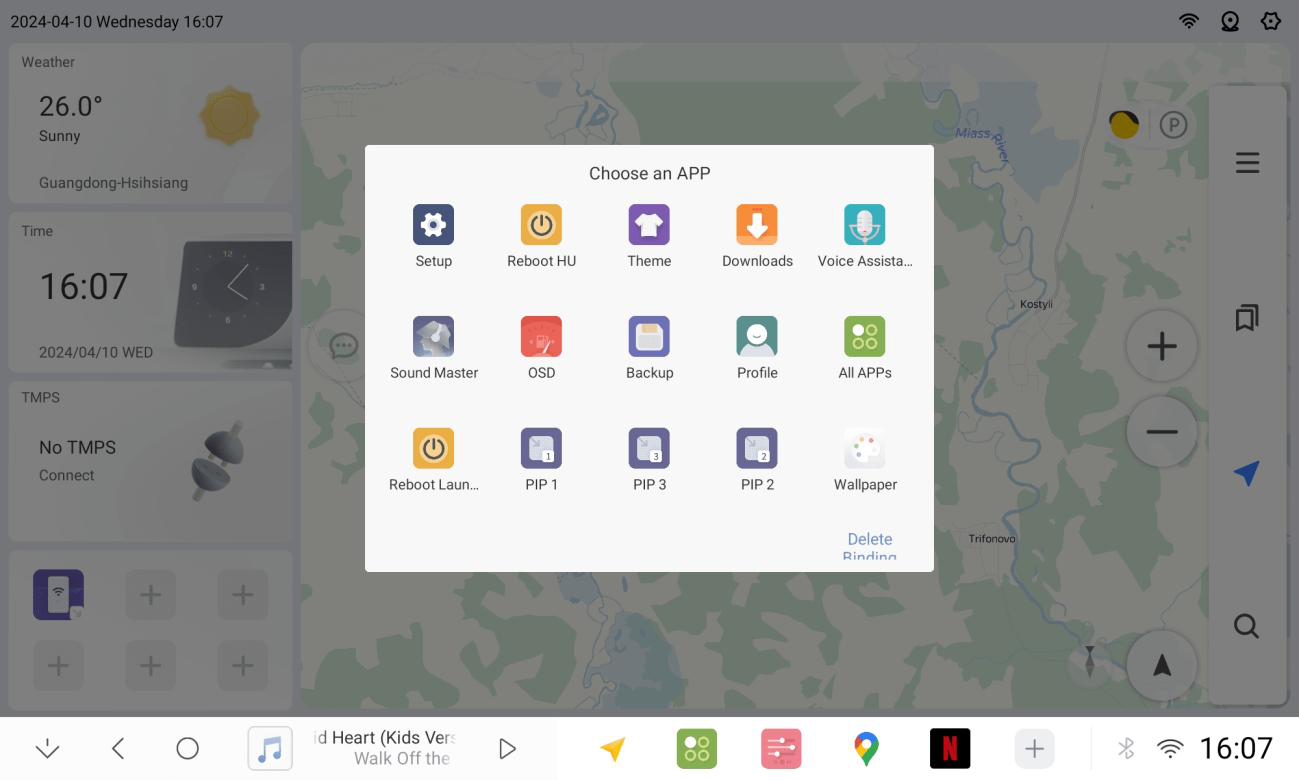
1.8.3 APP panel to add picture-in-picture 1/2/3 or other apps

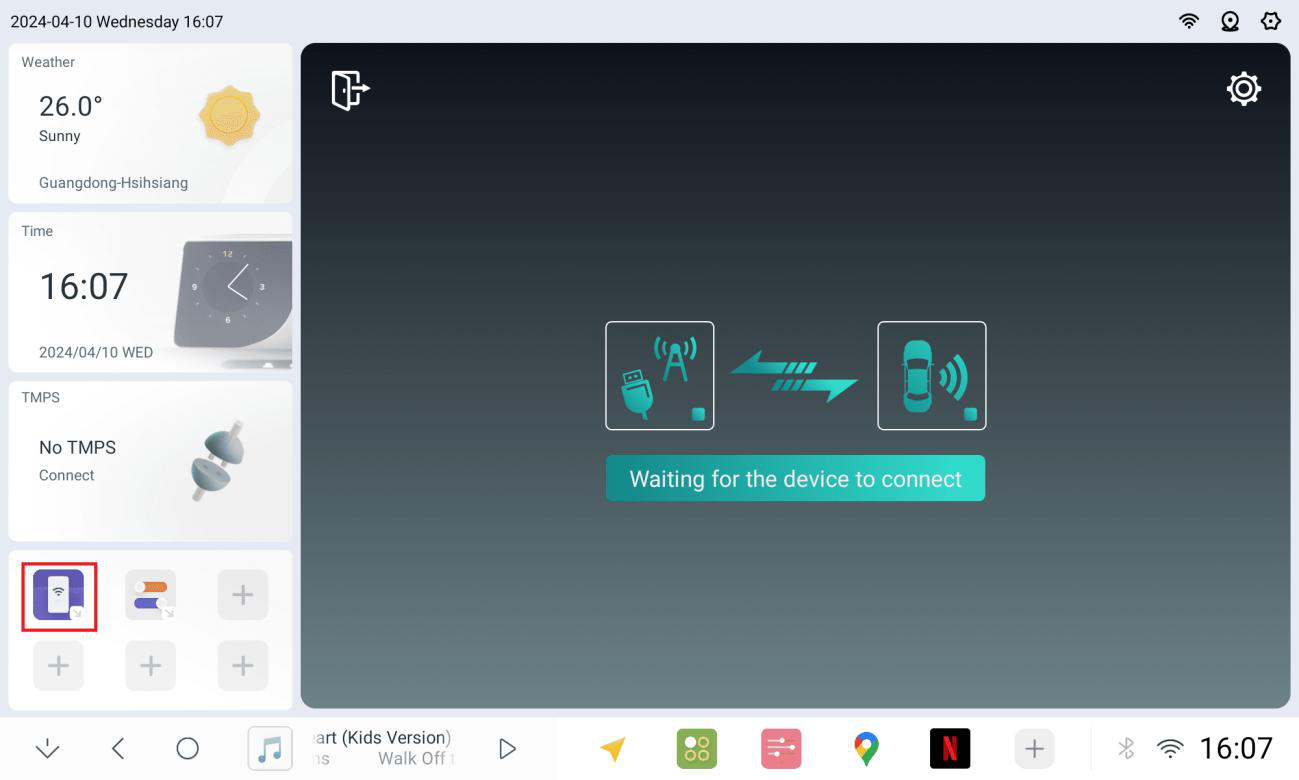
1.8.4 Partial application picture-in-picture demo
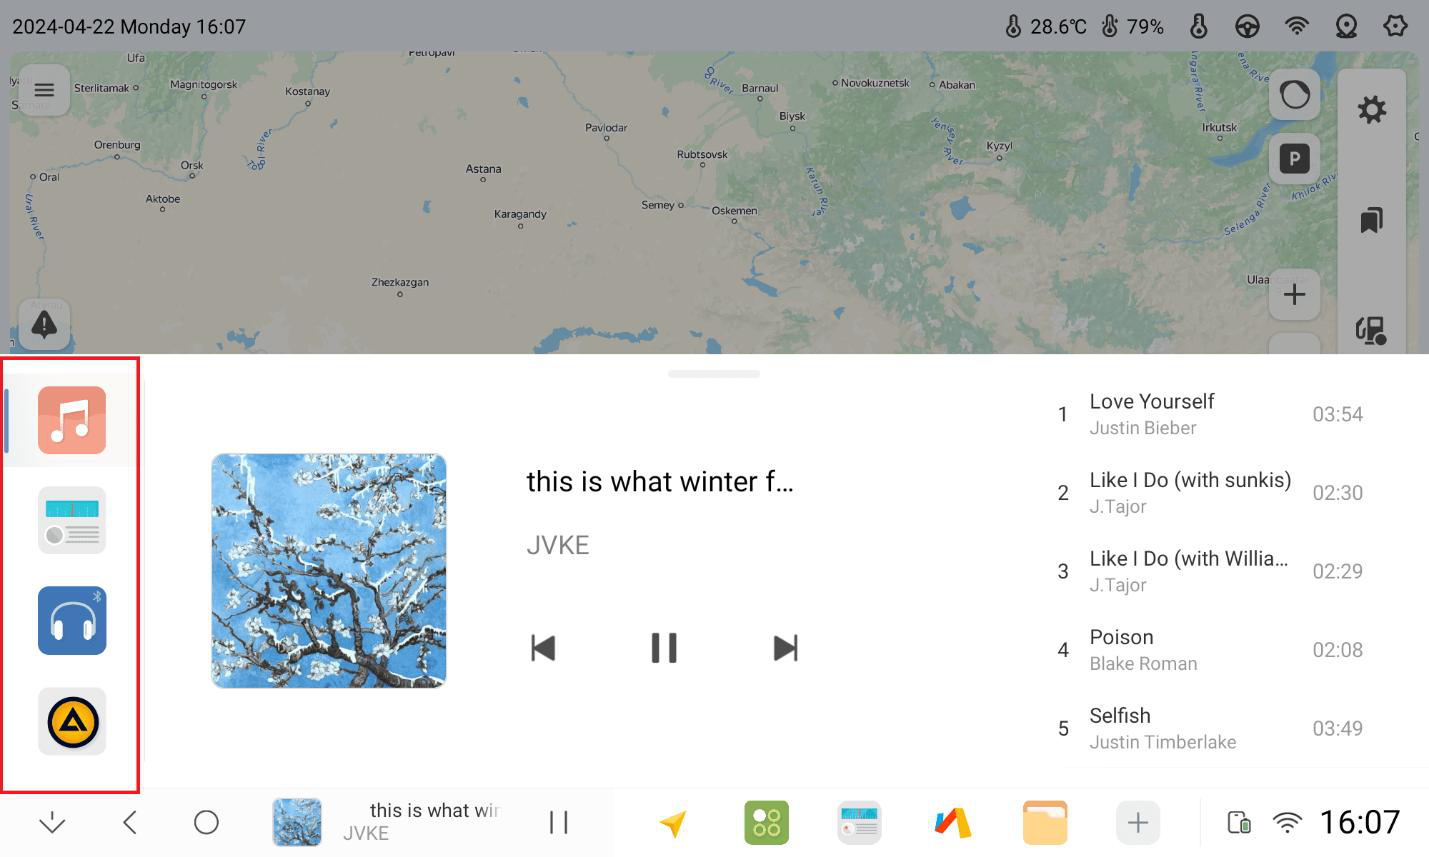
1.9 Music Plugins
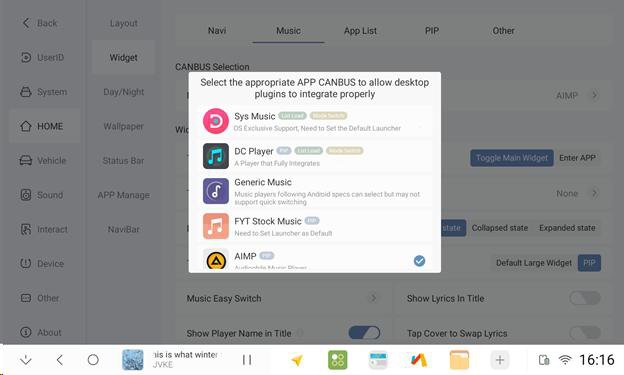
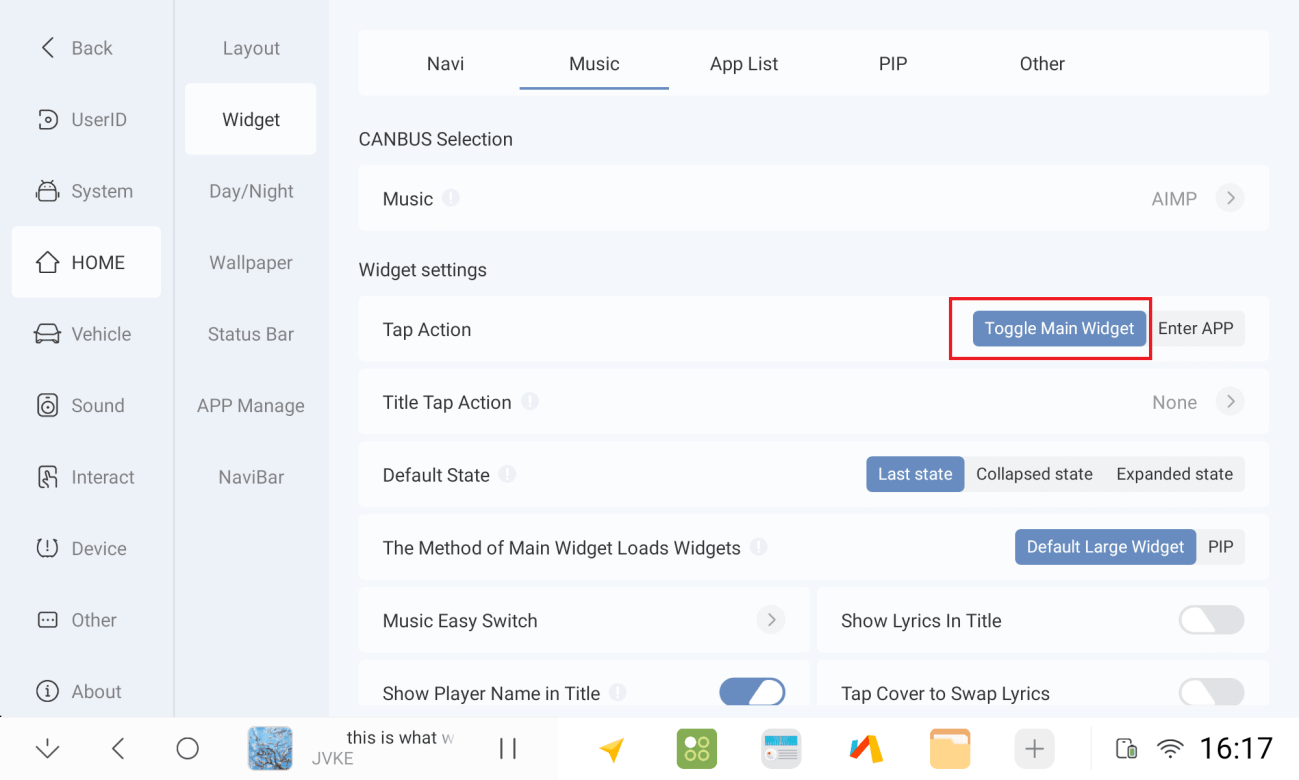
1.9.1 Settings-Home-Widget-Music-Select APP CANBUS, support multiple music apps.
1.9.2 For example, the plugin click action is set to switch the main plugin.
1.9.3 Click Home Plugin
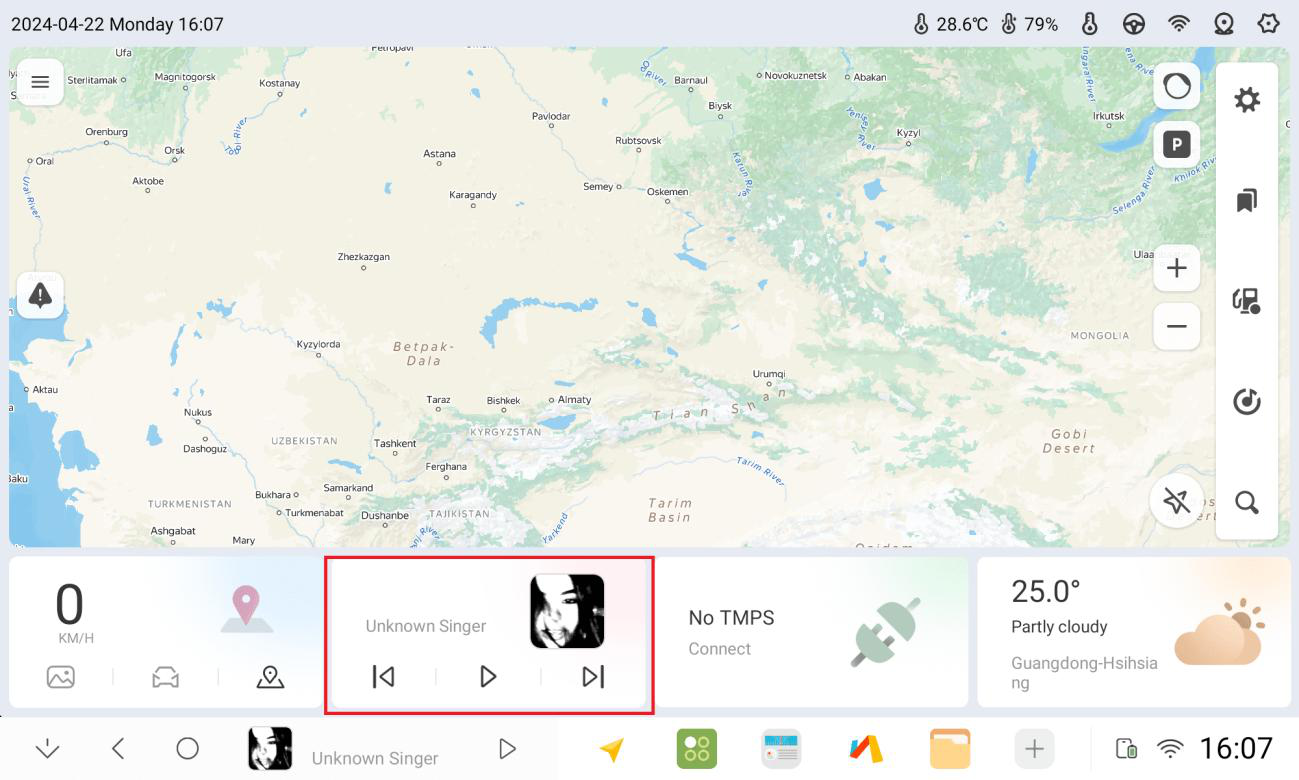
1.9.4 On the left side, you can quickly switch between local music, radio, Bluetooth music, and QQ music bound to the plug-in.

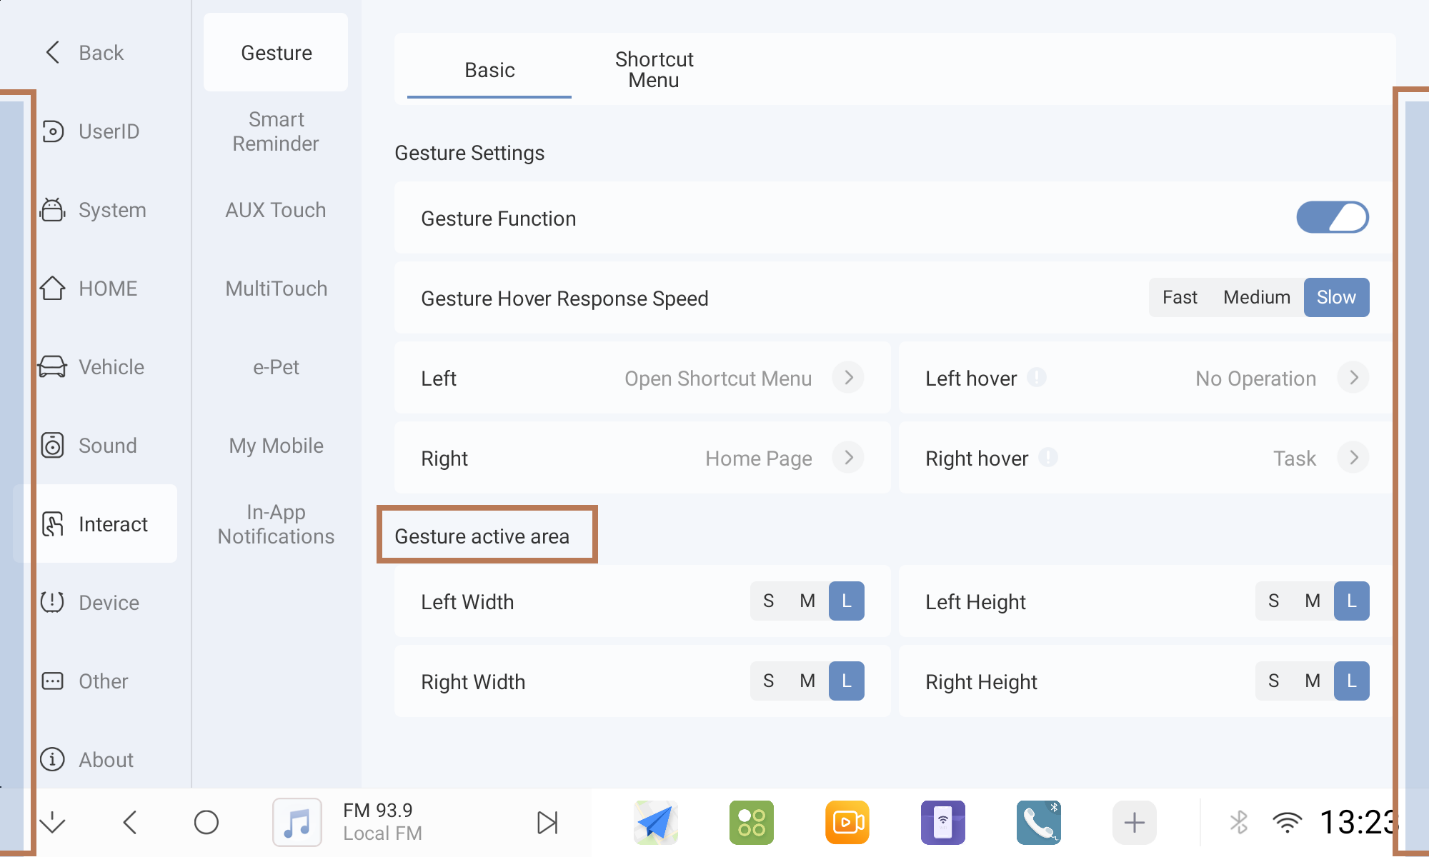
1.10 Full-screen Gestures
1.10.1 Enabling Gesture Functions
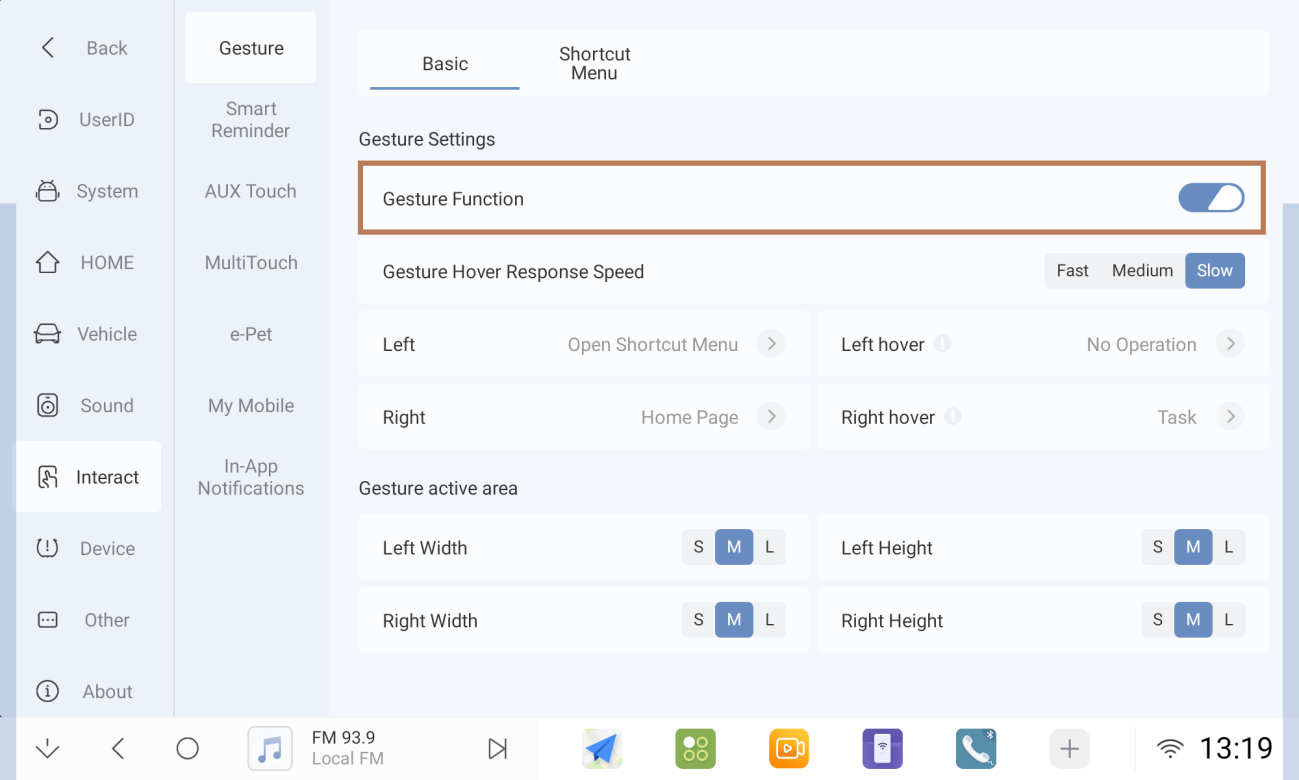
1.10.2 Operate as on the right side (release immediately after sliding)
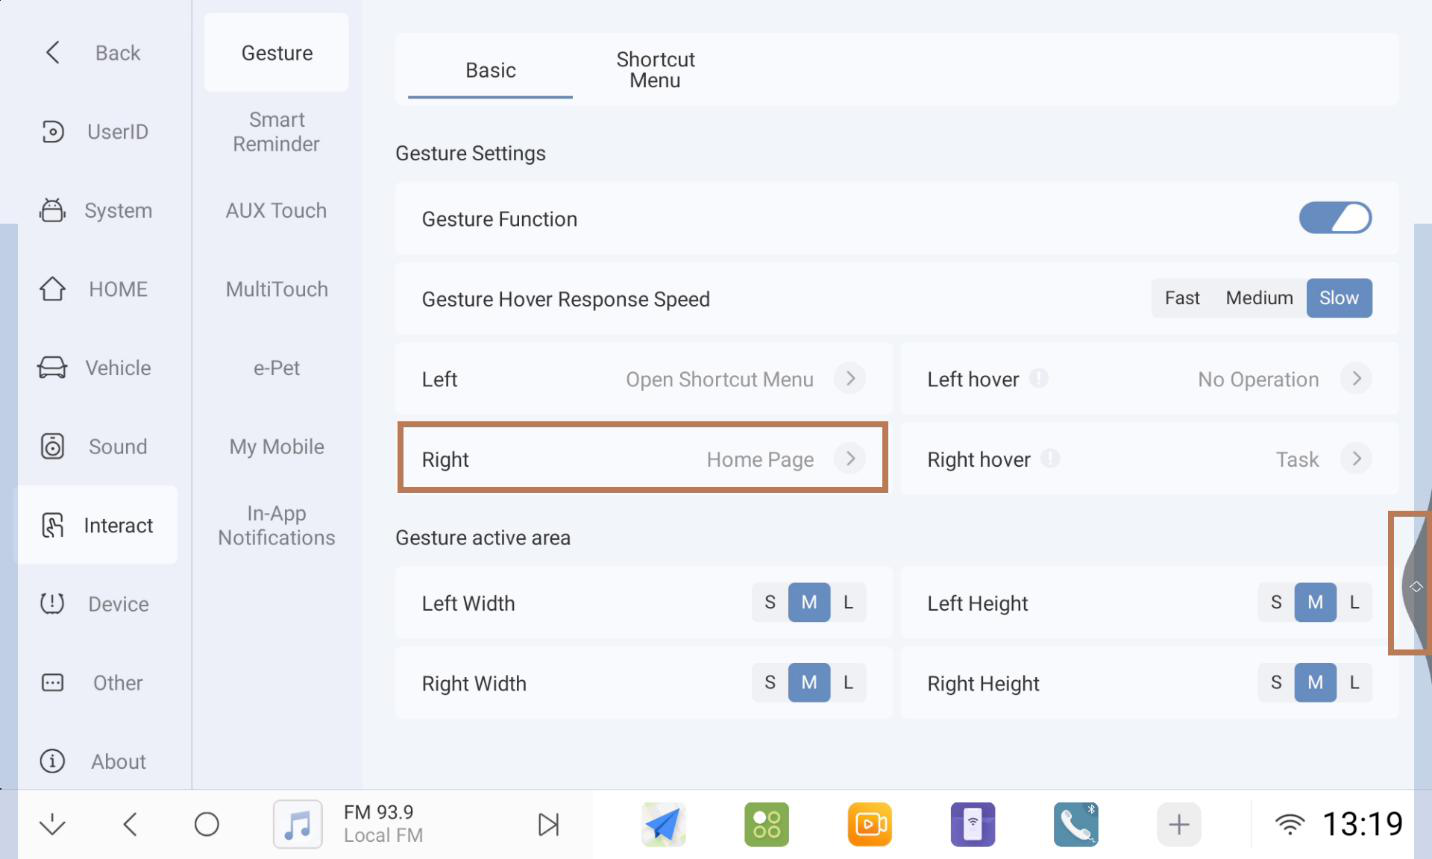
1.10.3 As in the right hover operation (swipe and hold for 1-2 seconds and then release)
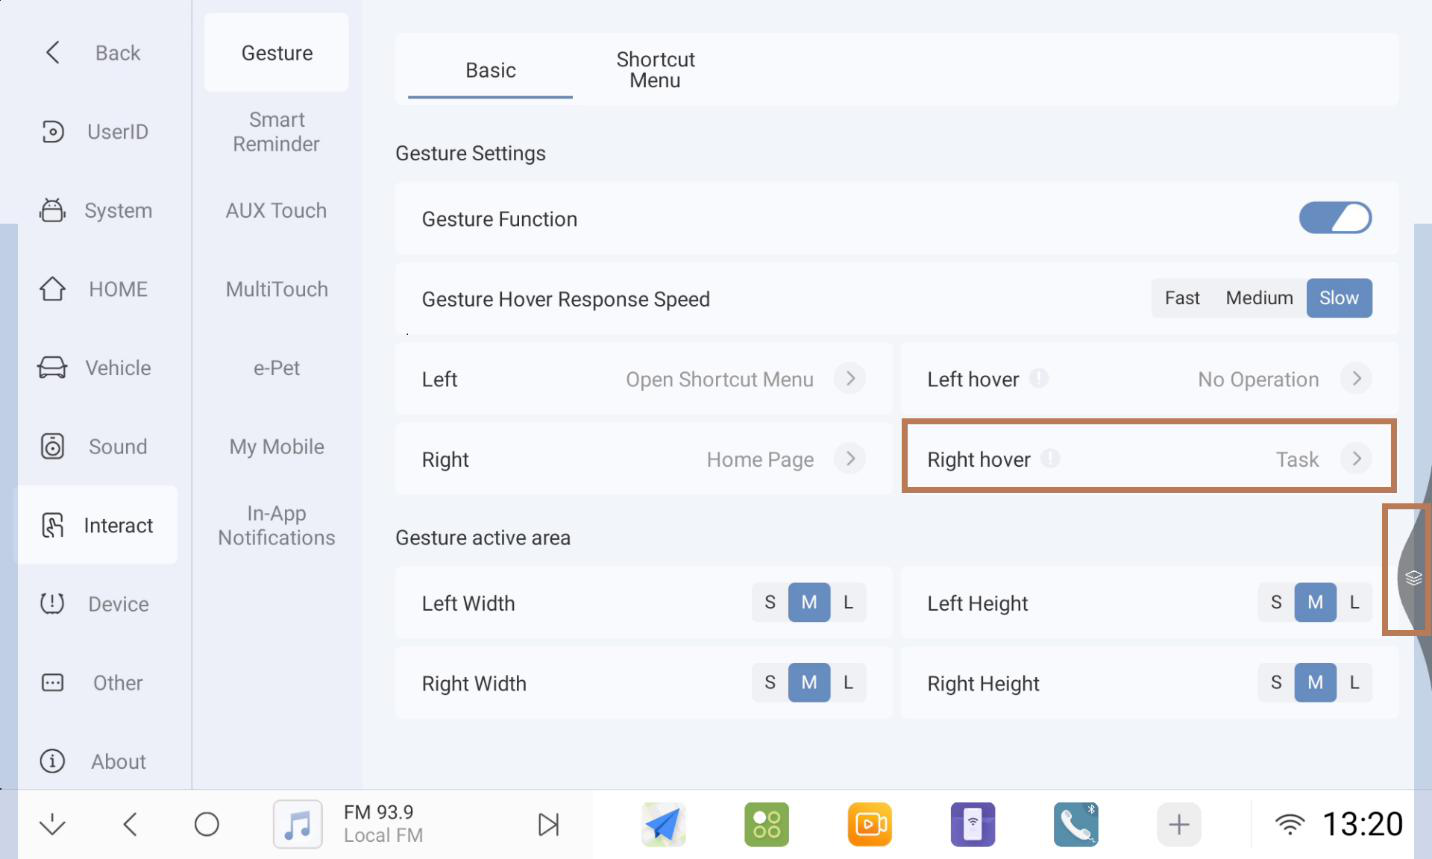
1.10.4 Like the left-hand side, set it as an app shortcut hover window.

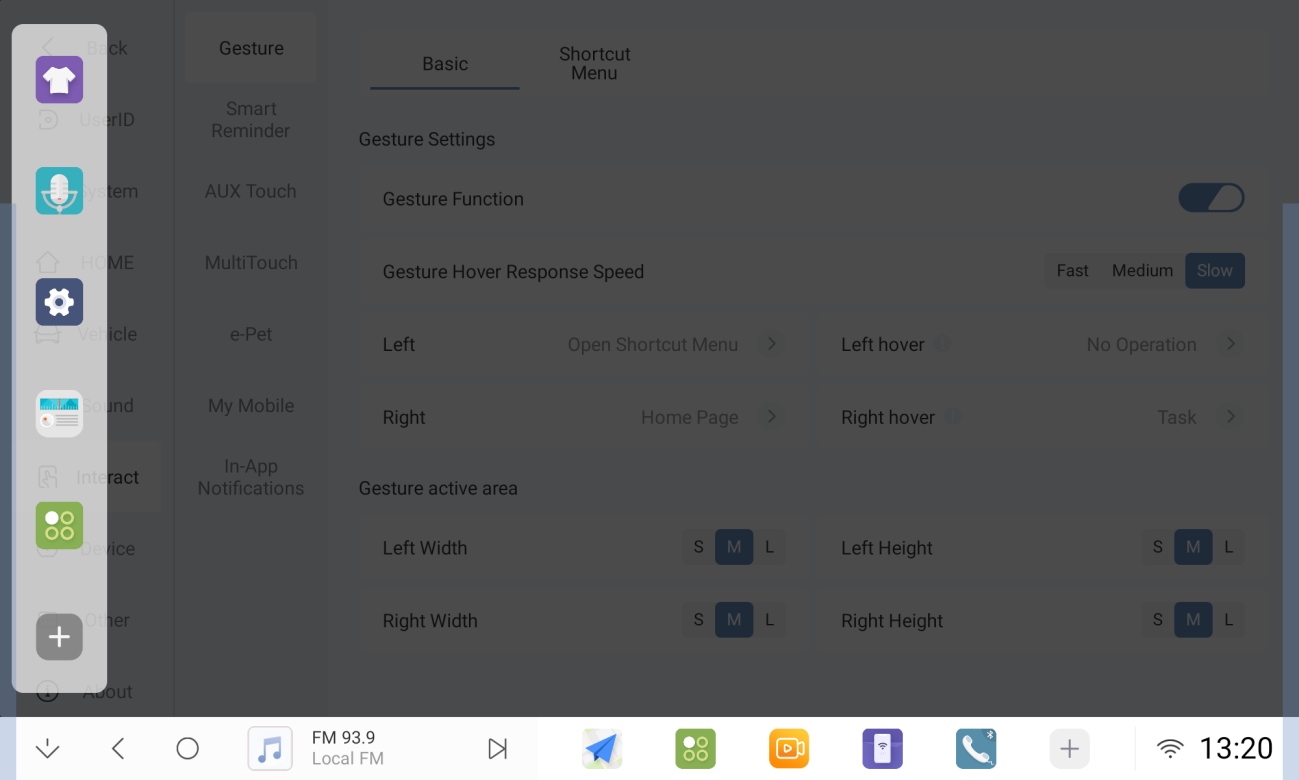
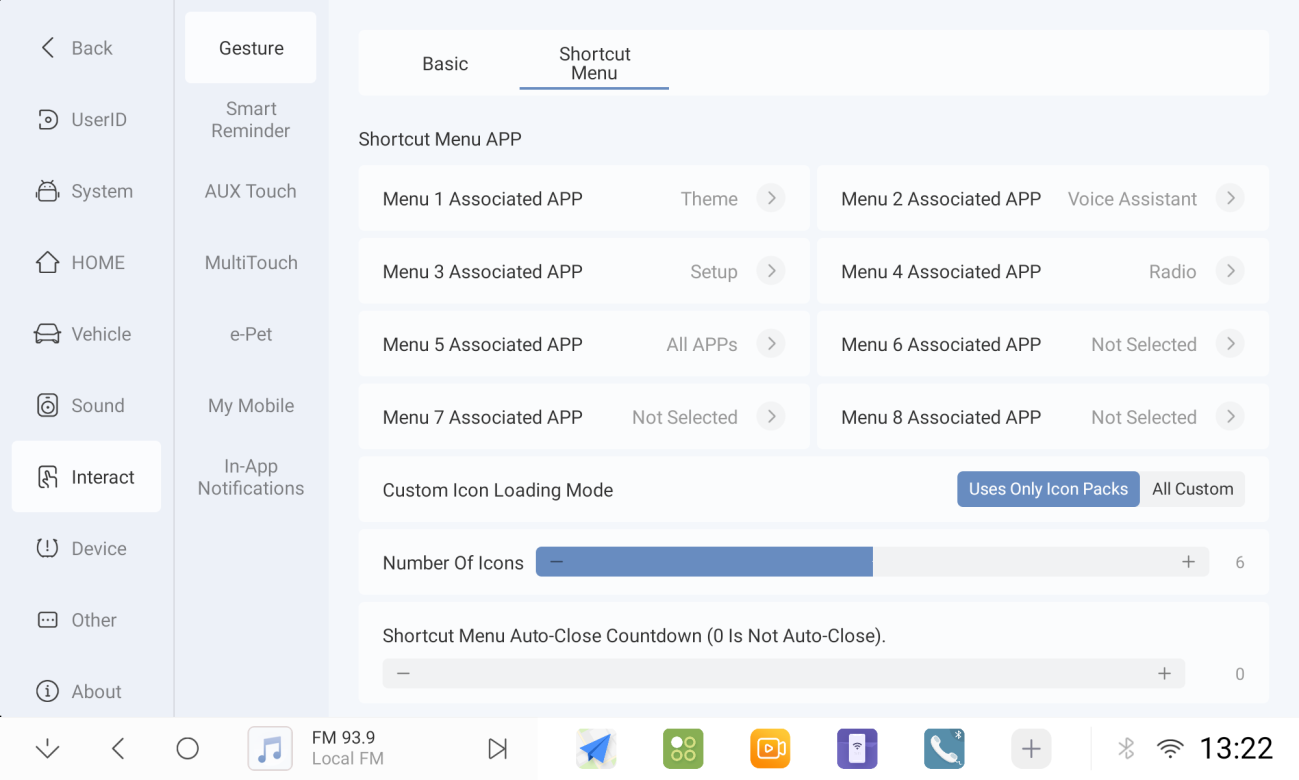
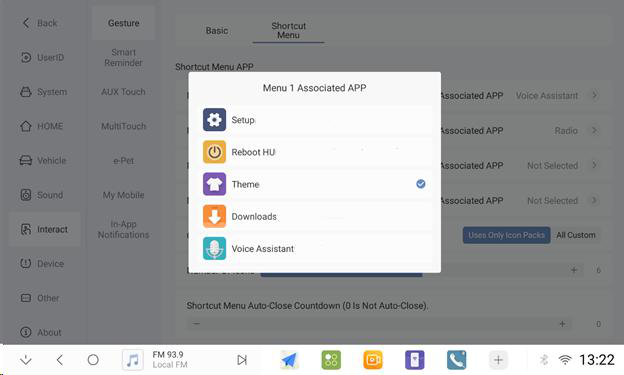
1.10.5 When you set the APP shortcut hover window or open the APP application, you can adjust the association or modify the application within the shortcut menu.
1.10.6 Can adjust the gesture hot zone height and width
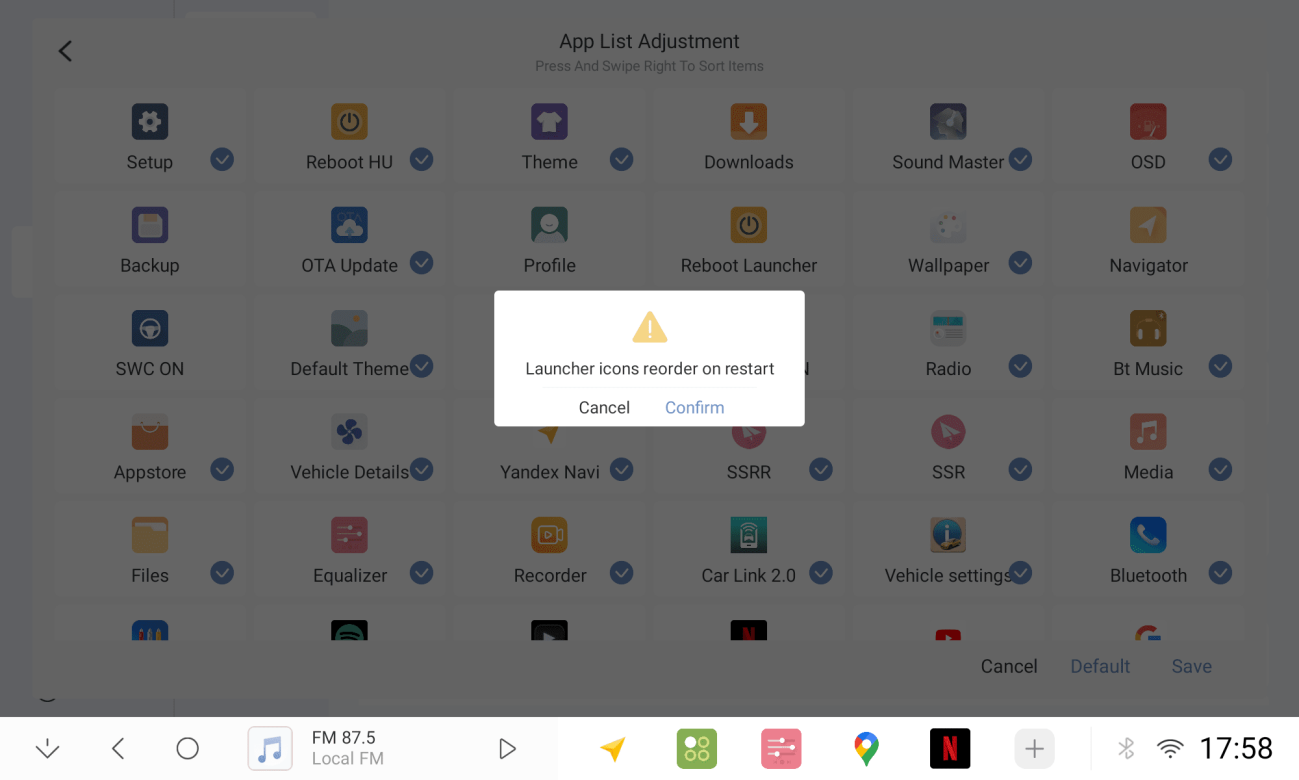
1.11 APP Management
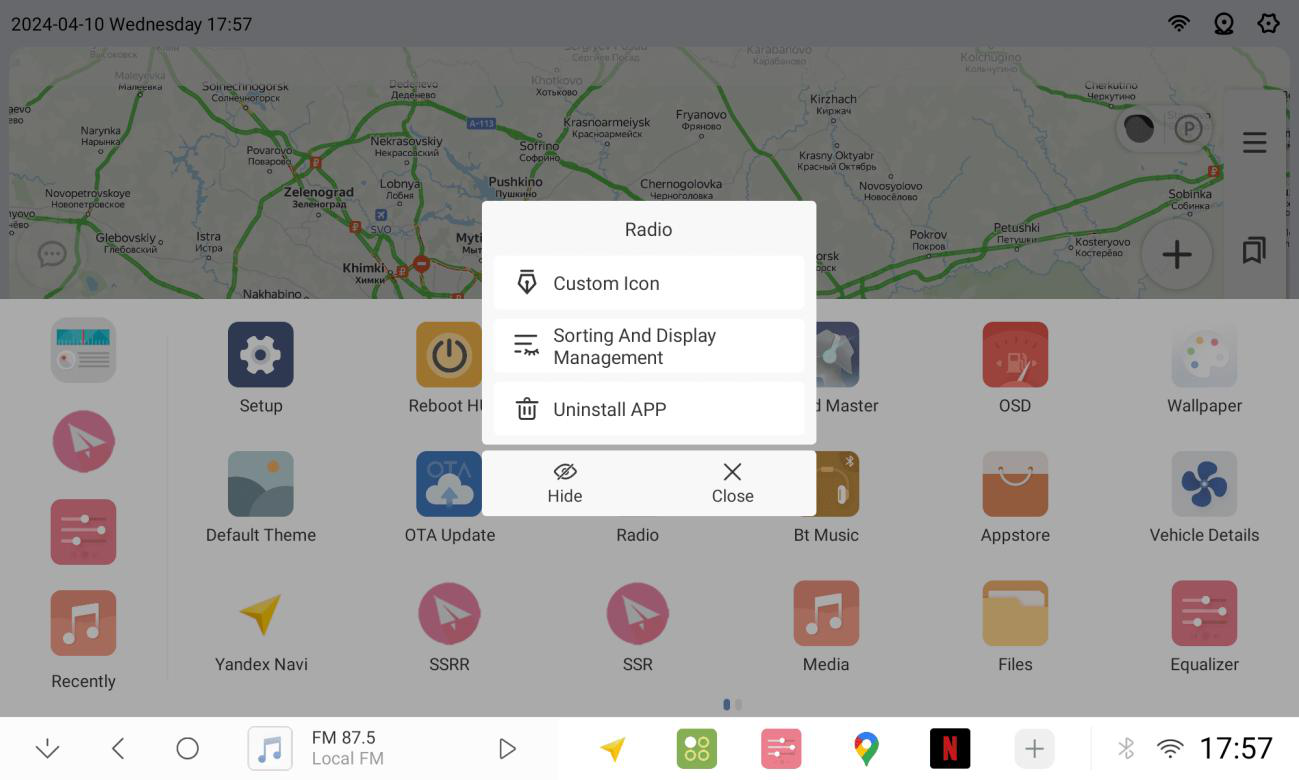
1.11.1 Long press on any application in the list to select sorting and display management
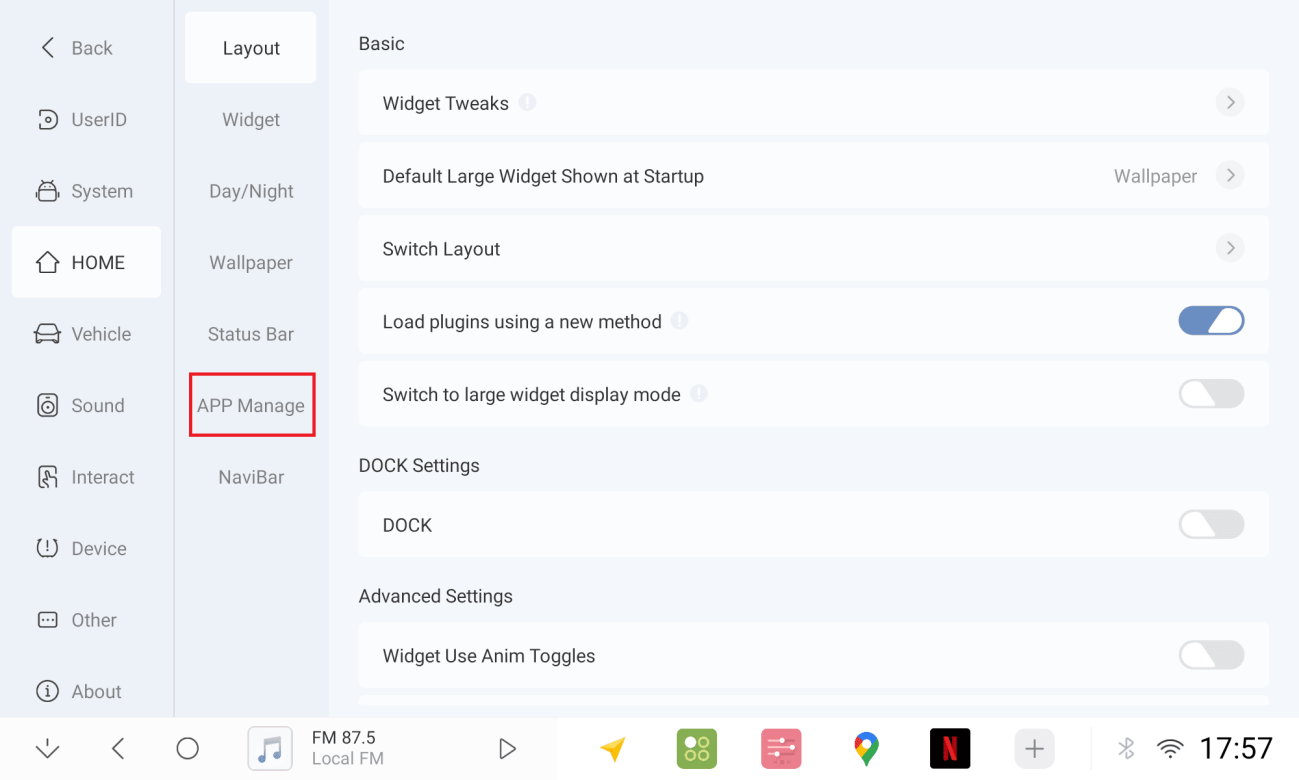
1.11.2 In Settings, choose APP Management
1.11.3 Drag the APP to adjust the sorting, tick to show the app in the list/uncheck to hide it
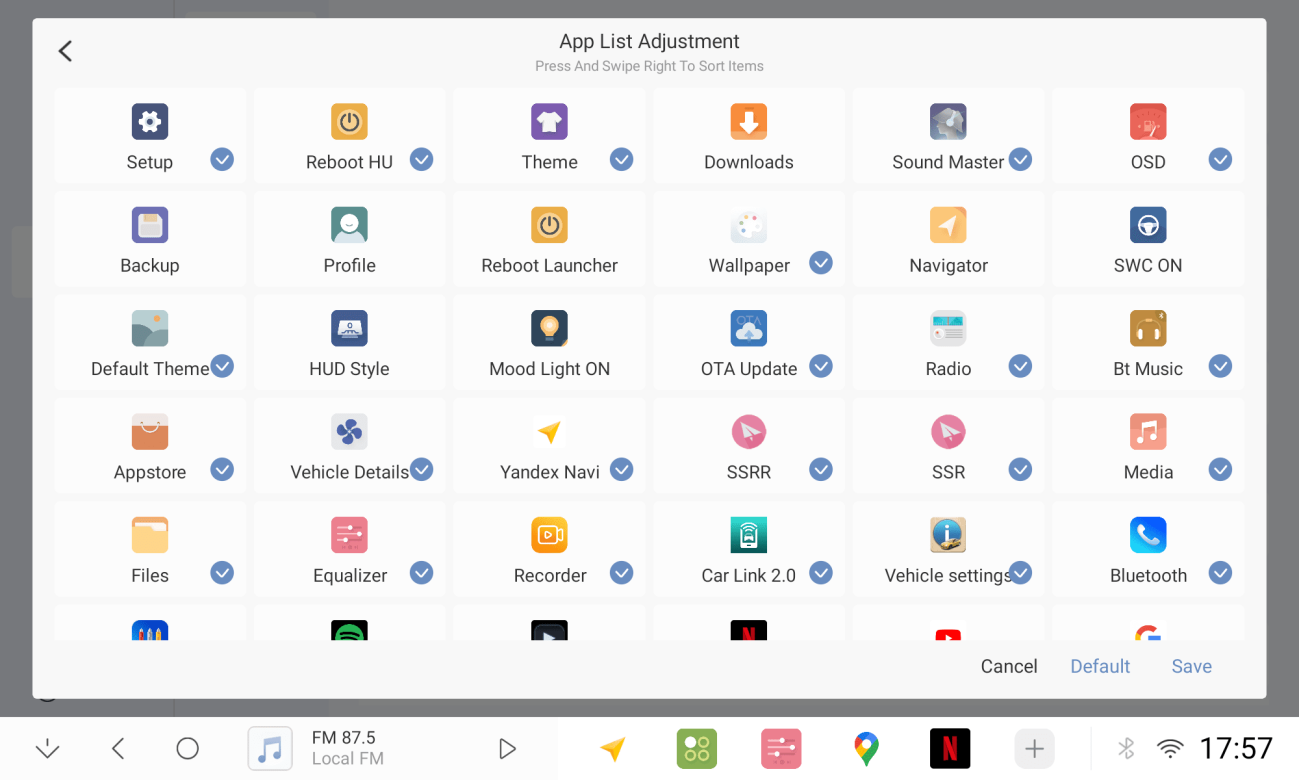
1.11.4 Click save and Confirm after adjusting
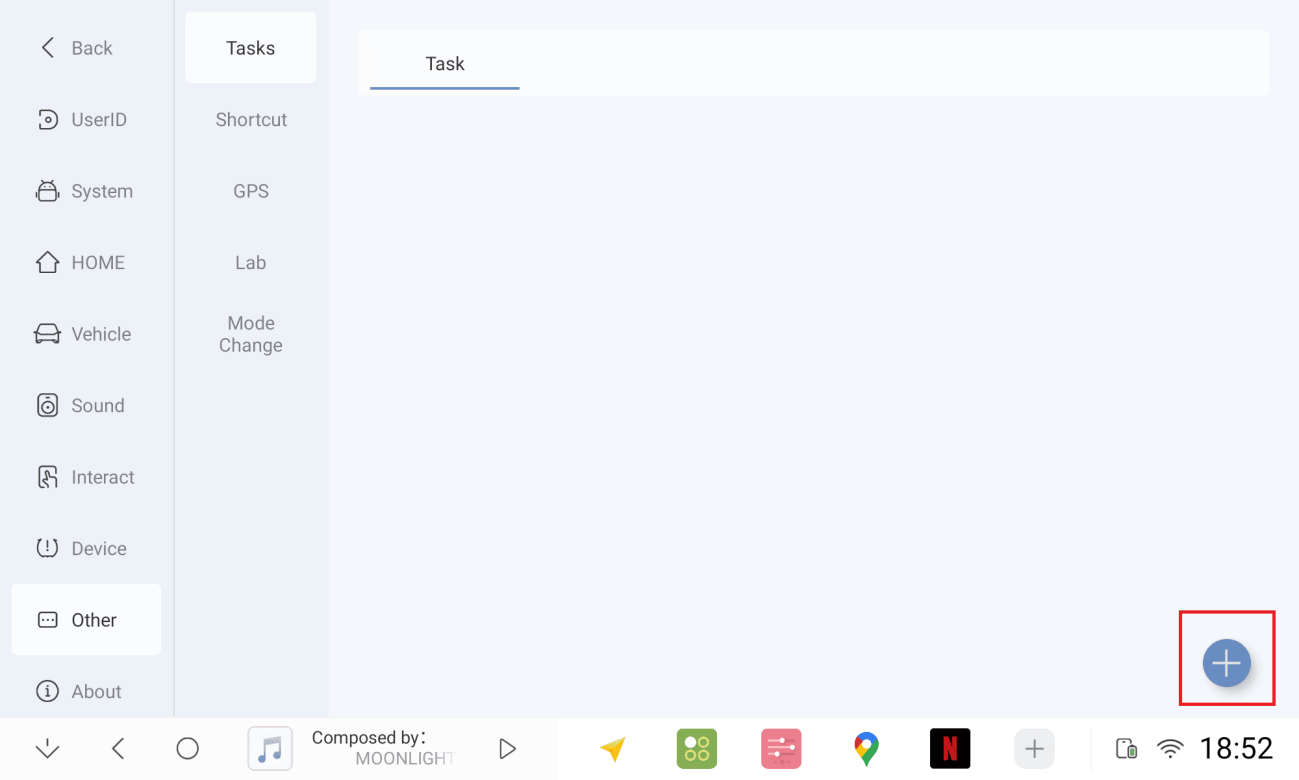
1.12 Planned Tasks
1.12.1 Add a task (it is recommended that multiple tasks be executed 2 seconds apart, otherwise they will not take effect)
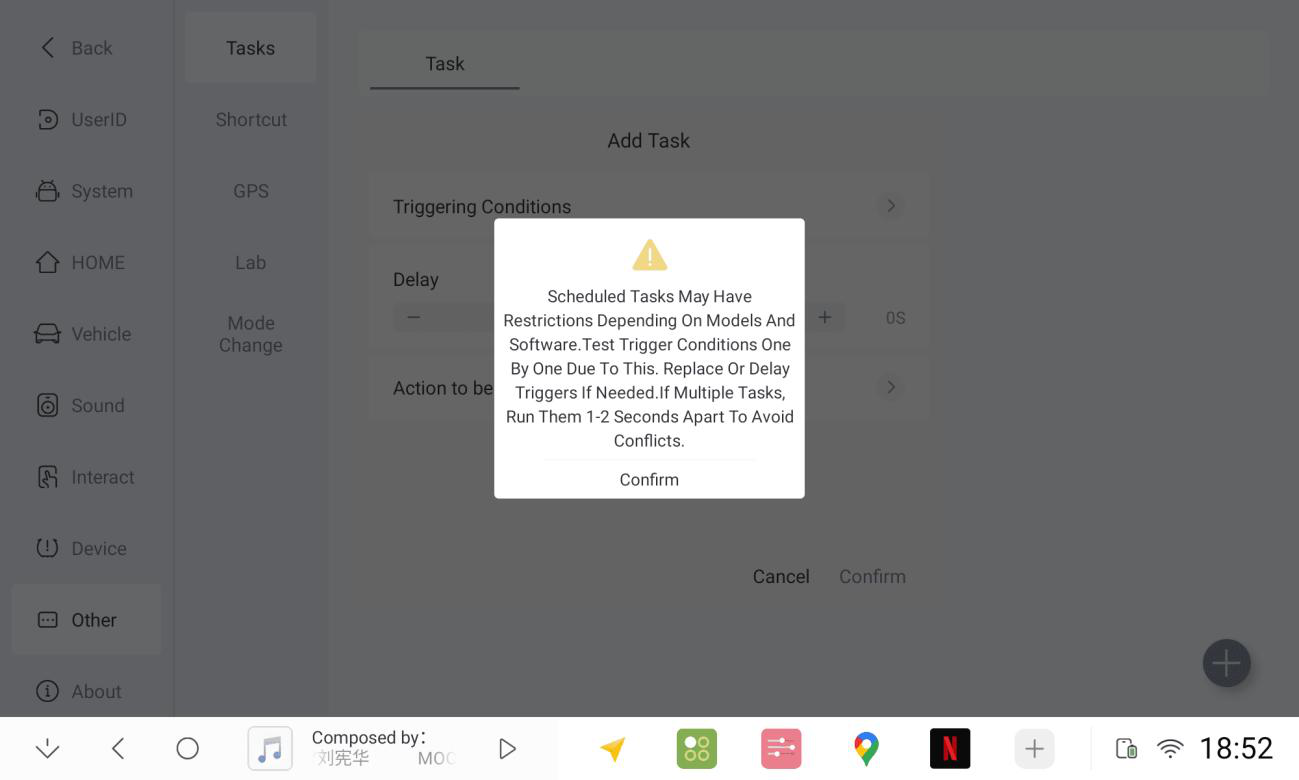
1.12.2 Setting the trigger conditions and executing actions
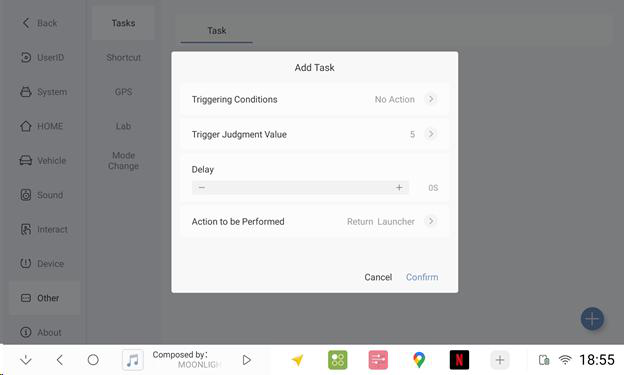
1.12.3 If the system starts - after 2 seconds - play music
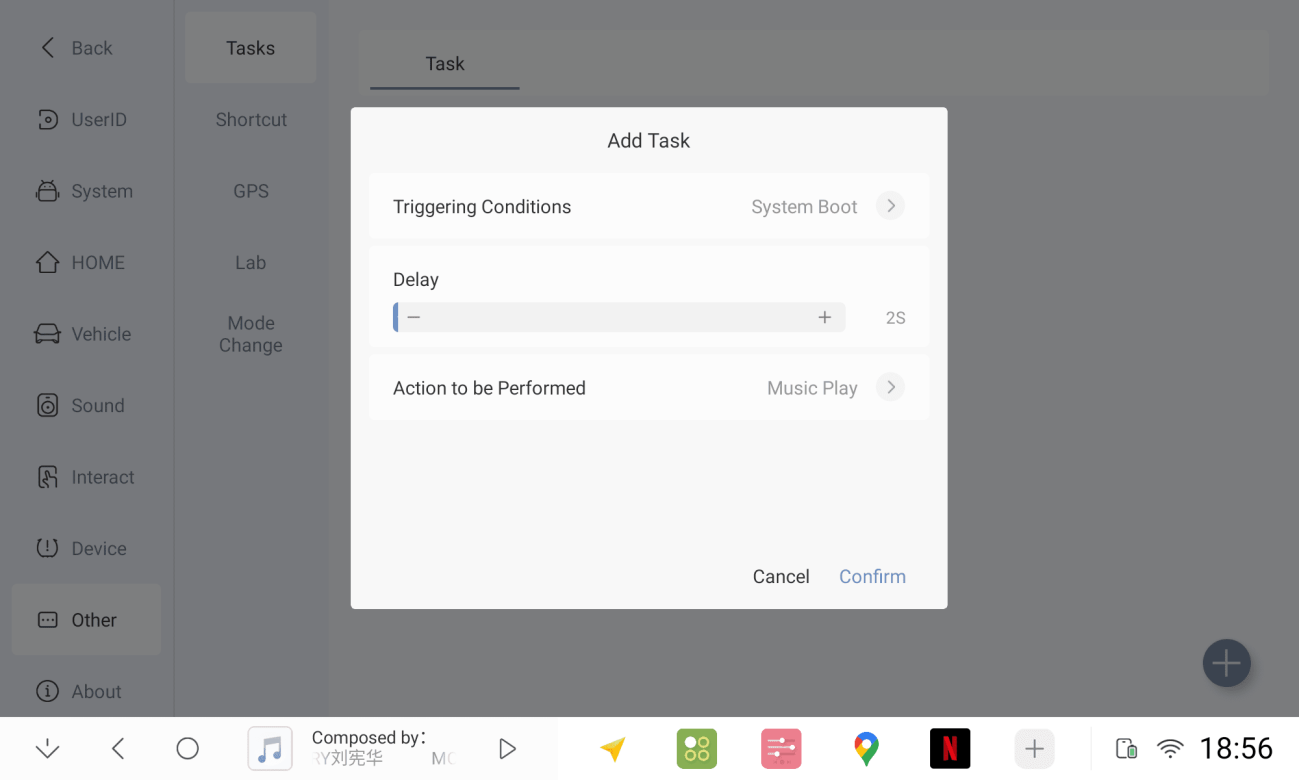
For reference only, if it can work or not, please check the description of trigger condition and action in detail
Description of System Function
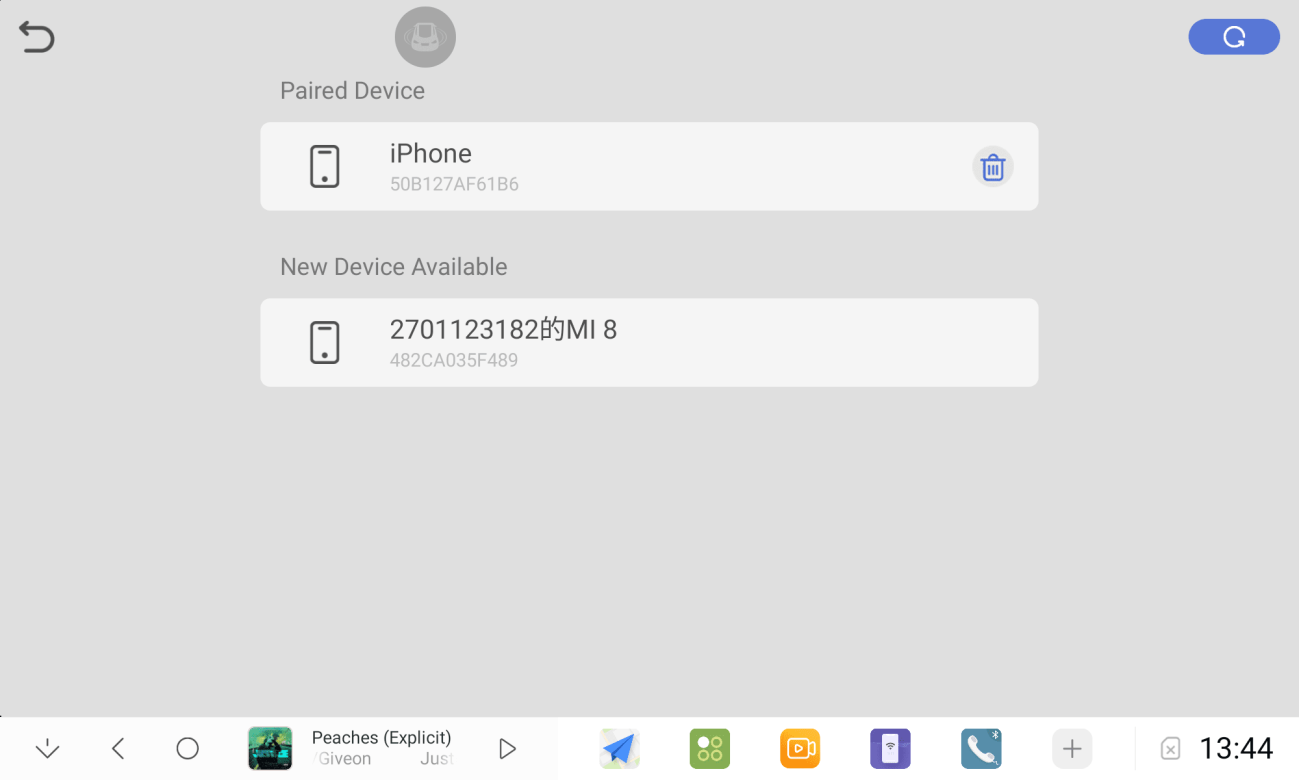
2.1 Apple Connected
2.1.1 Connect your mobile phone to your car's Bluetooth and click on pairing.
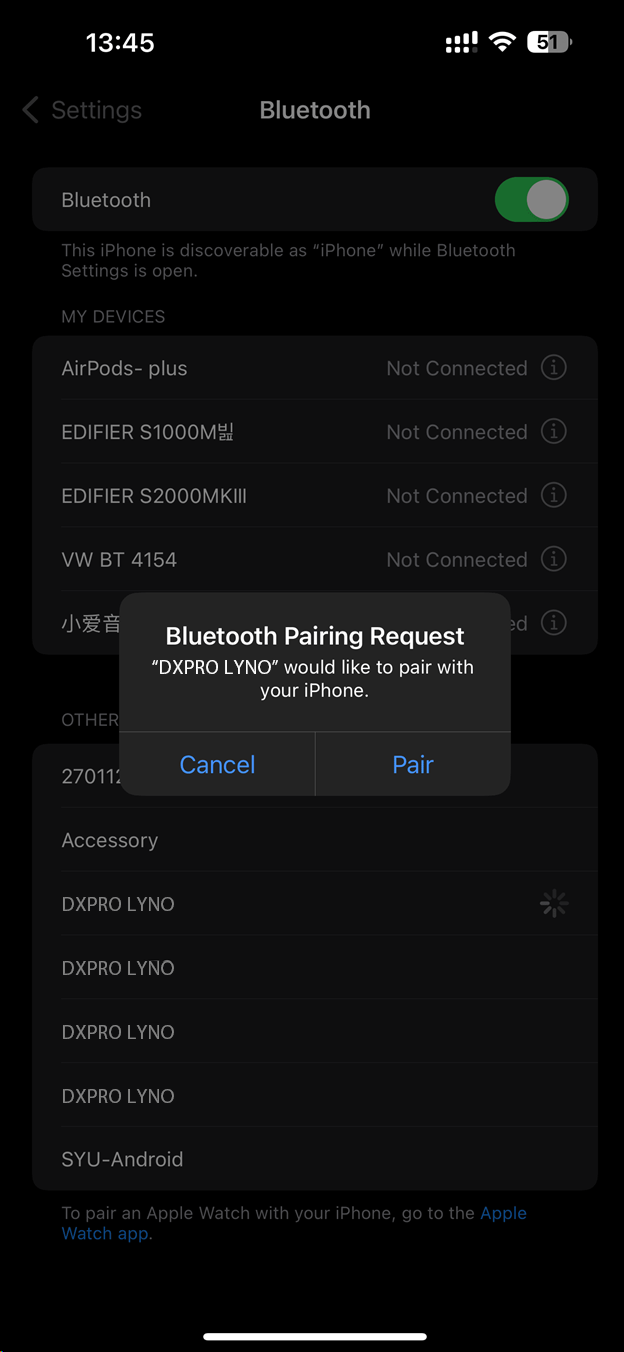
2.1.2 Open the car cartlink2.0, mobile phone click to confirm the use of carplay in-car
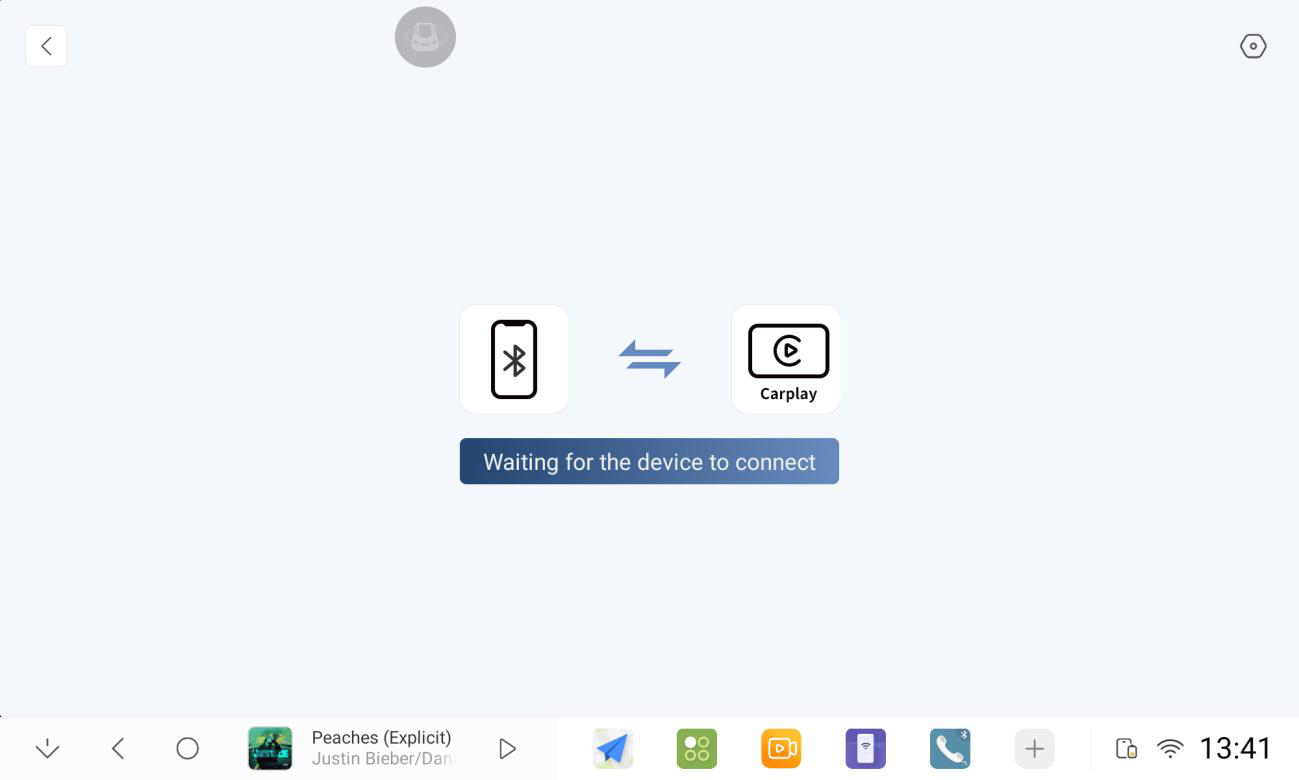
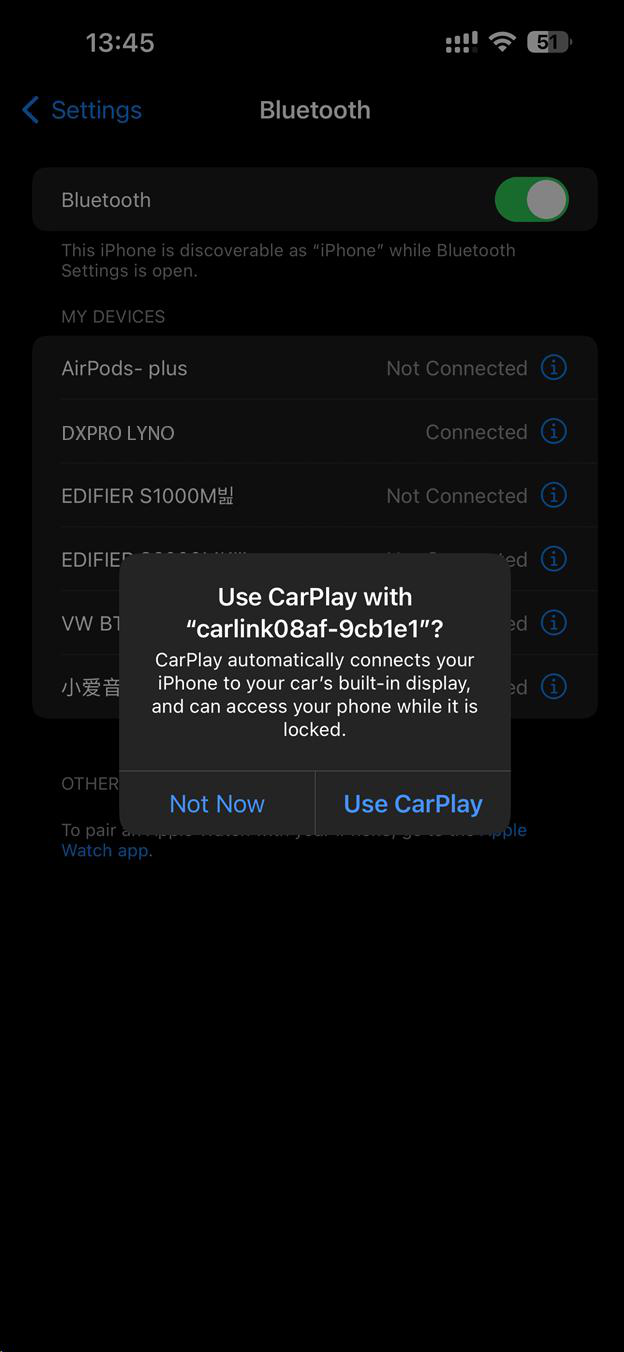
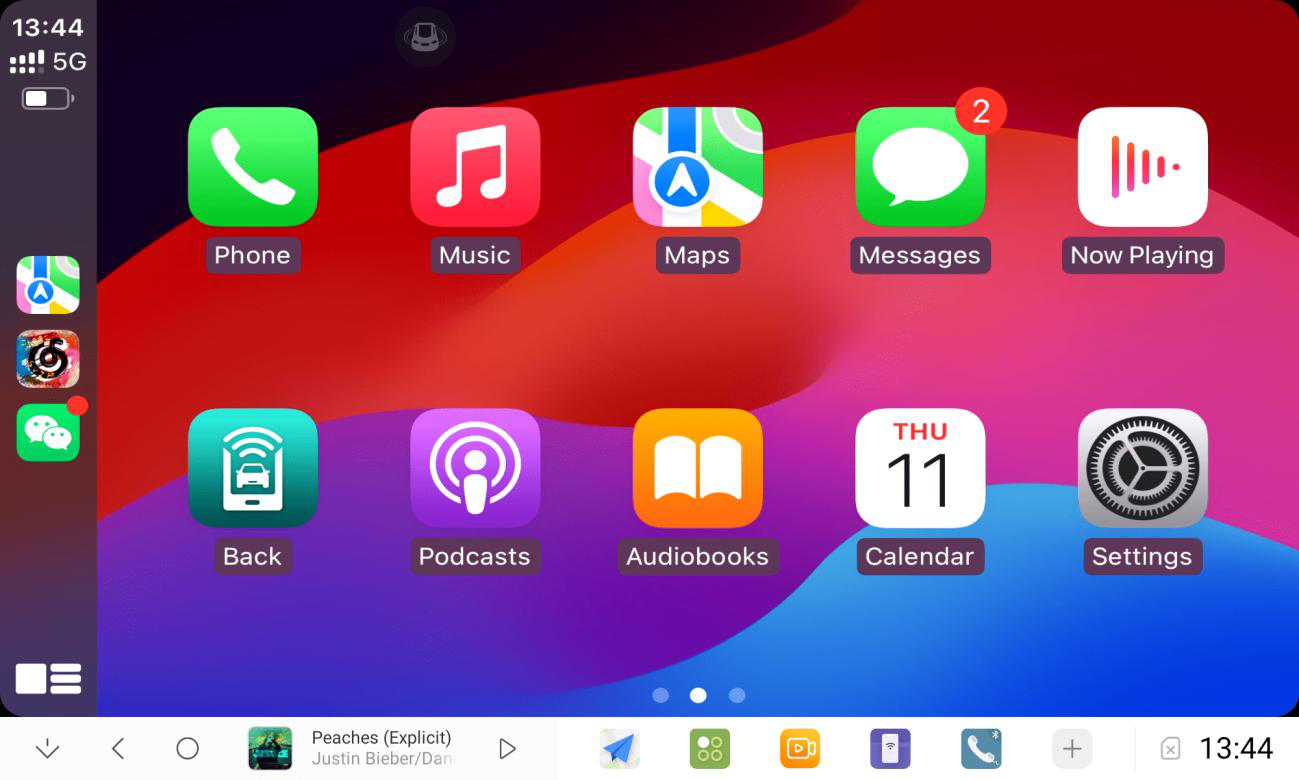
2.1.3 Connect successfully, enter carplay
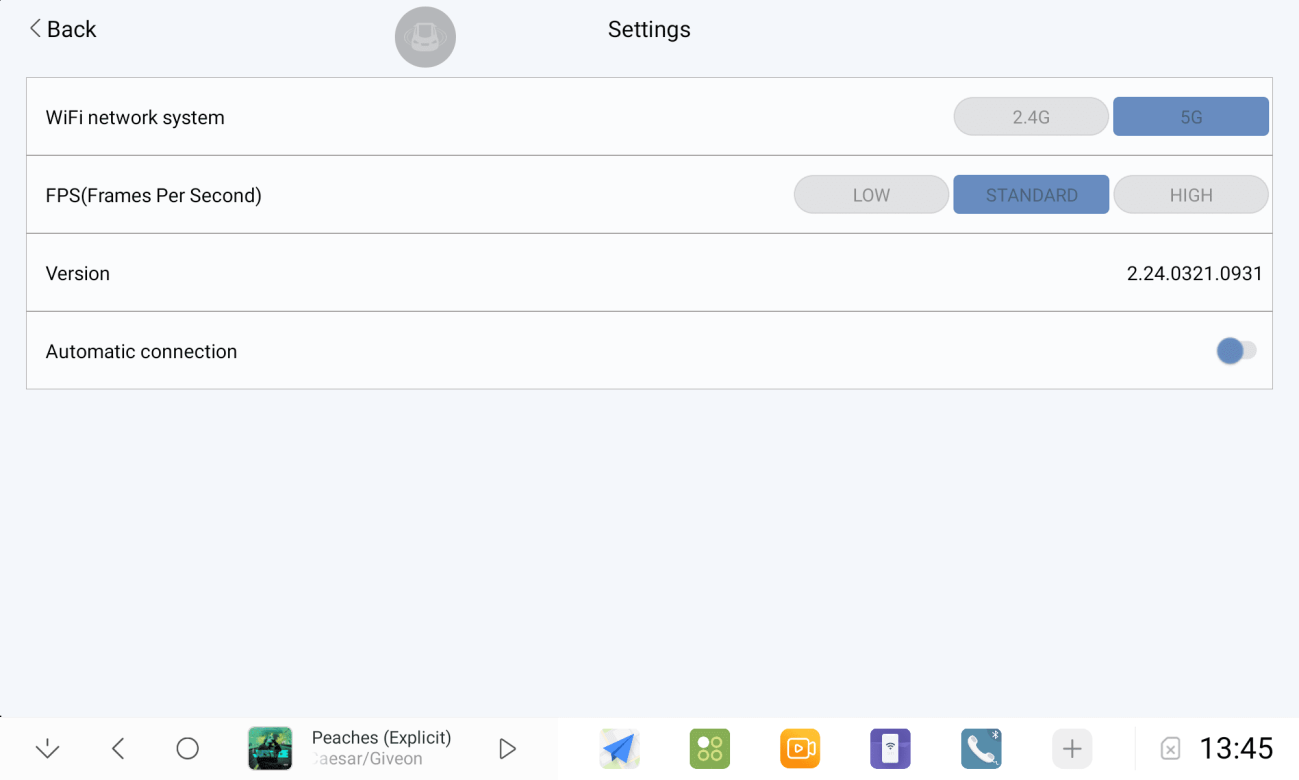
2.1.4 If you can't connect, you can change the wifi system, if the carplay screen is not smooth, change the frame rate.
2.2 Huawei Internet
2.2.1 Connect the car to your mobile phone's Bluetooth and click on pairing
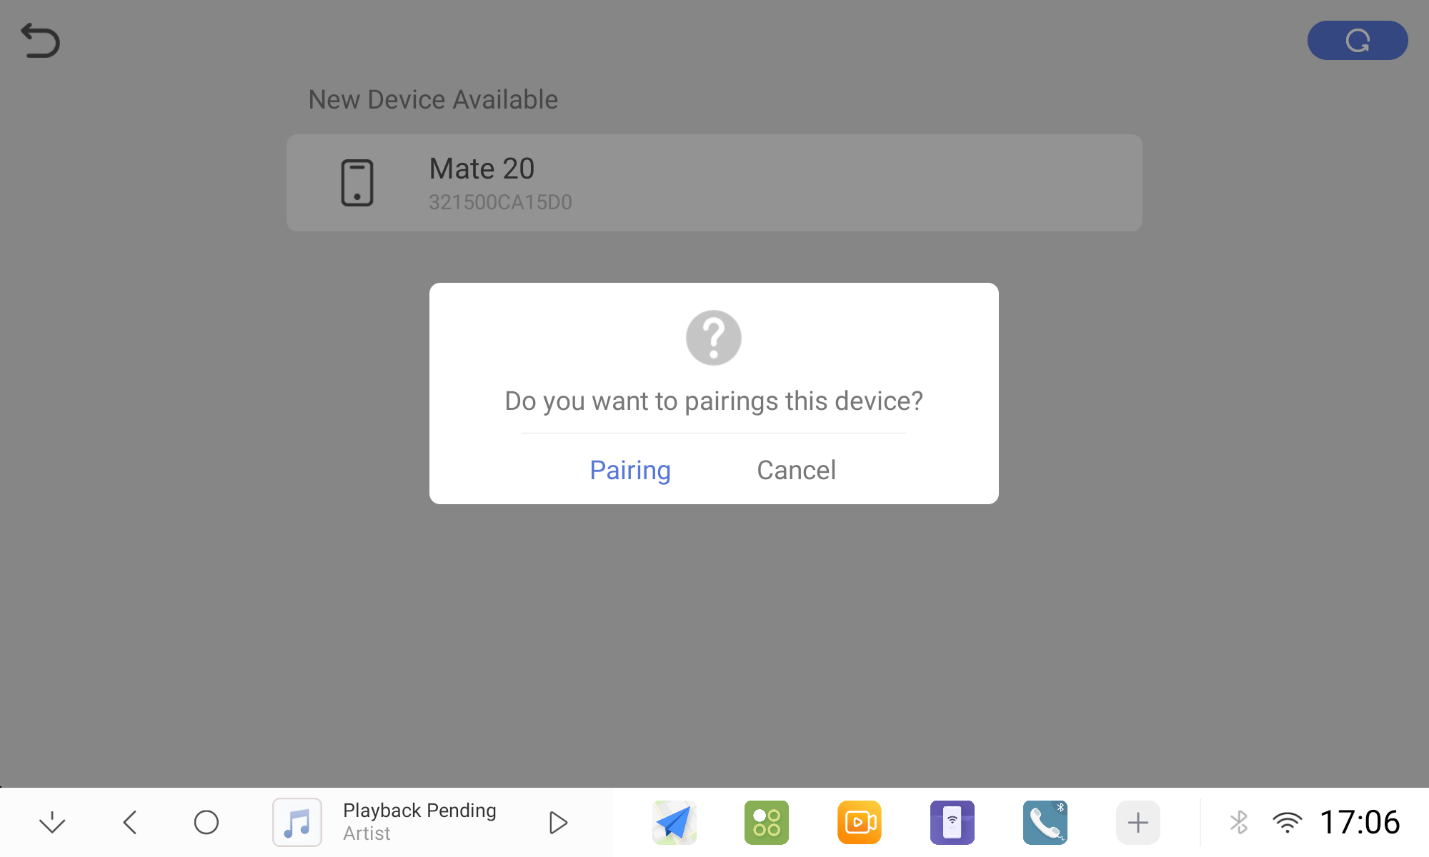
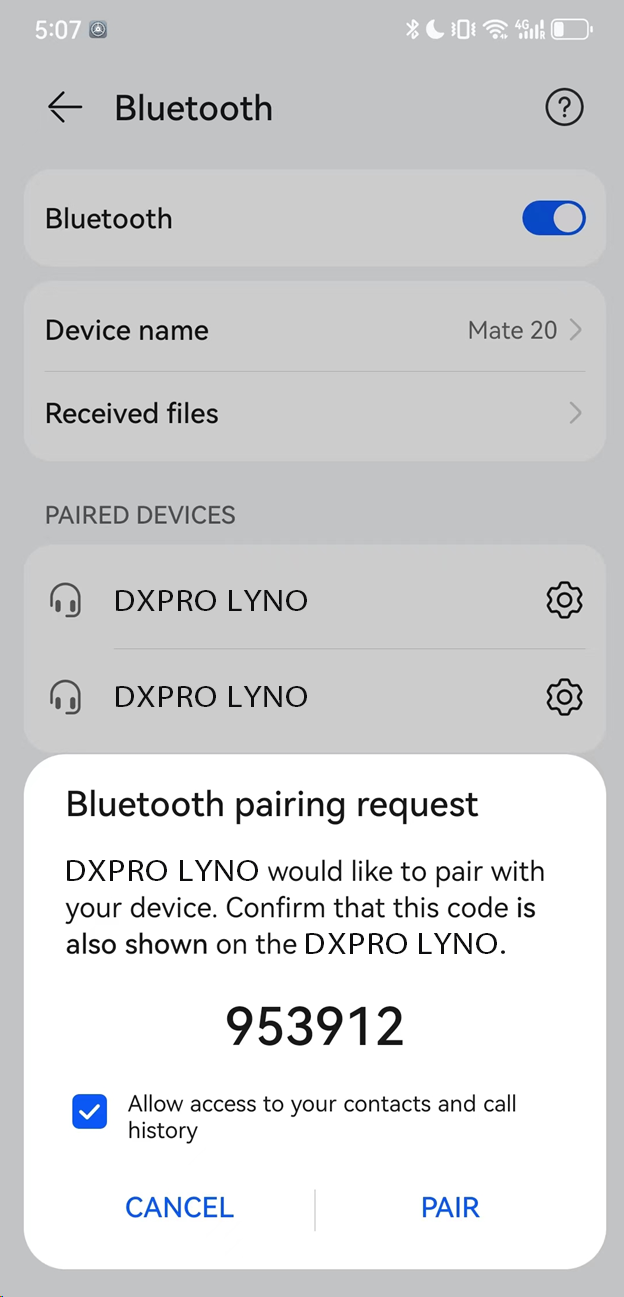
2.2.2 Open HUAWEI HiCar, tap Connect on your phone and enter the connection code
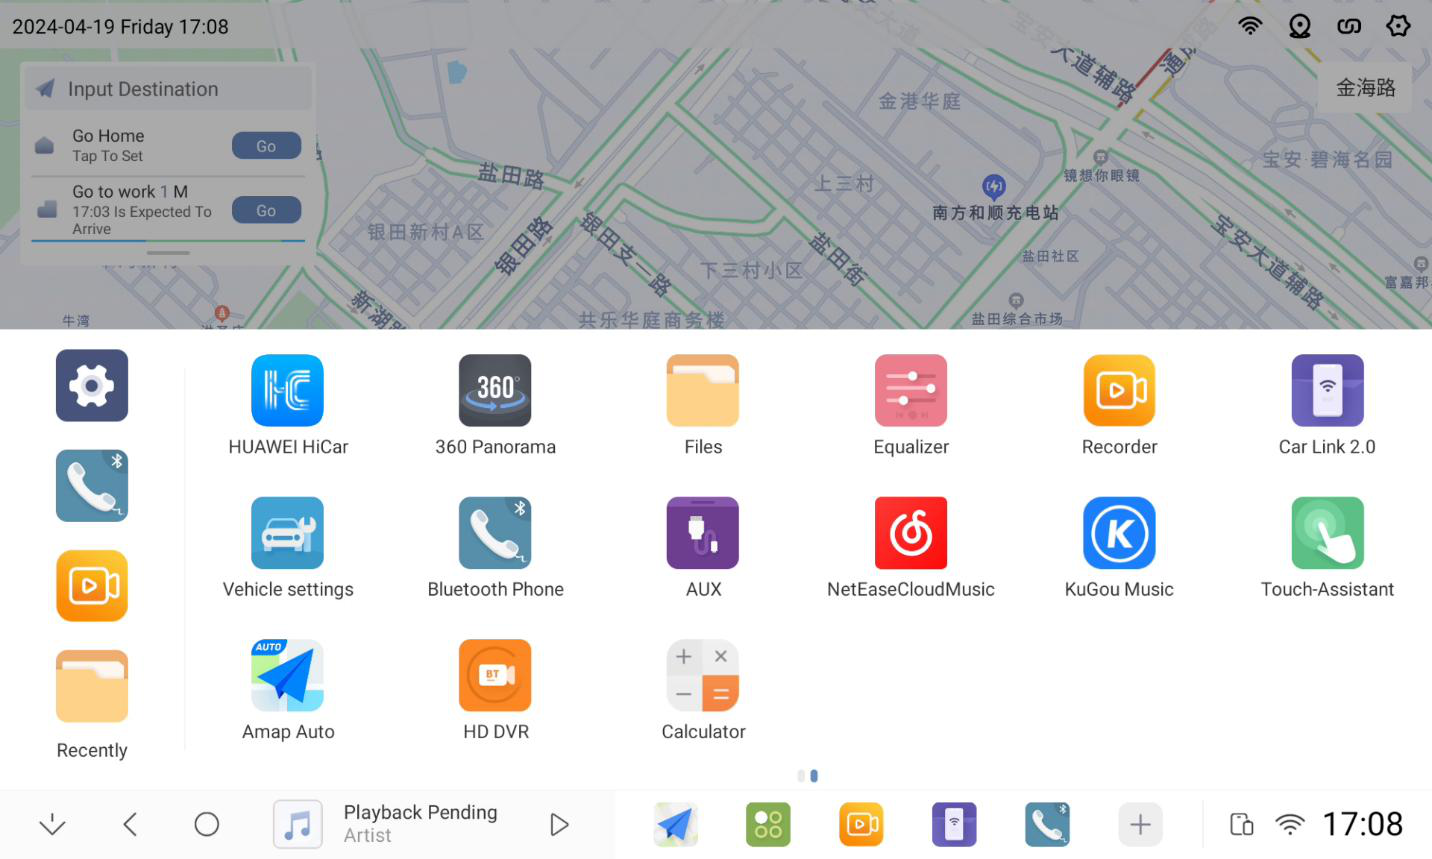
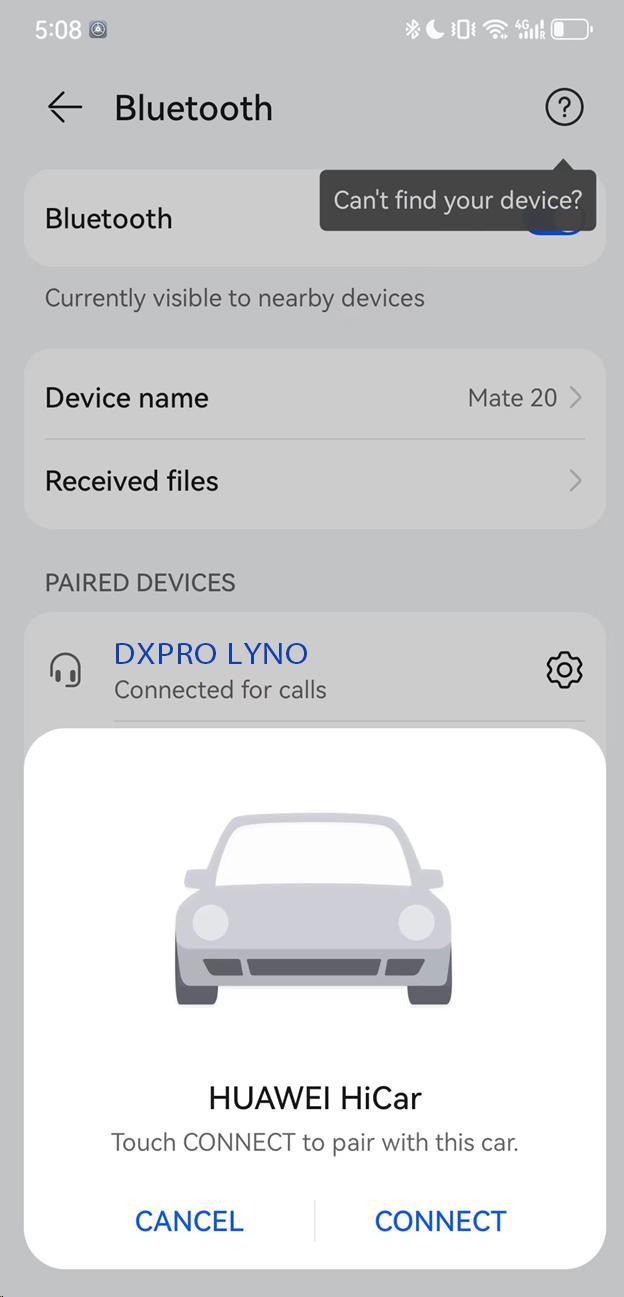
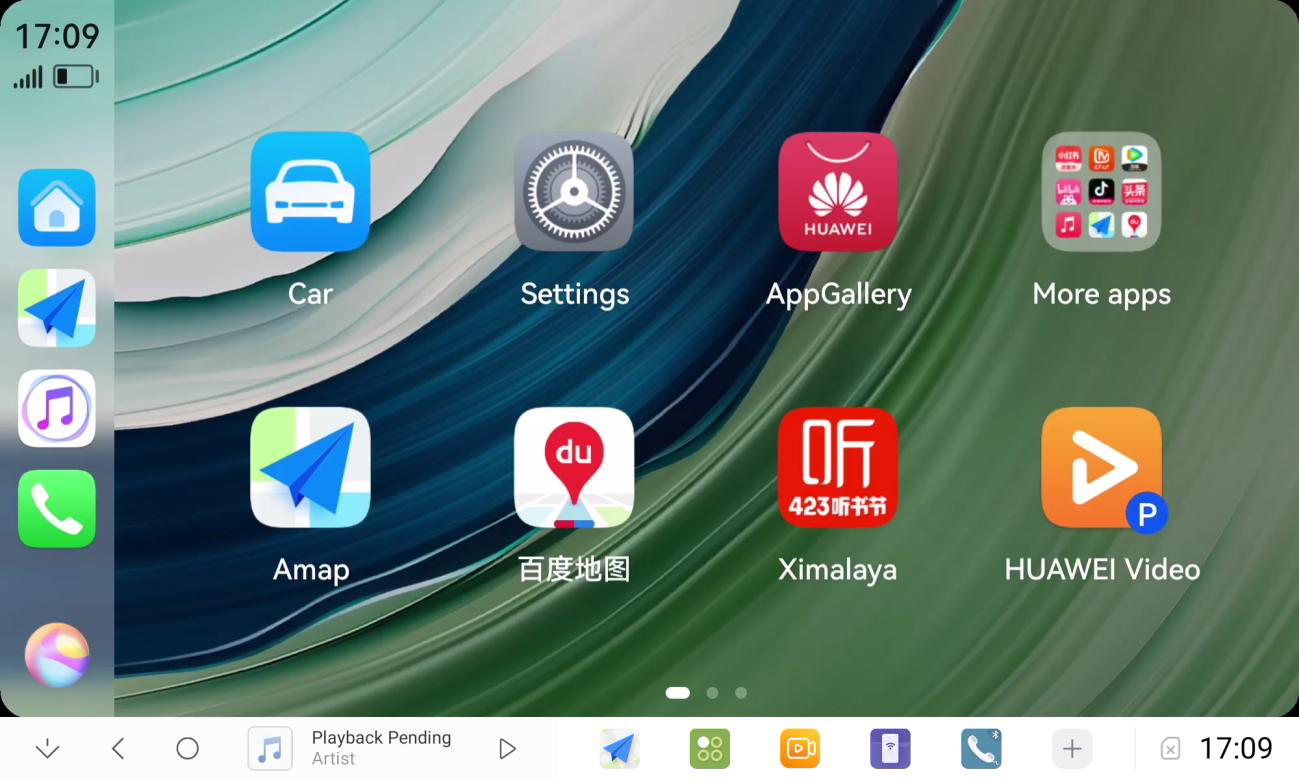
2.2.3 Successful connection, enter Huawei hicar
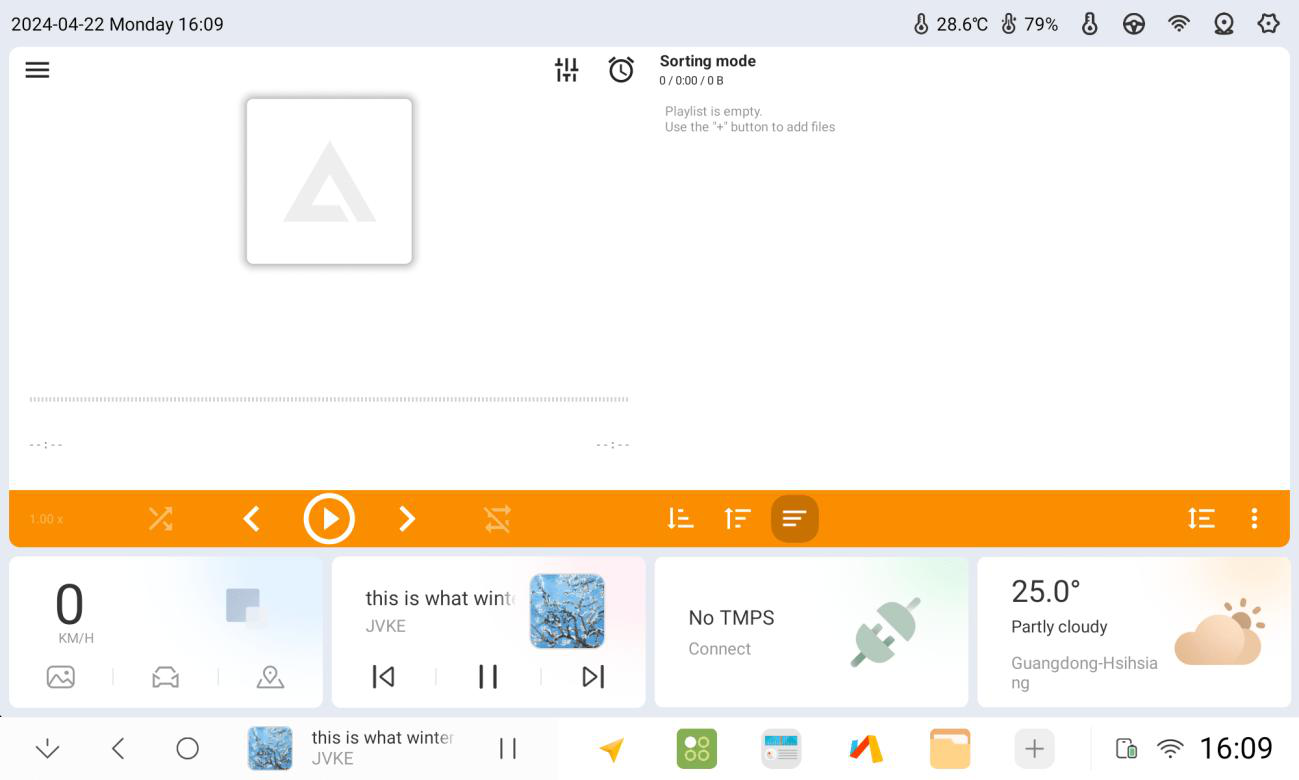
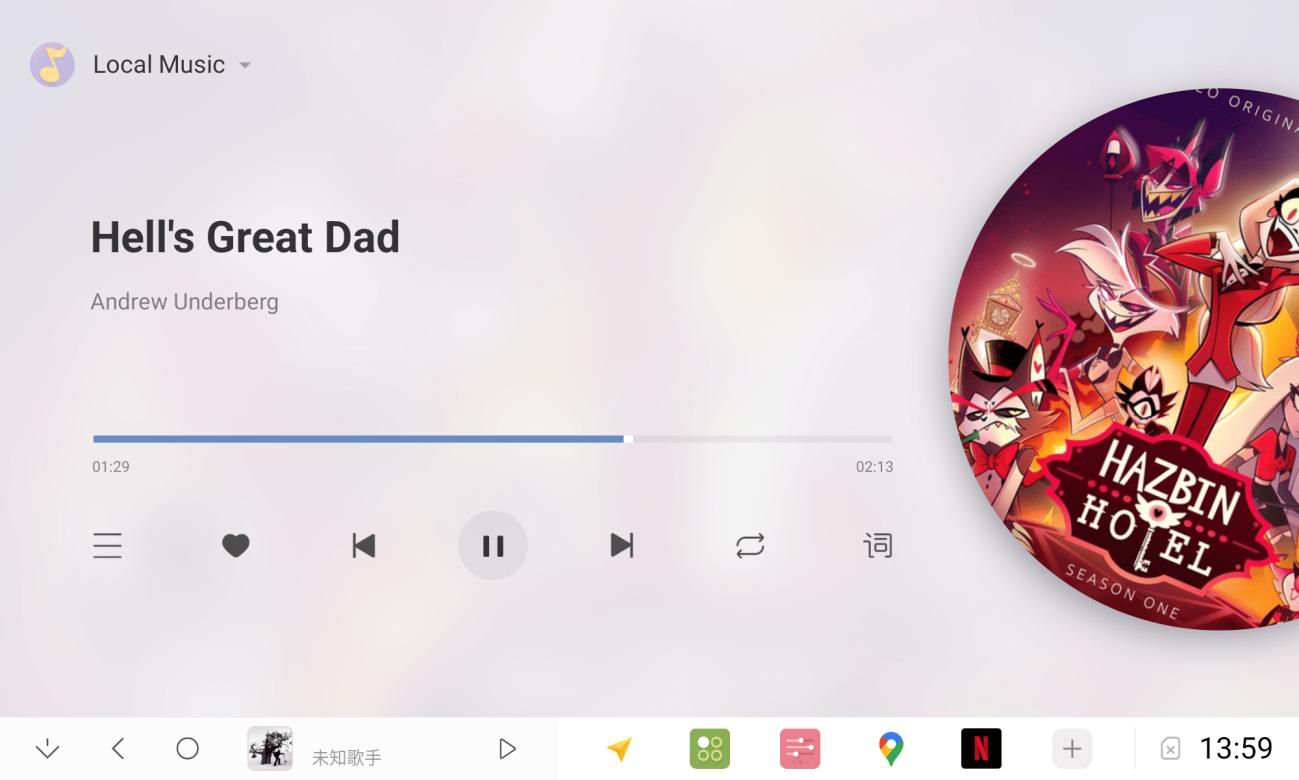
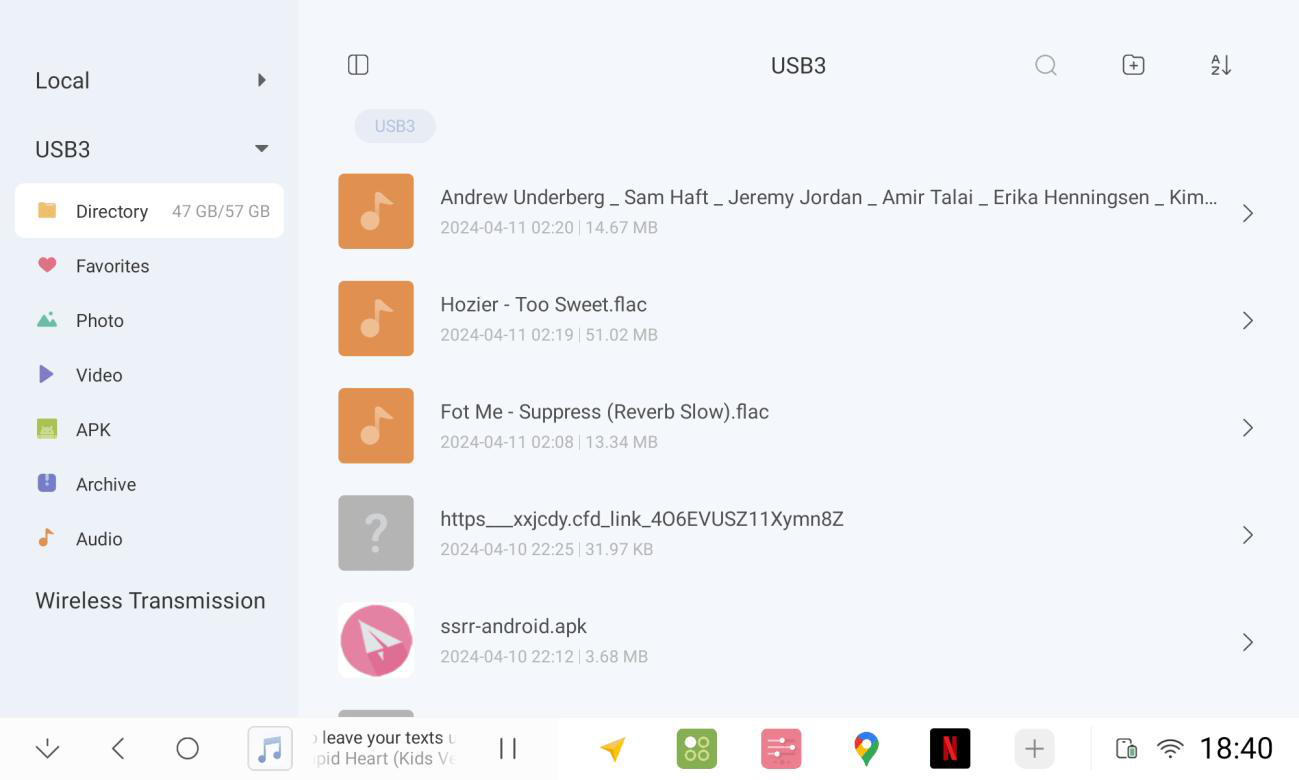
2.3 Local Music
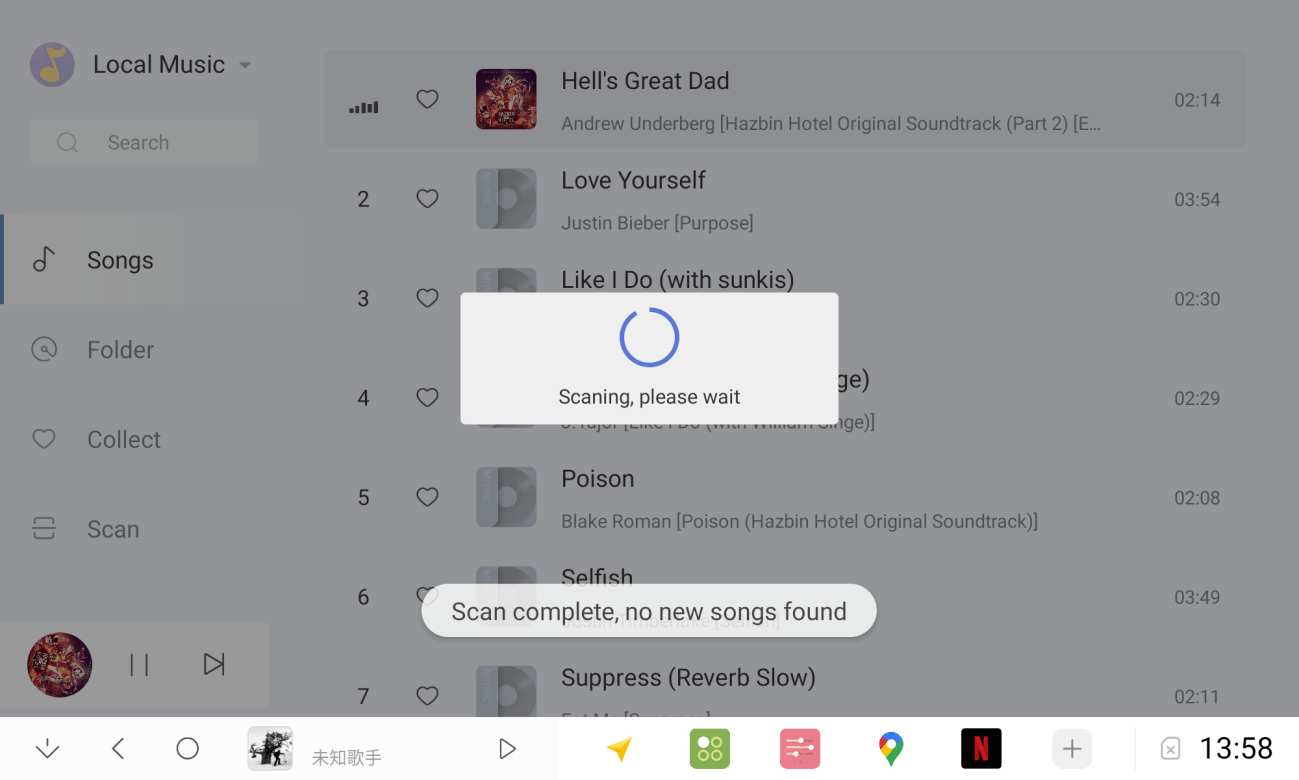
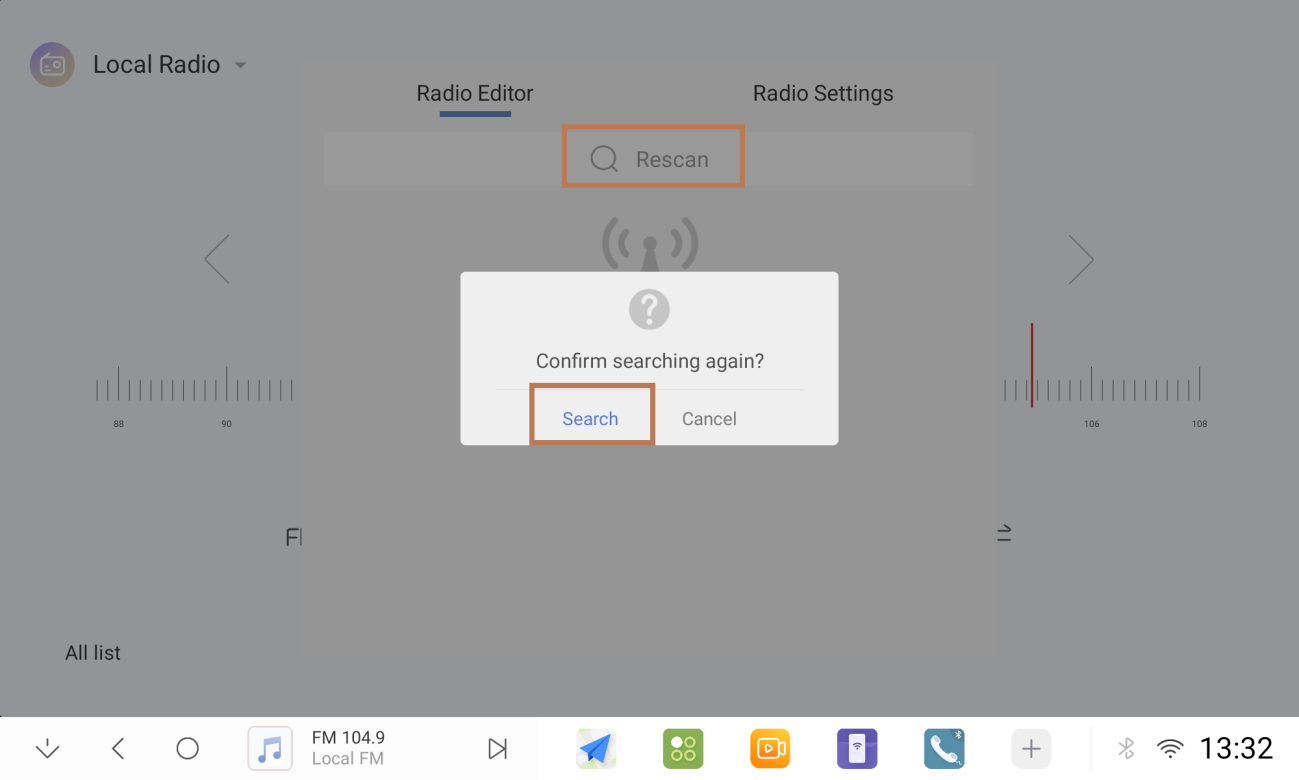
2.3.1 Accessing a USB stick or deleting and adding music requires a rescan.
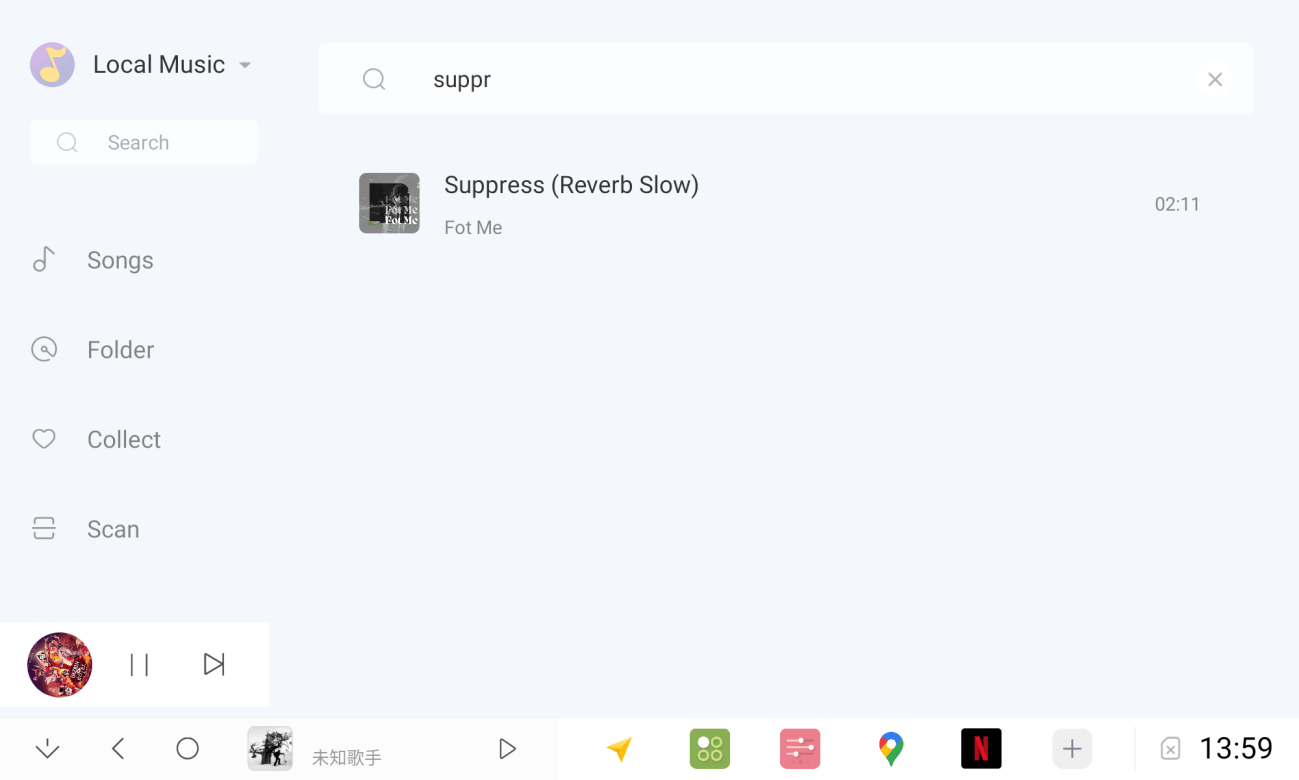
2.3.2 Too many lyrics Support search to find
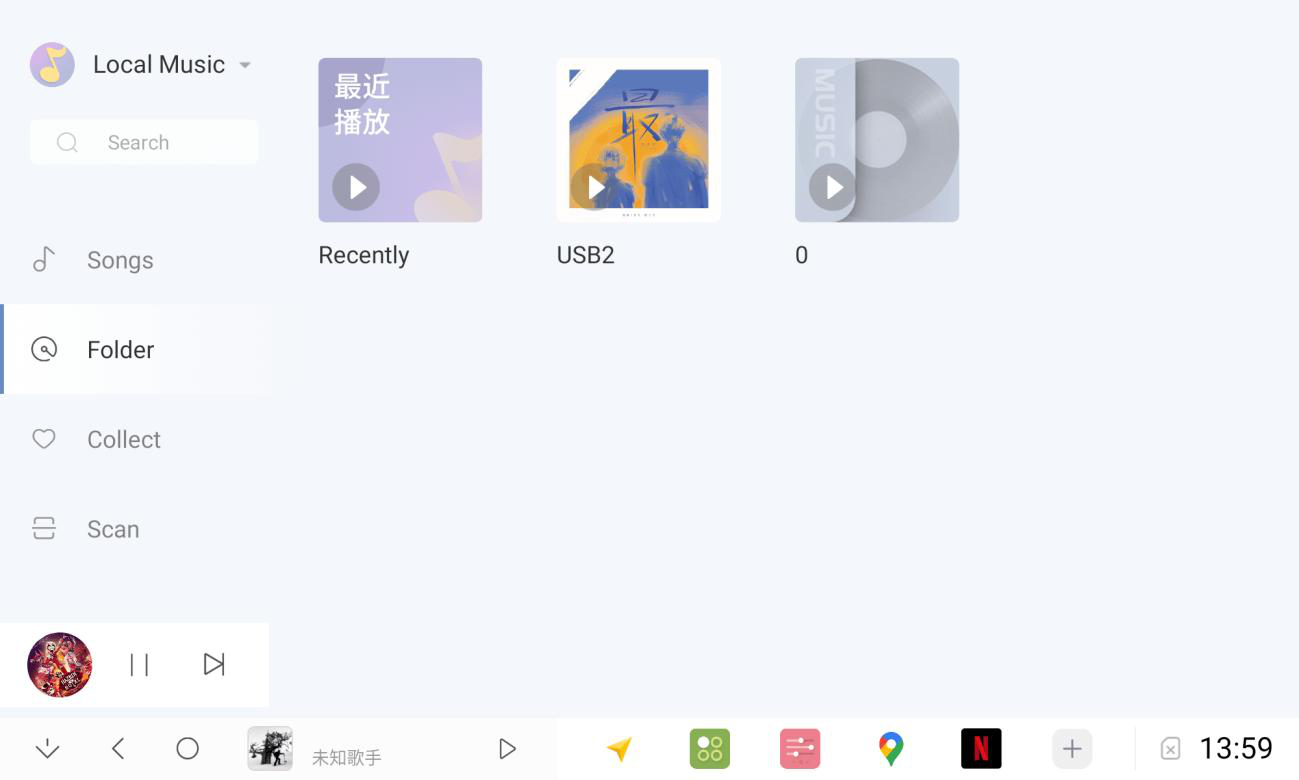
2.3.3 Album catalogue is automatically generated based on folders
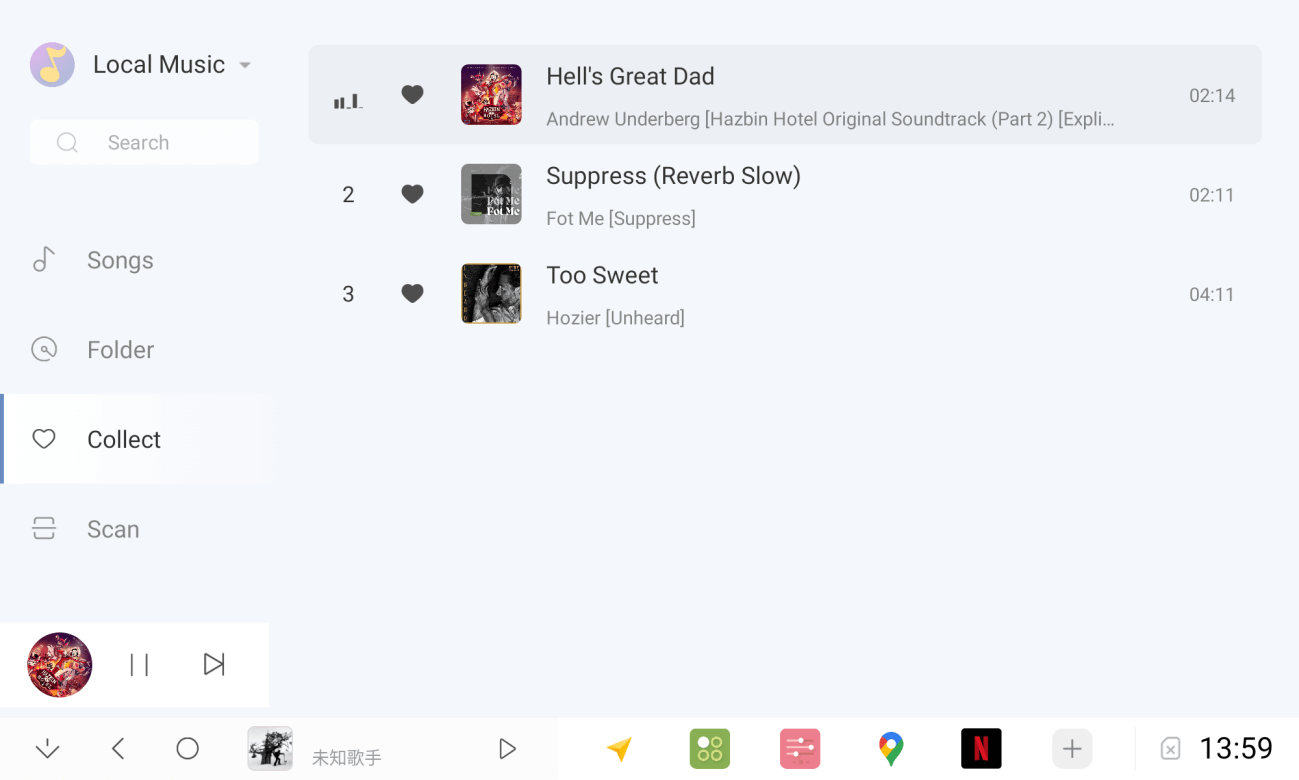
2.3.4 Favourite songs Play in favourites list
2.3.5 Full screen display of songs
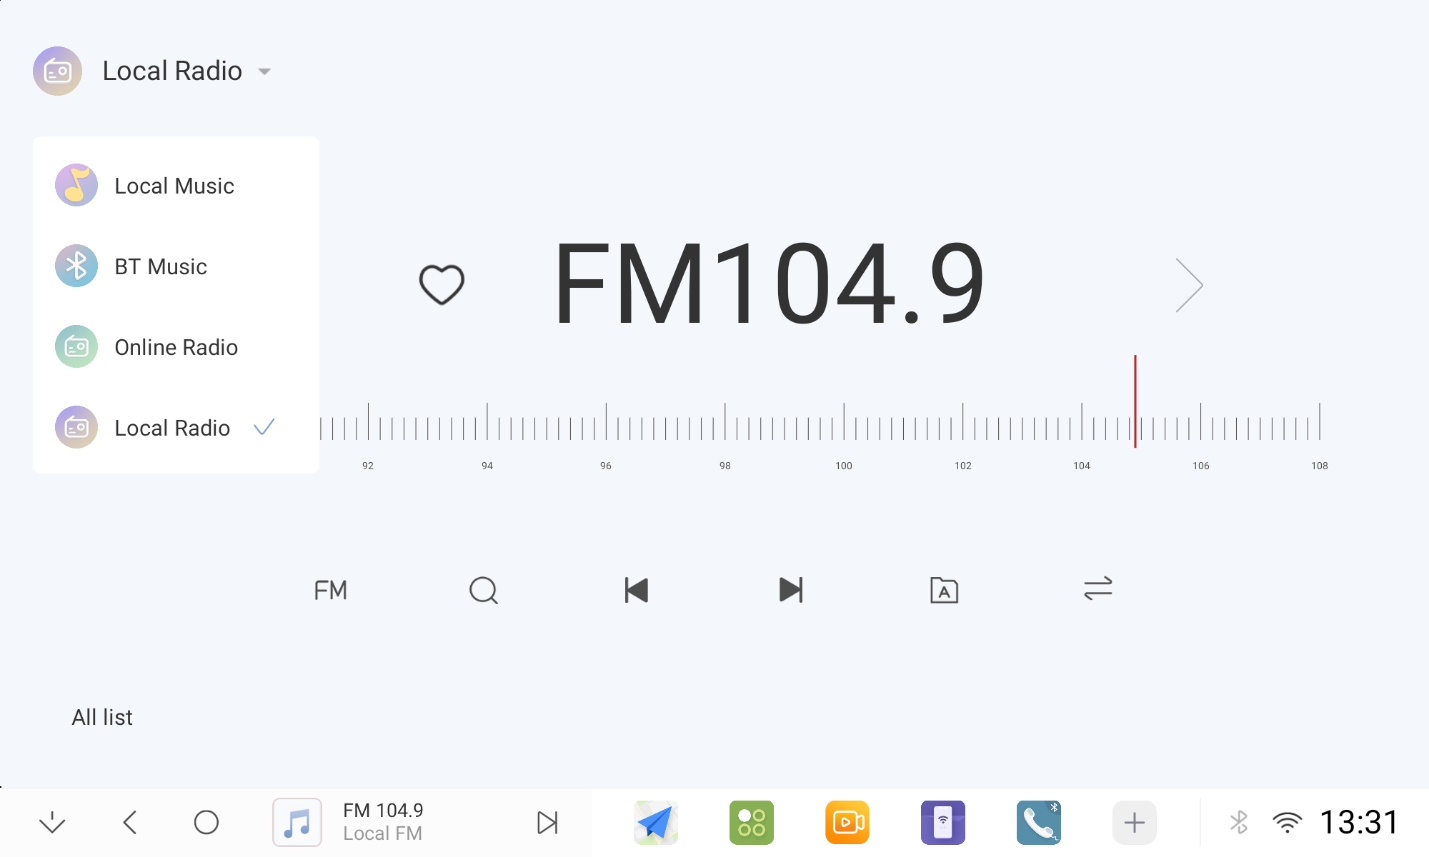
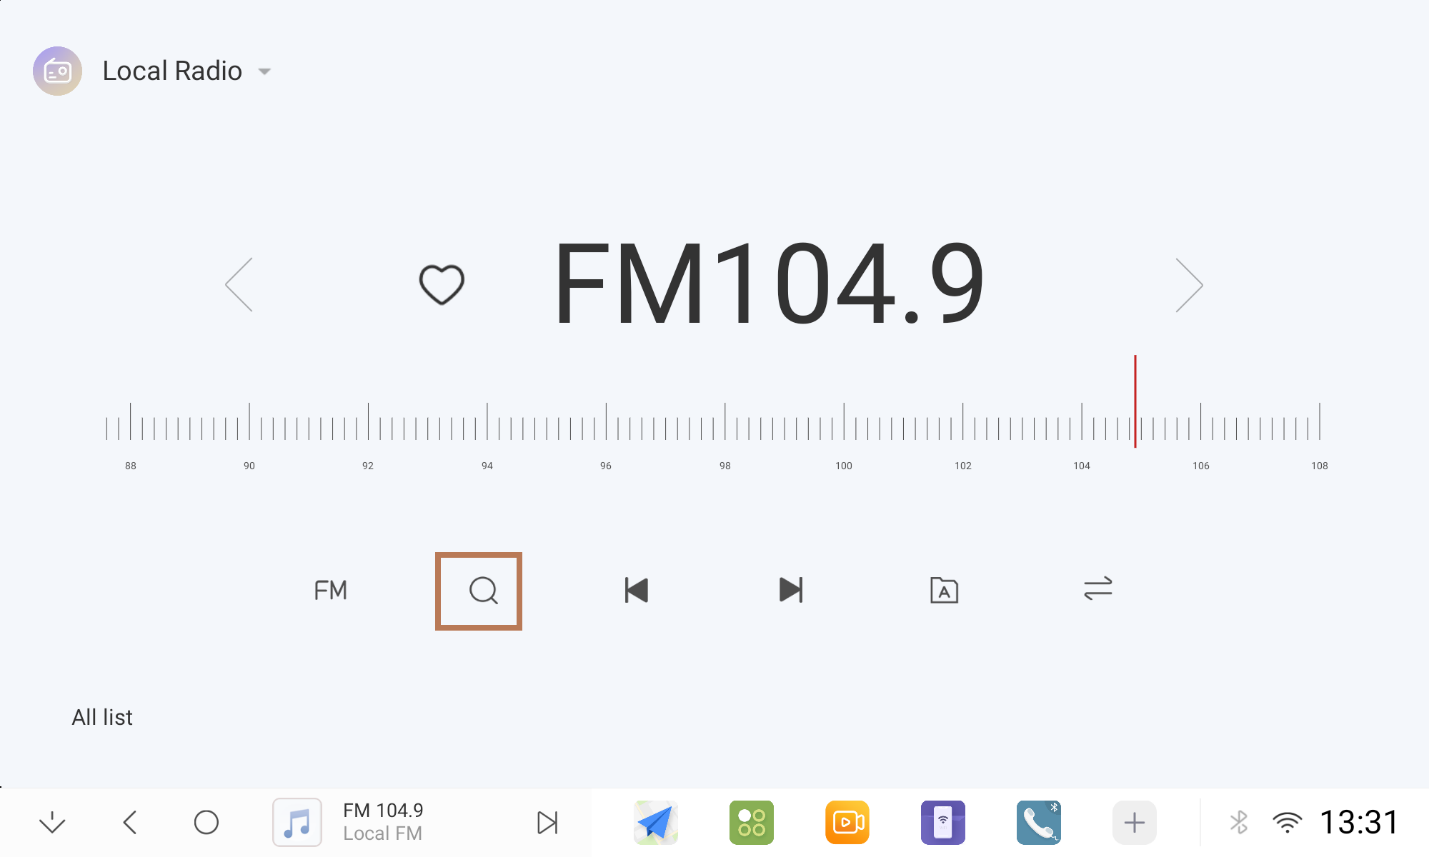
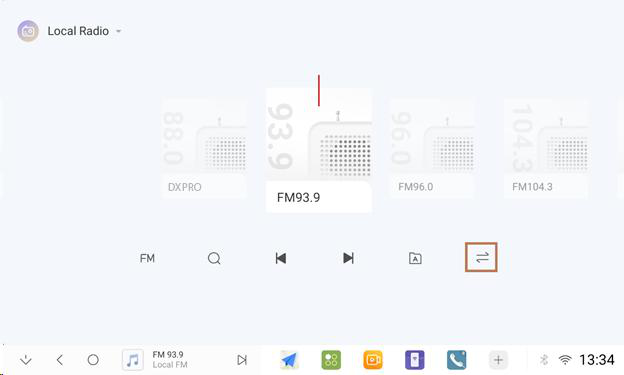
2.4 Radio
2.4.1 In the Multimedia application, switch to the local radio
2.4.2 Search for radio stations
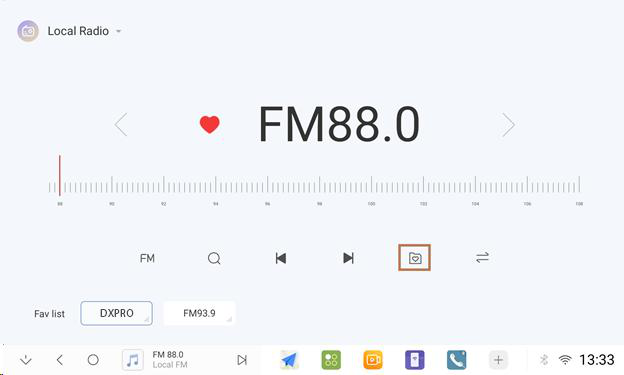
2.4.3 Collection Radio
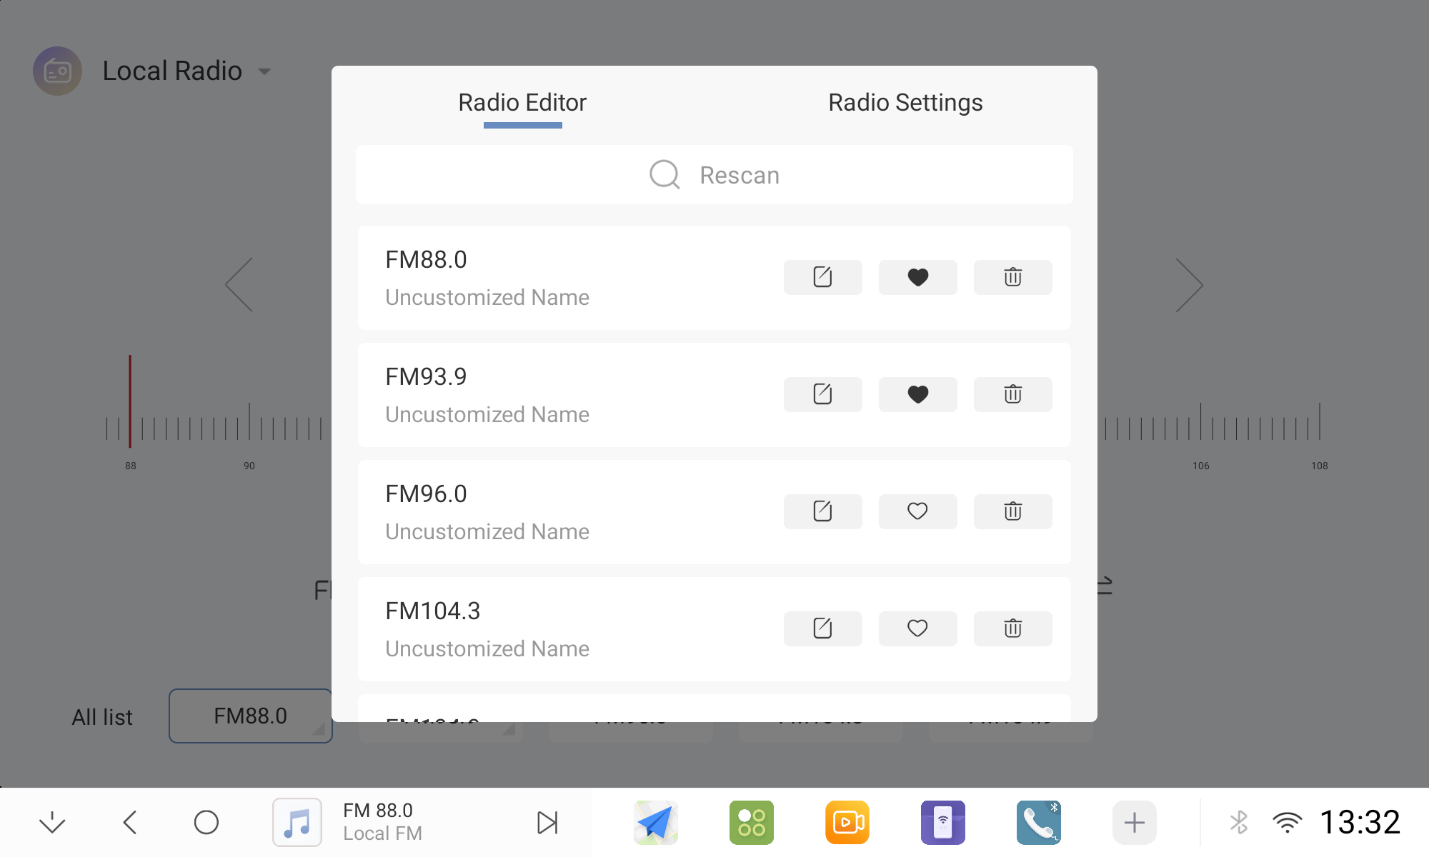
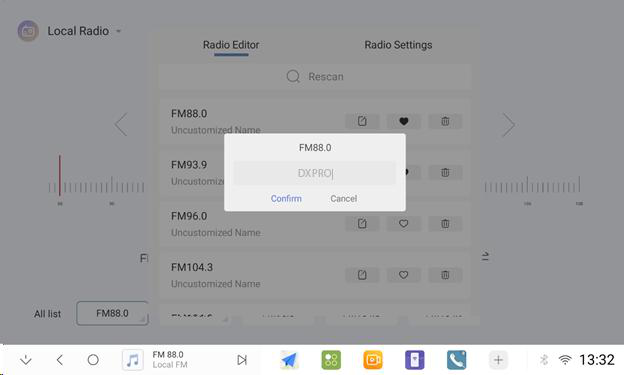
2.4.4 Change of radio station name
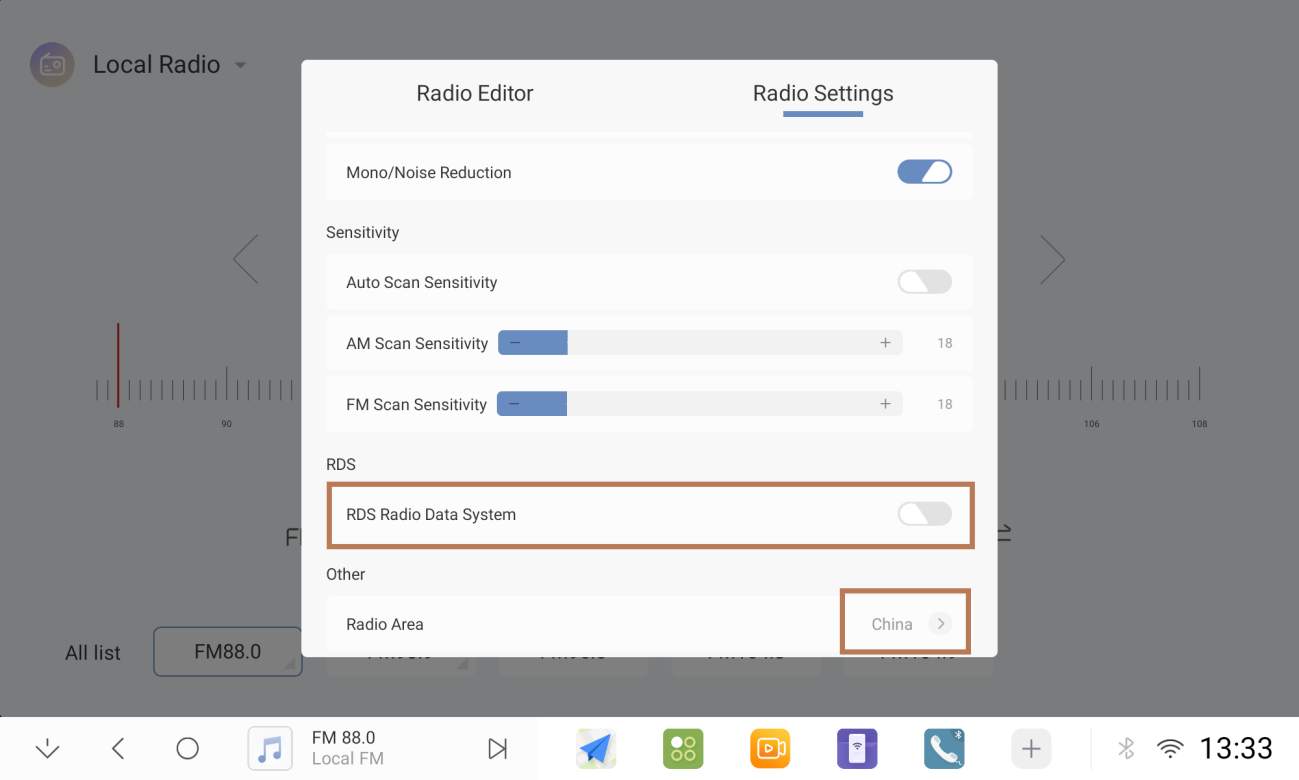
2.4.5 Switching on RDS wireless radio and setting up radio zones
2.4.6 Switch favourites list
2.4.7 Interface style switching
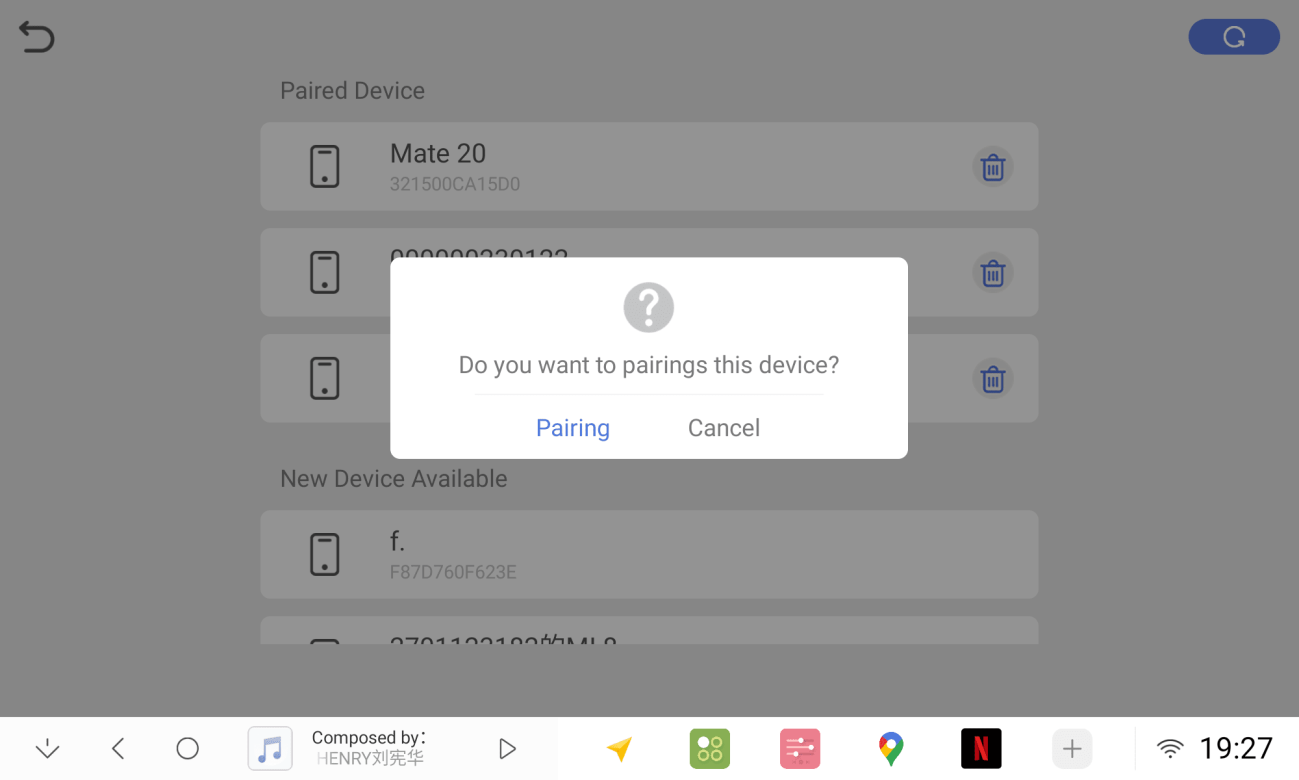
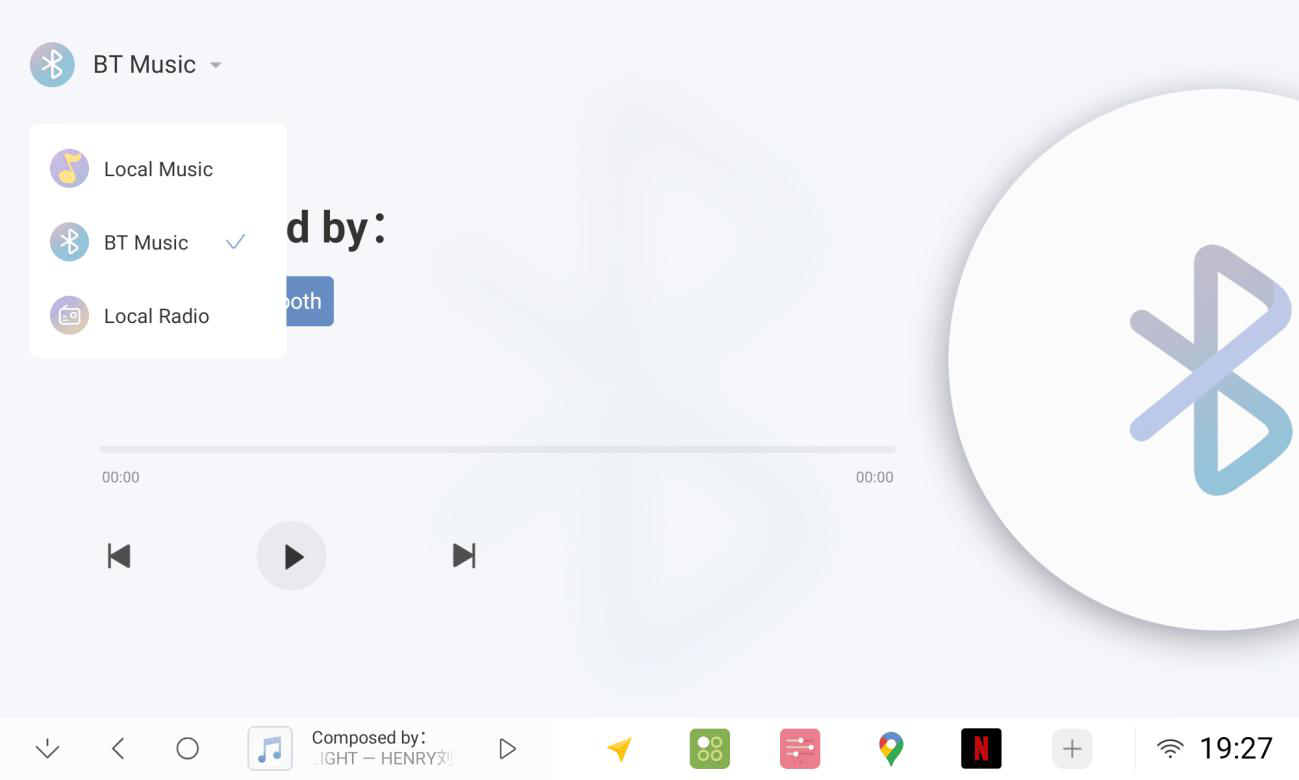
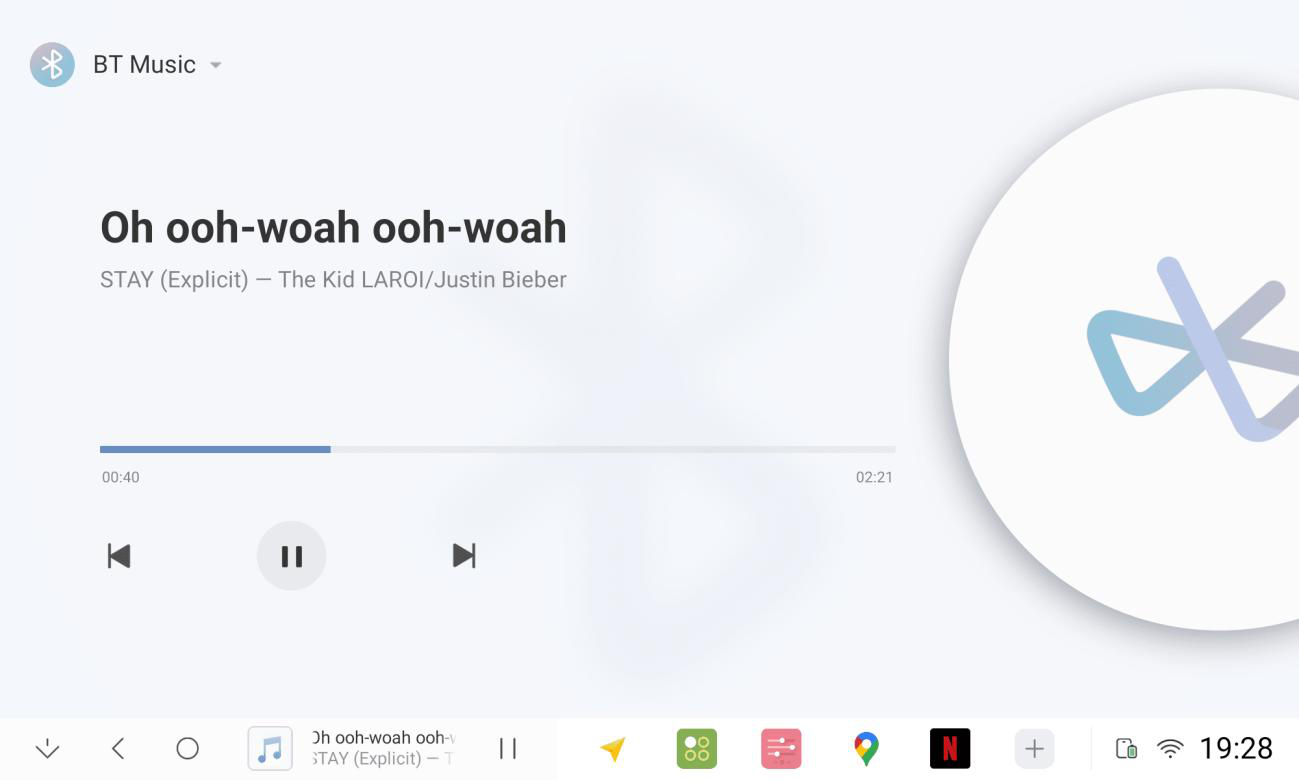
2.5 Bluetooth Music
2.5.1 Connecting your mobile phone's Bluetooth
2.5.2 Switch to Bluetooth music in the Multimedia application
2.5.3 Bluetooth music interface click to play (if there is no sound, the mobile phone to open the music player)
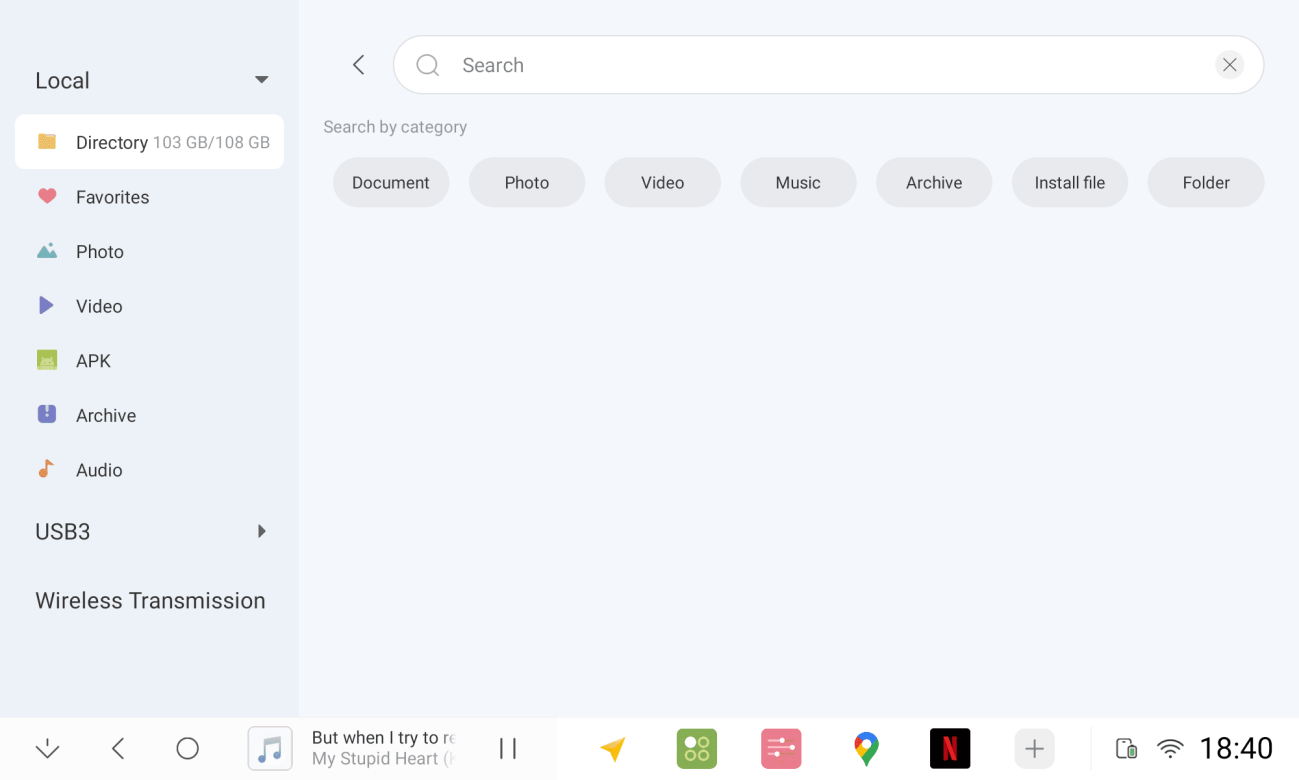
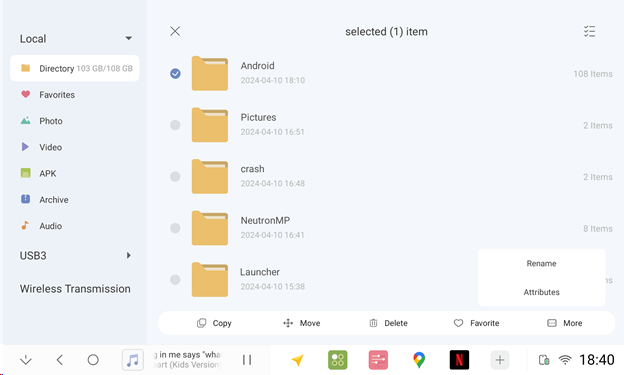
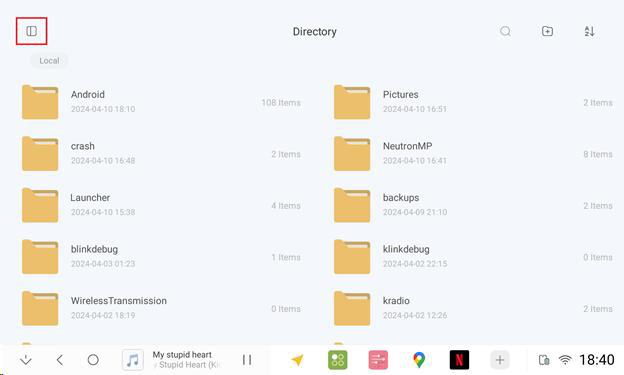
2.6 Document Management
2.6.1 U disk drive letter can be selected on the left side, you can quickly search for different types of files
2.6.2 Accurately locate files on disk
2.6.3 Long press on a file to edit it
2.6.4 File Sorting and Display Mode Settings
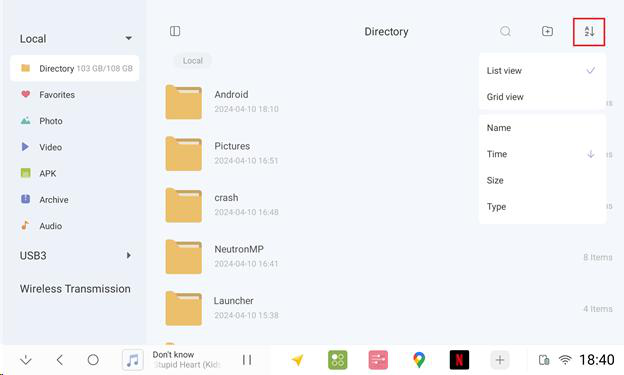
2.6.5 Switching display mode (full or half screen)
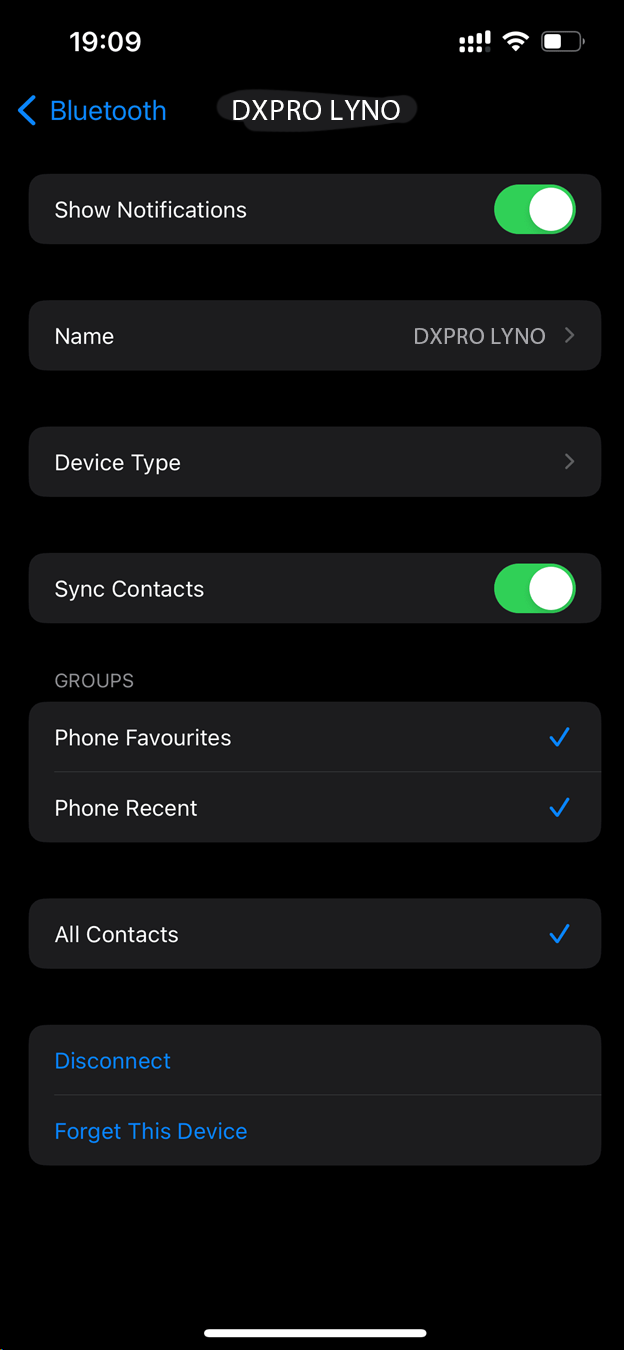
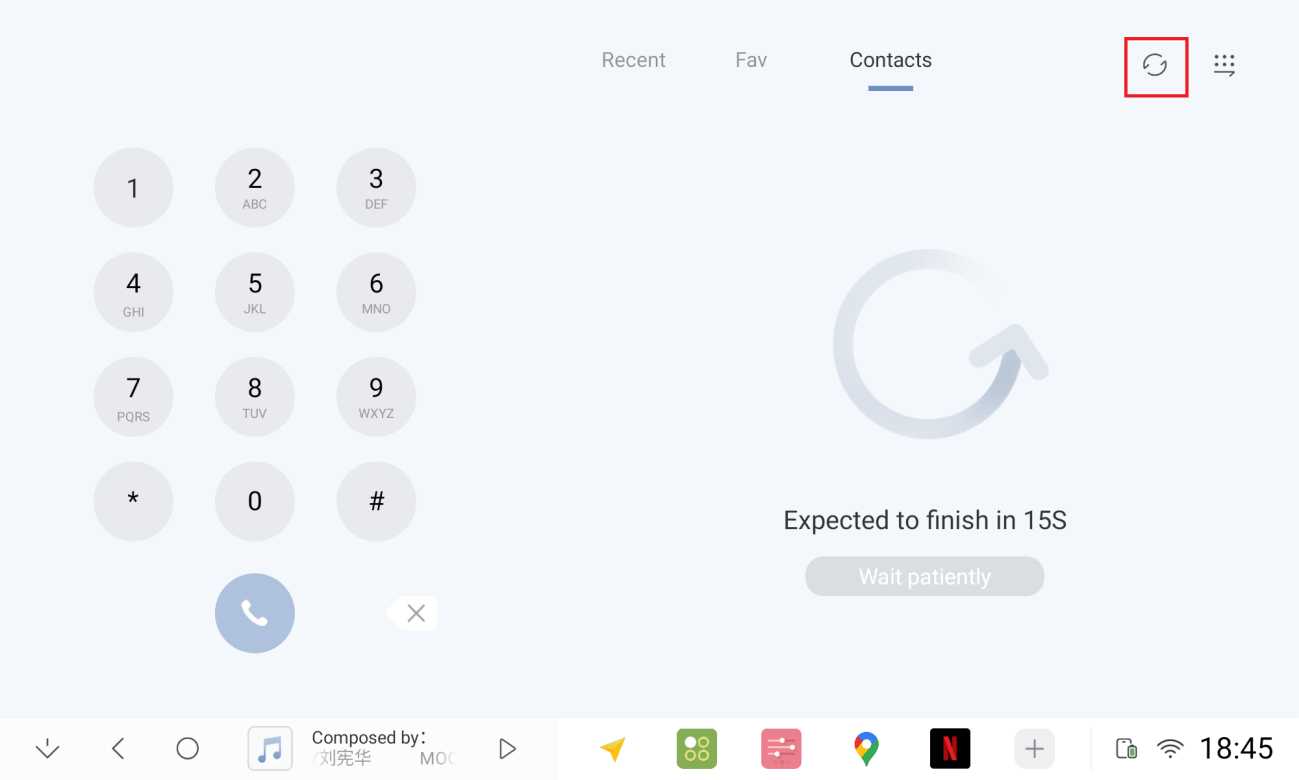
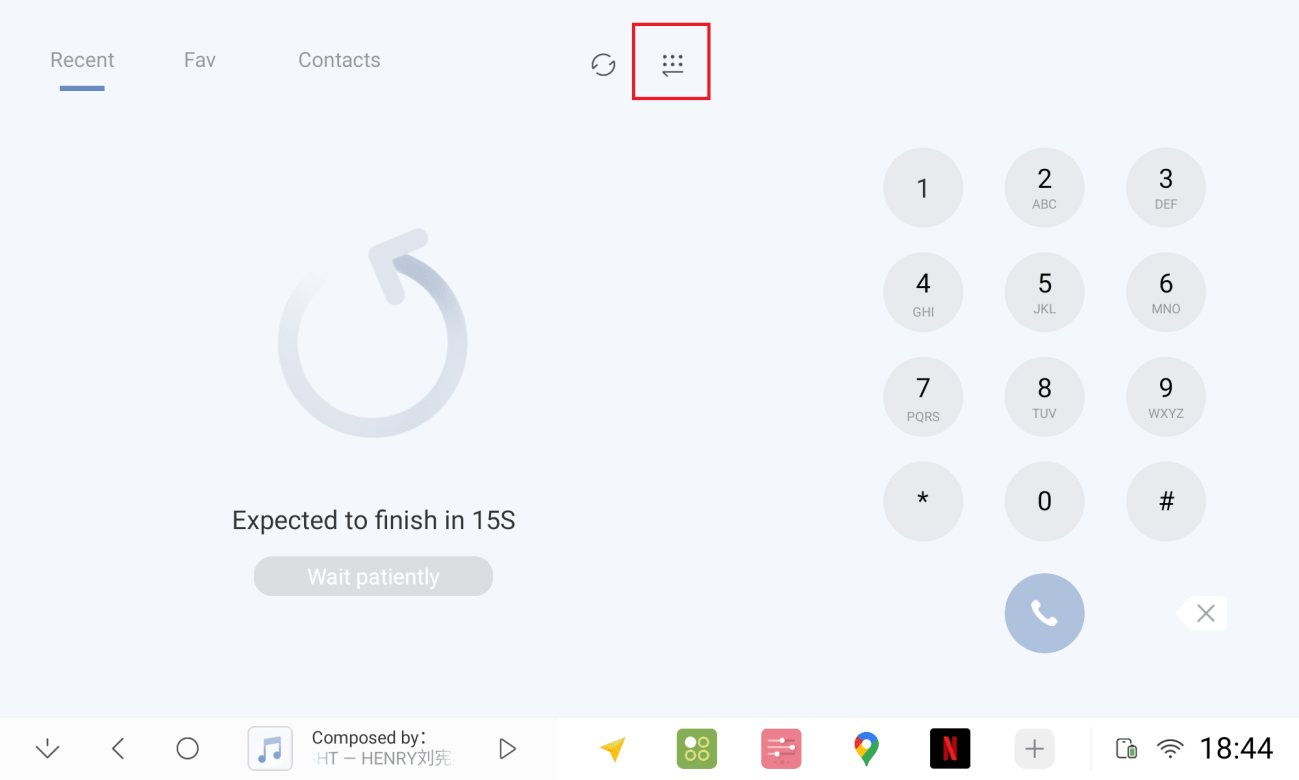
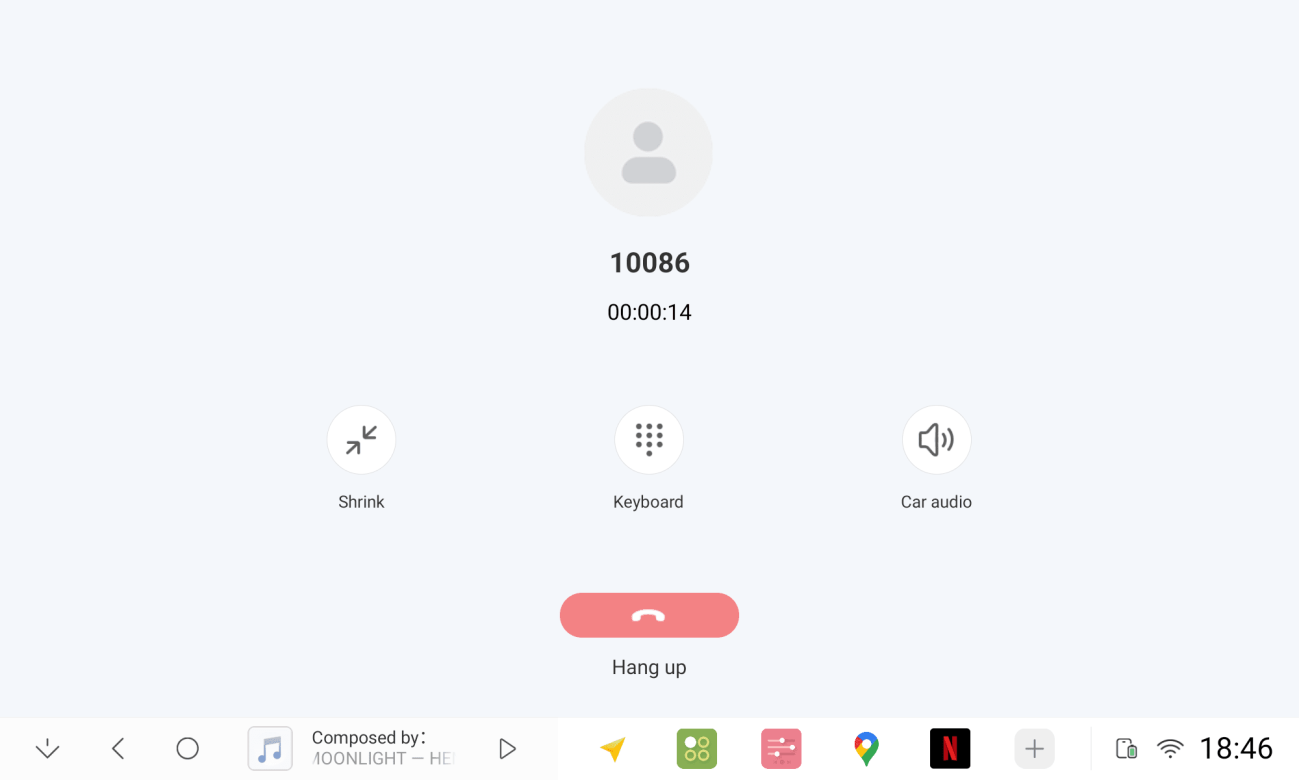
2.7 Bluetooth Phone
2.7.1 Connecting cell phone Bluetooth

2.7.2 Synchronization of cell phone contacts (Bluetooth setting of cell phone, synchronization of contacts needs to be turned on)
2.7.3 Keyboard left/right alignment
2.7.4 Personal Favorites, Contacts, Recent Contacts
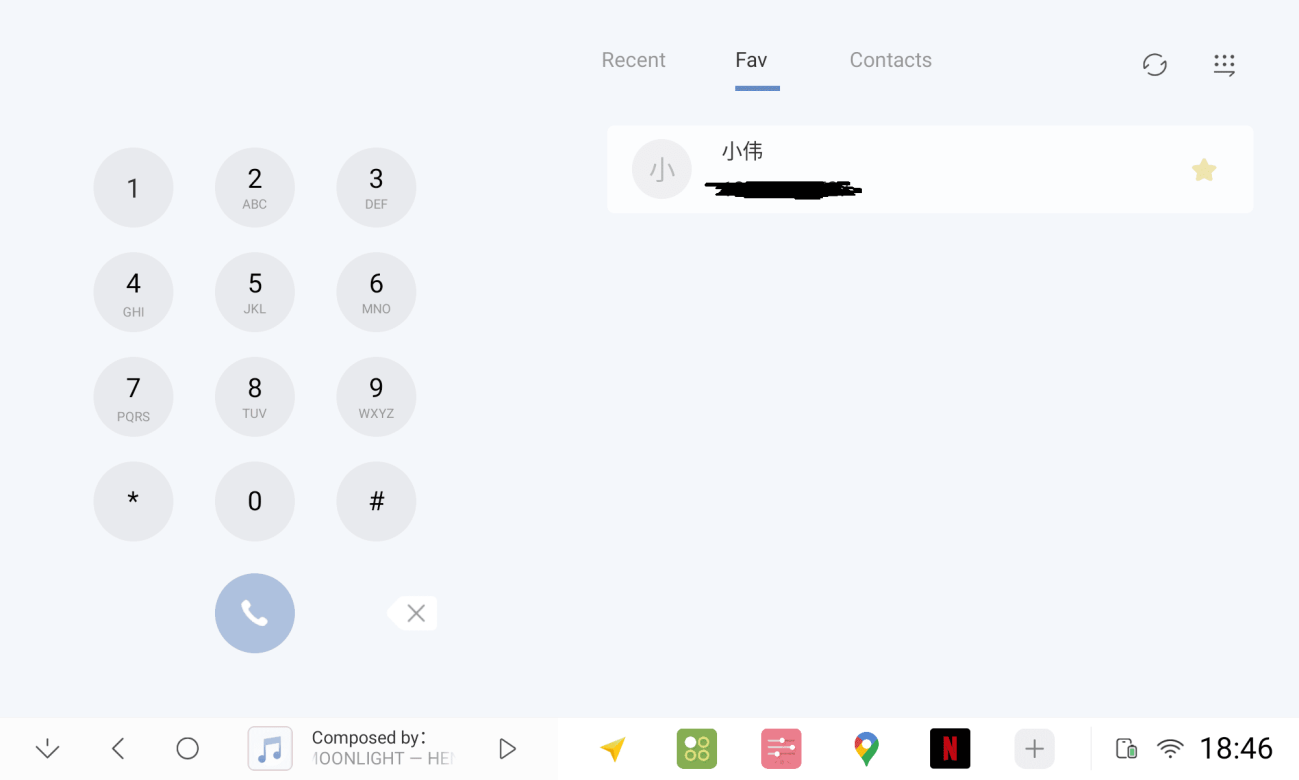
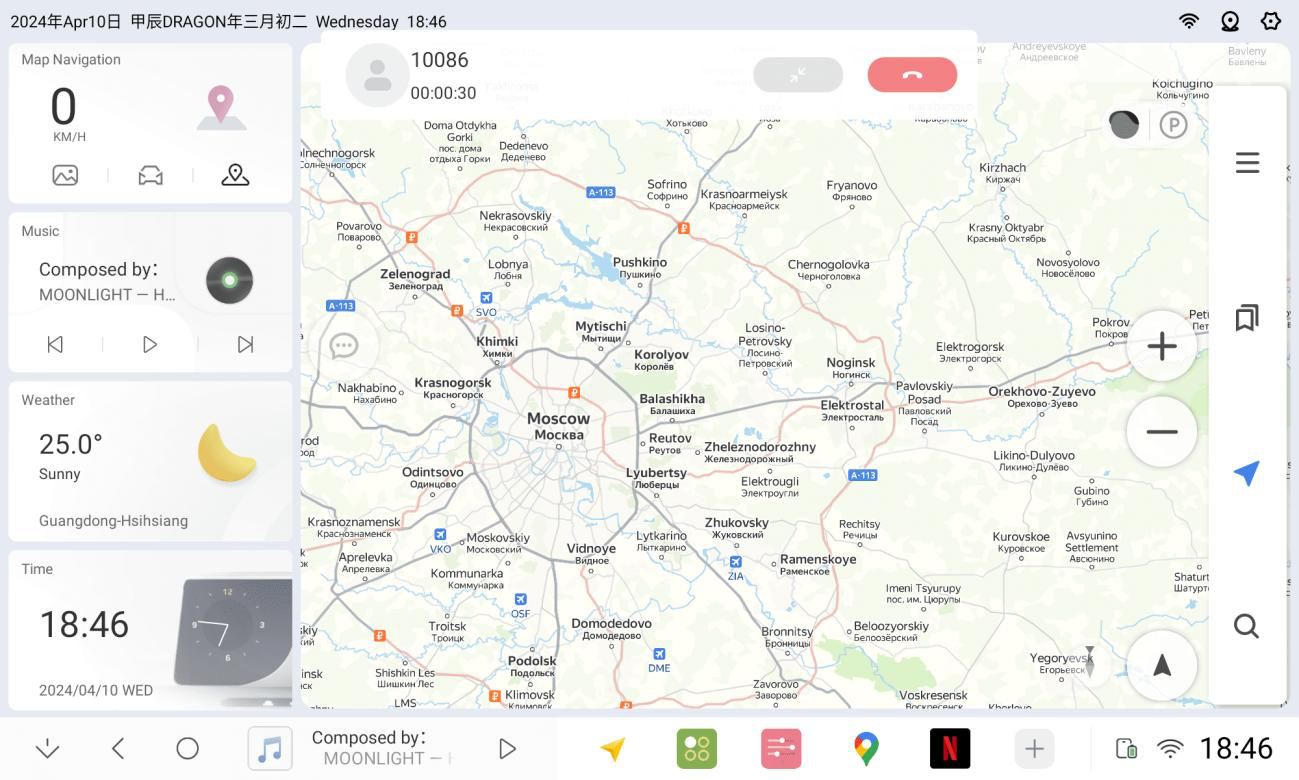
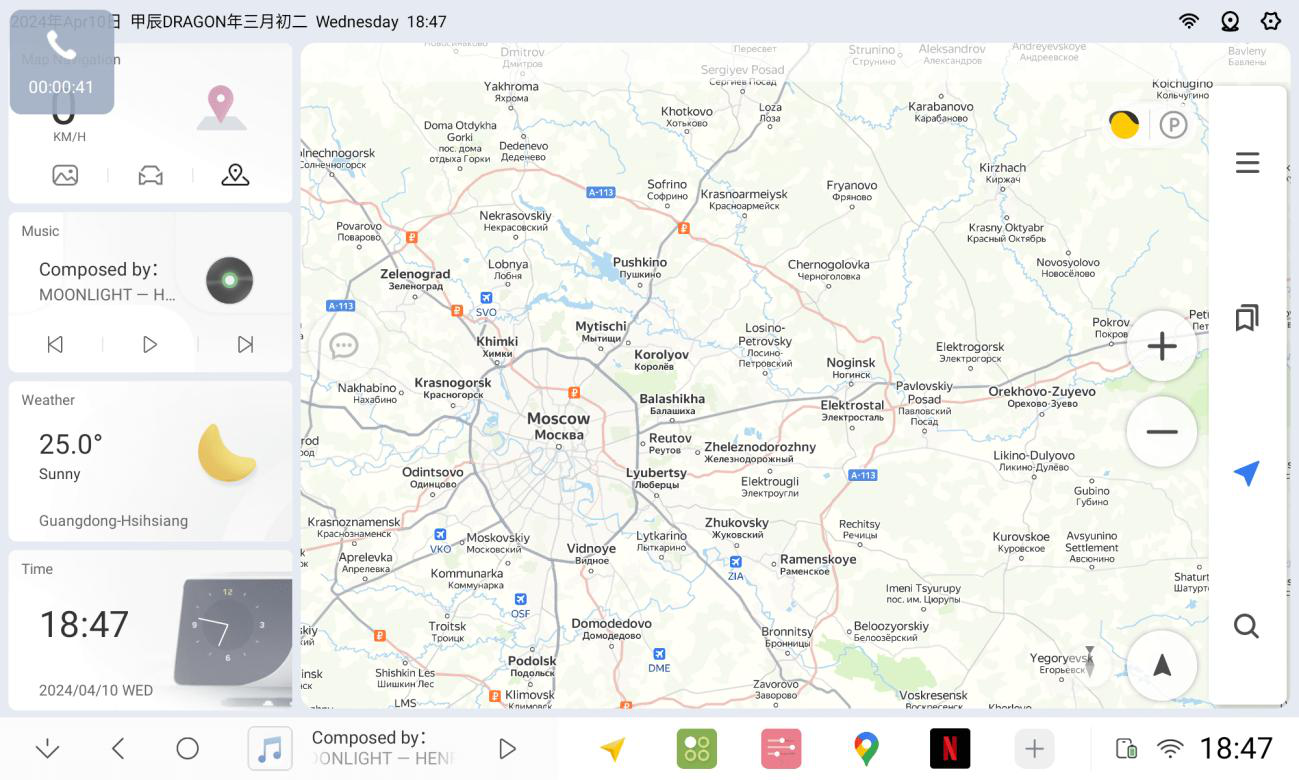
2.7.5 Dialing interface Full-screen, top bar, or hover icon display options
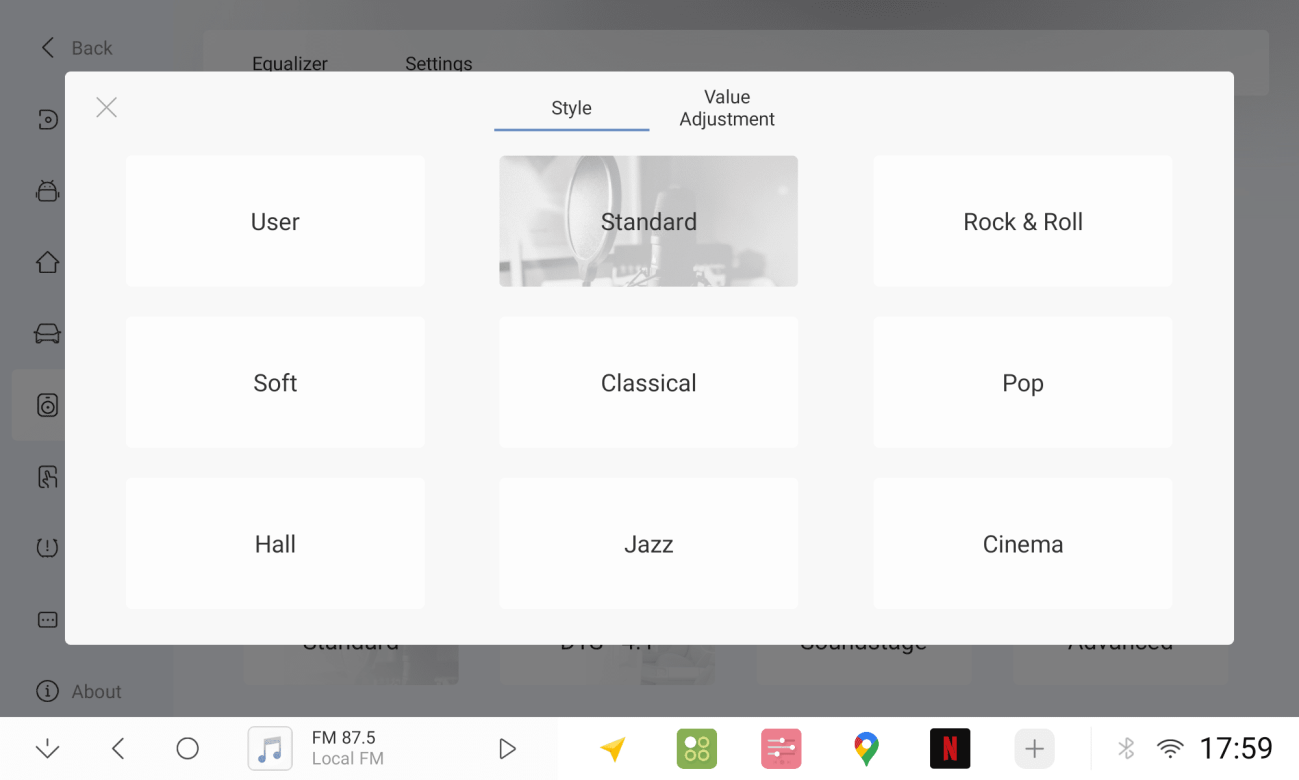
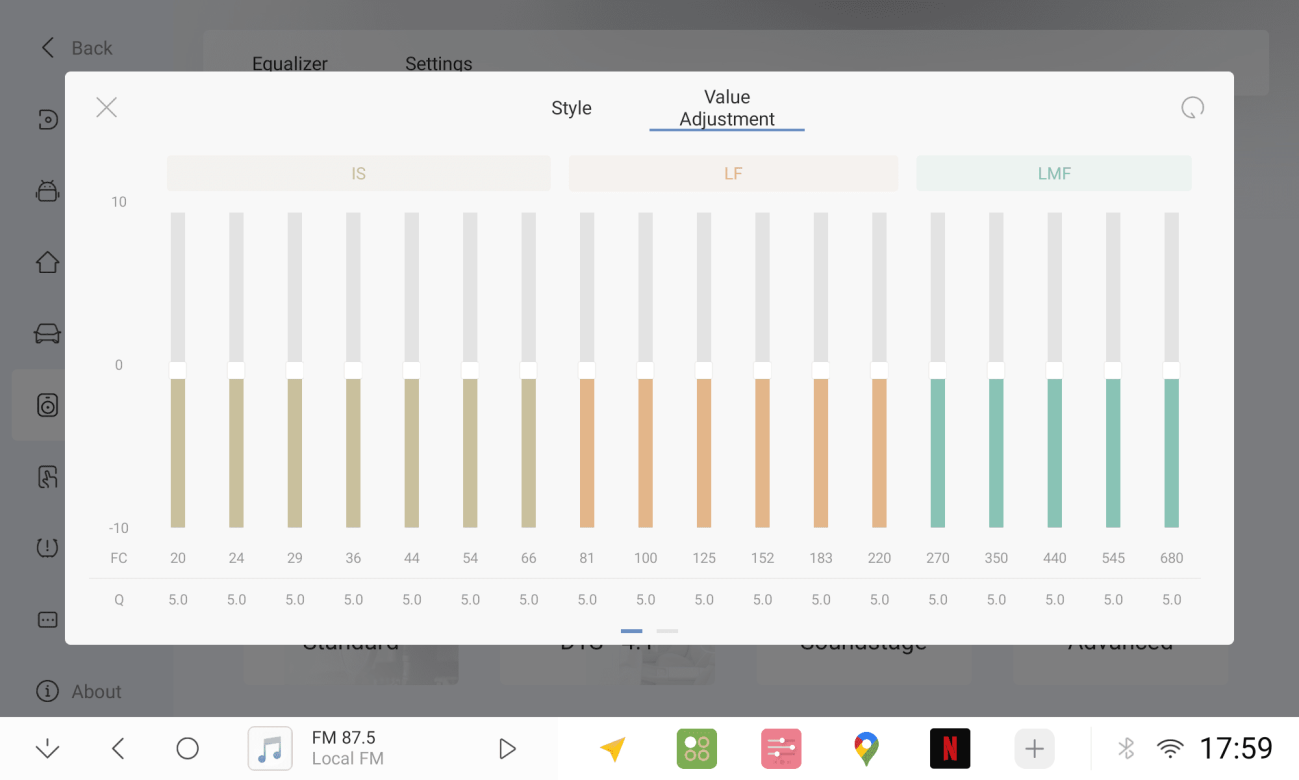
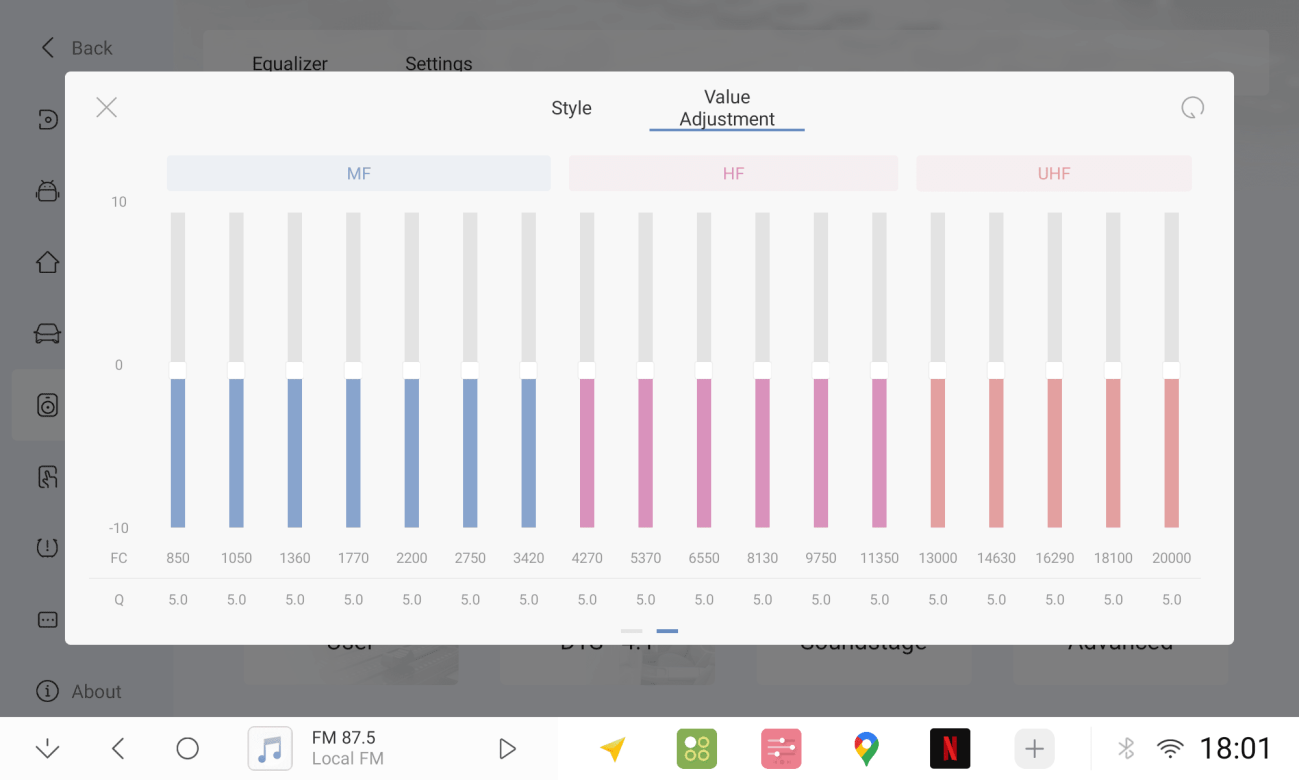
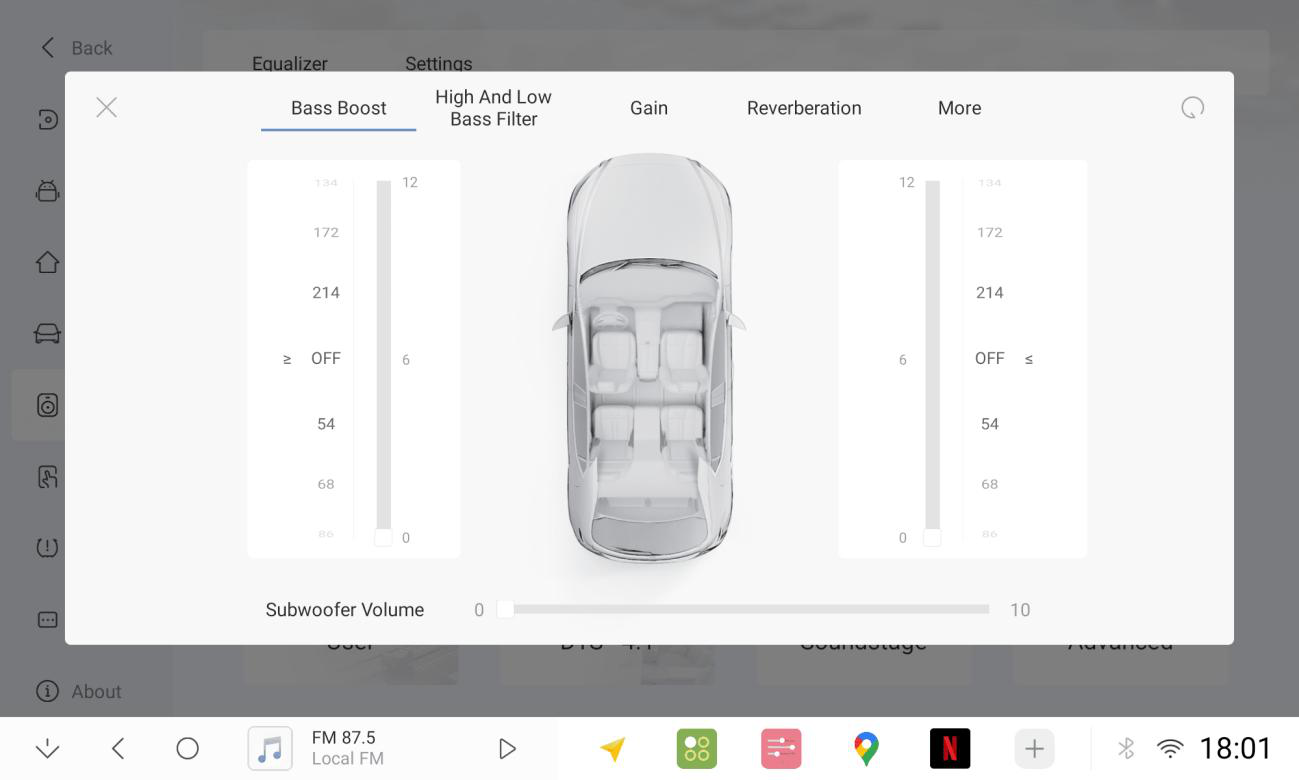
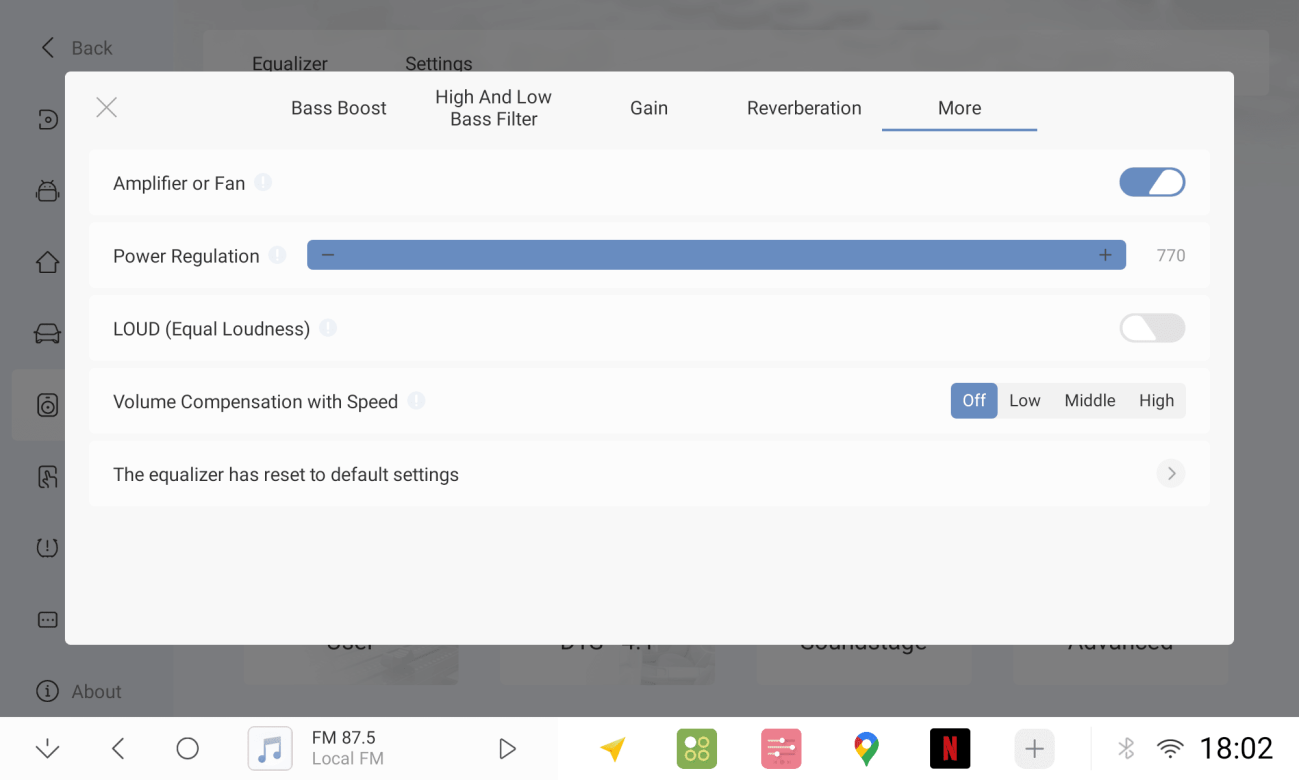
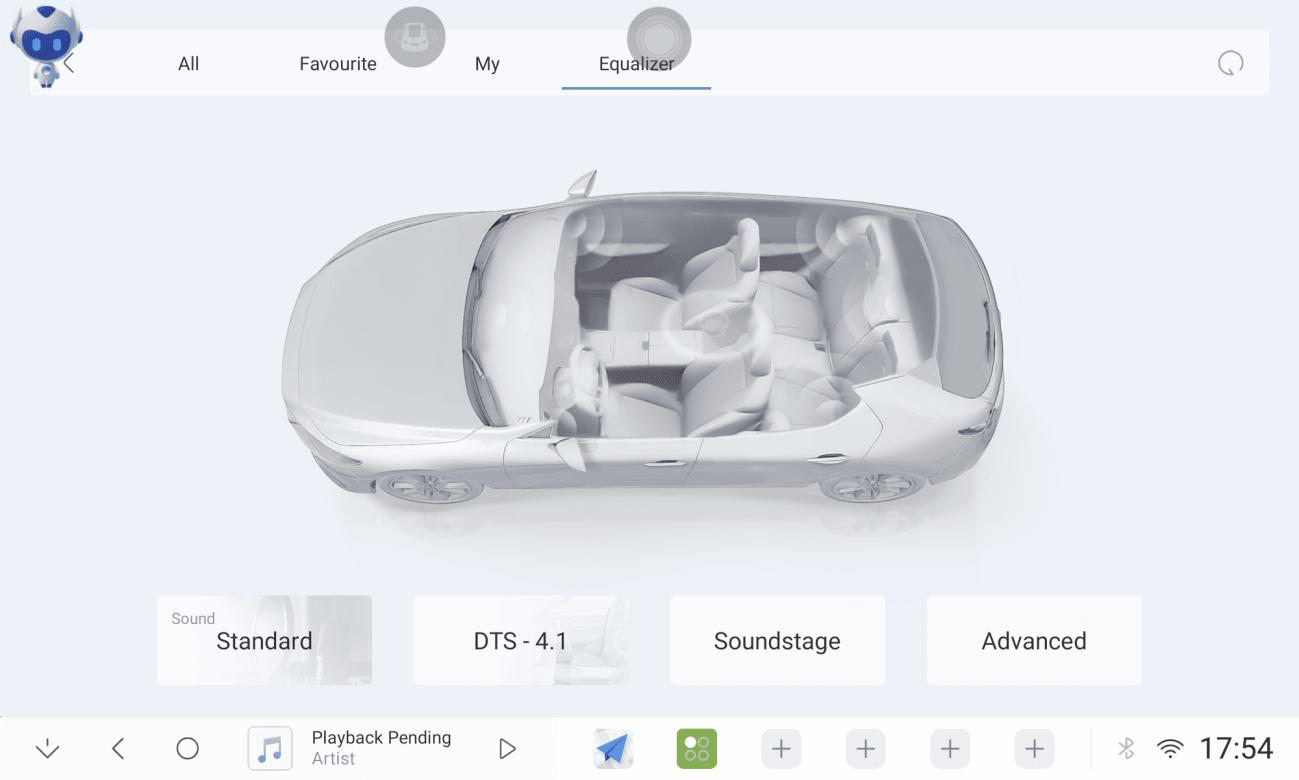
2.8 Equalizer
2.8.1 Sound Adjustment
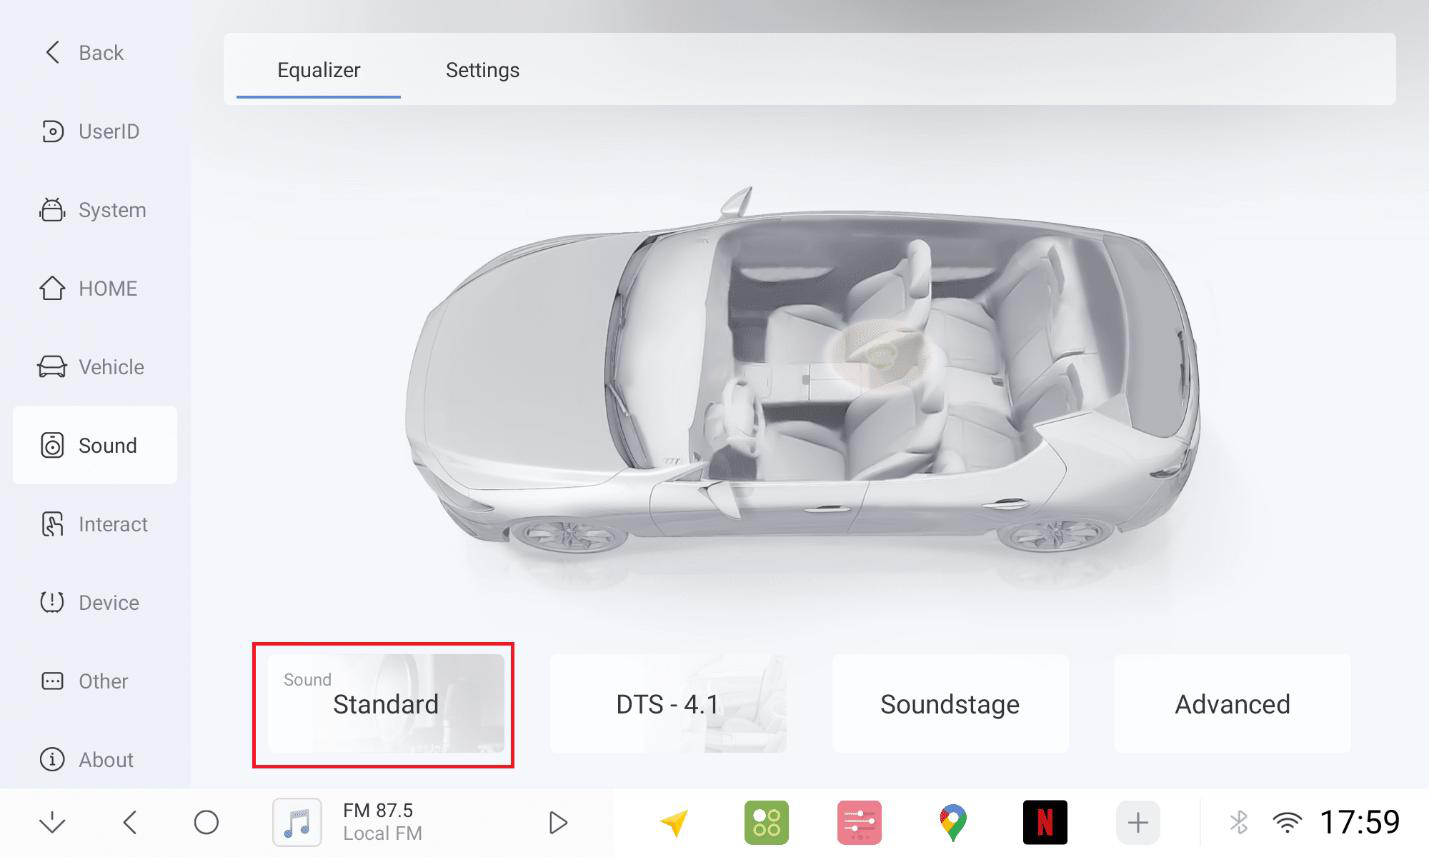
2.8.2 9 Styles
2.8.3 36-band EQ adjustment
2.8.4 DTS4.1/5.1
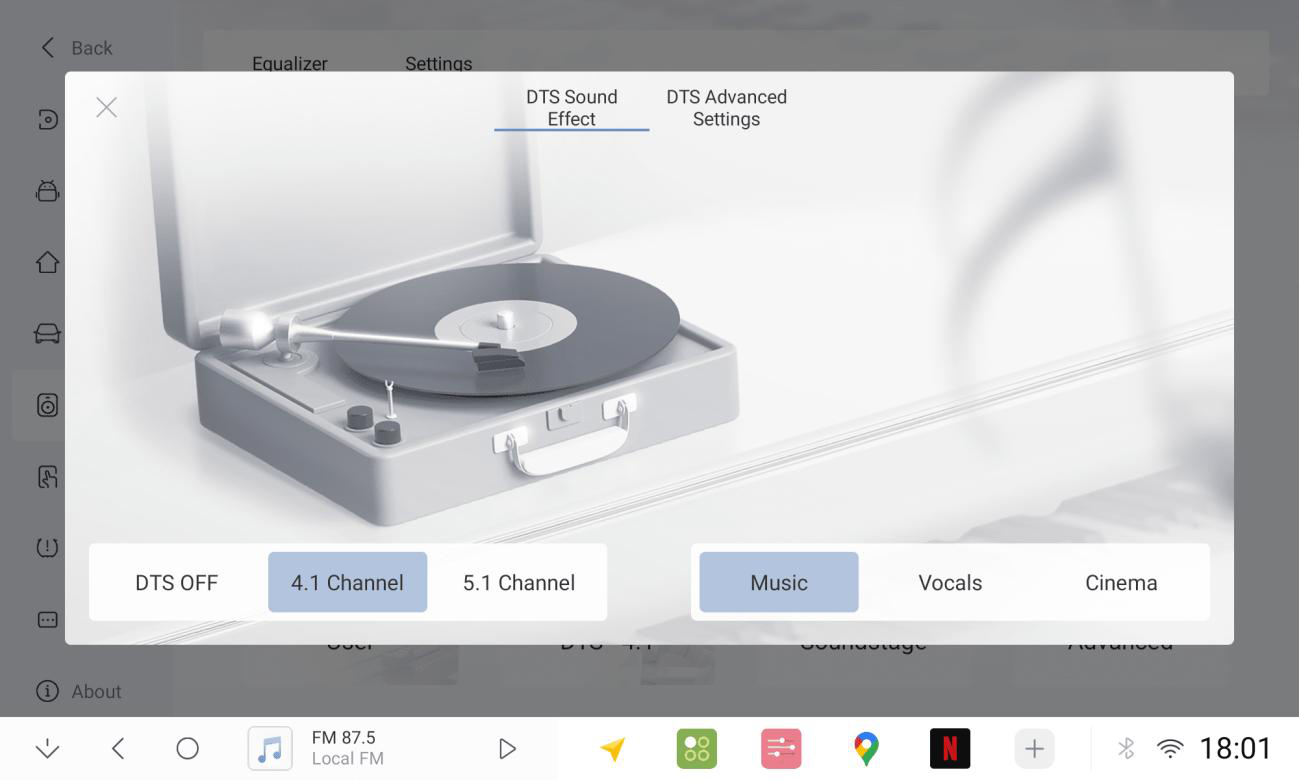
2.8.5 Sound Field Adjustment

2.8.6 Bass High/Low filter Gain Reverb Adjustment
2.8.7 Amplifier Switch Power Adjustment
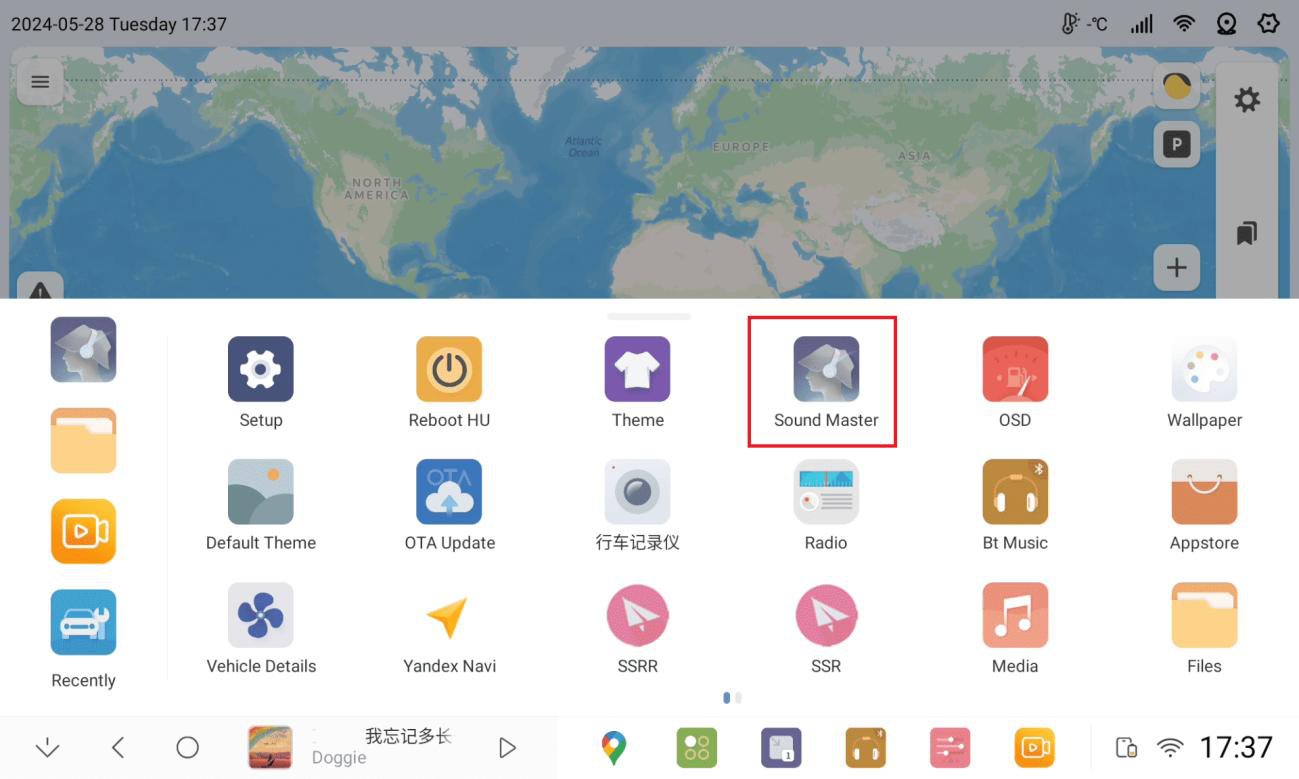
2.9 Sound Master
2.9.1 Access to Sound Master (Need to connect the internet and login the account)
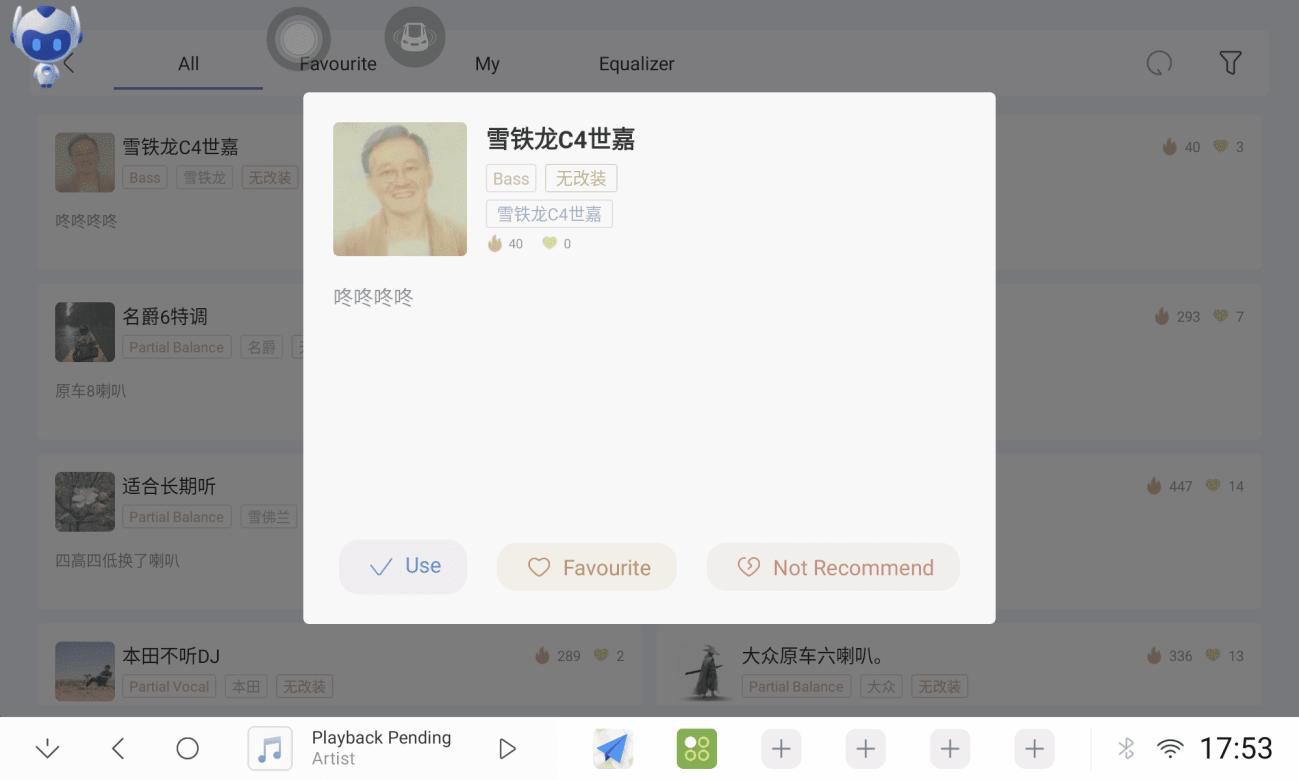
2.9.2 You can select the sound effects according to your own preferences to match your musical style.
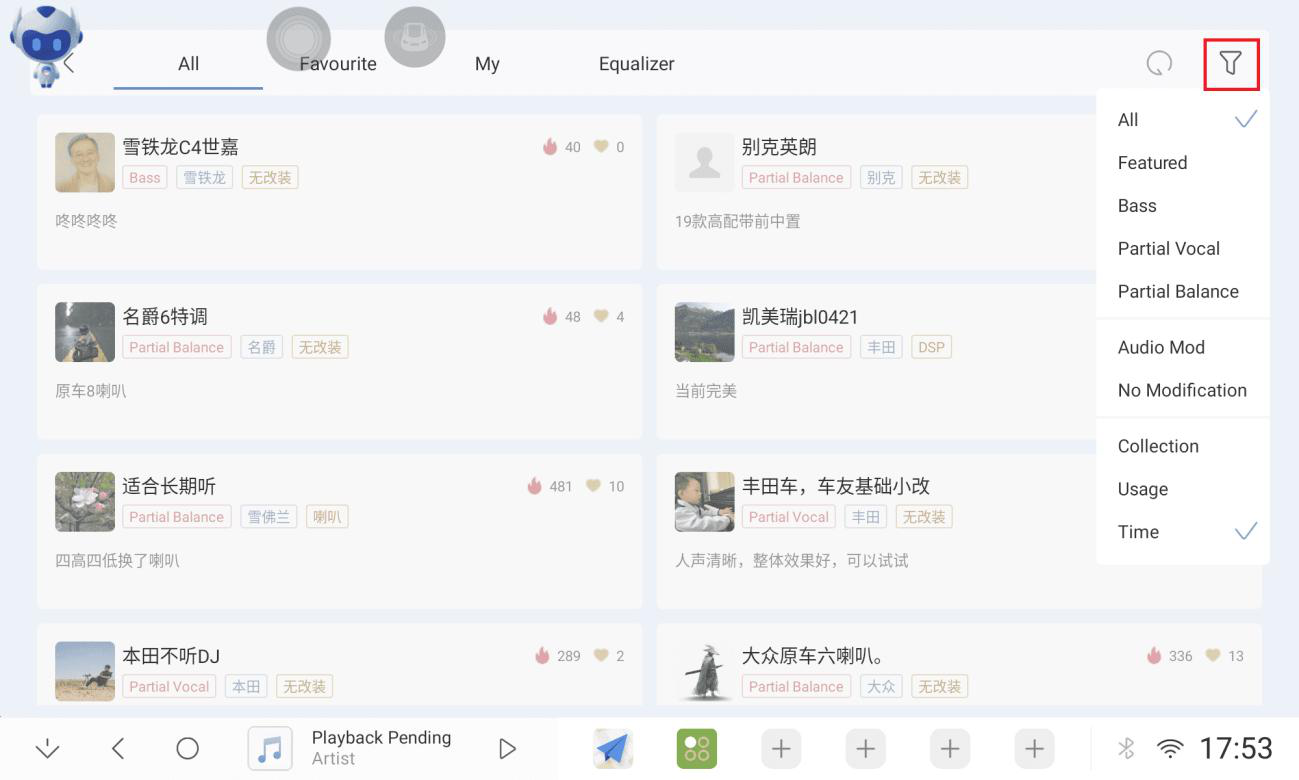
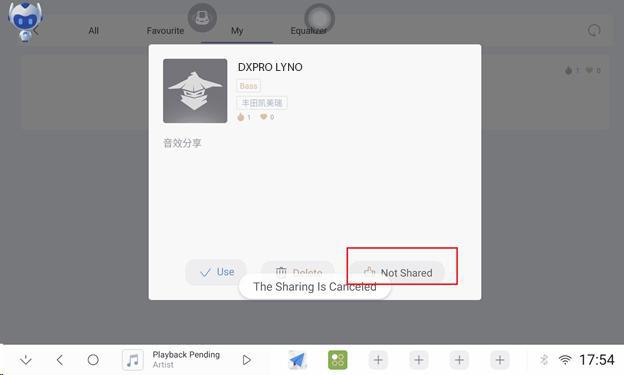
2.9.3 If you like a sound you can use it or bookmark it to your list.
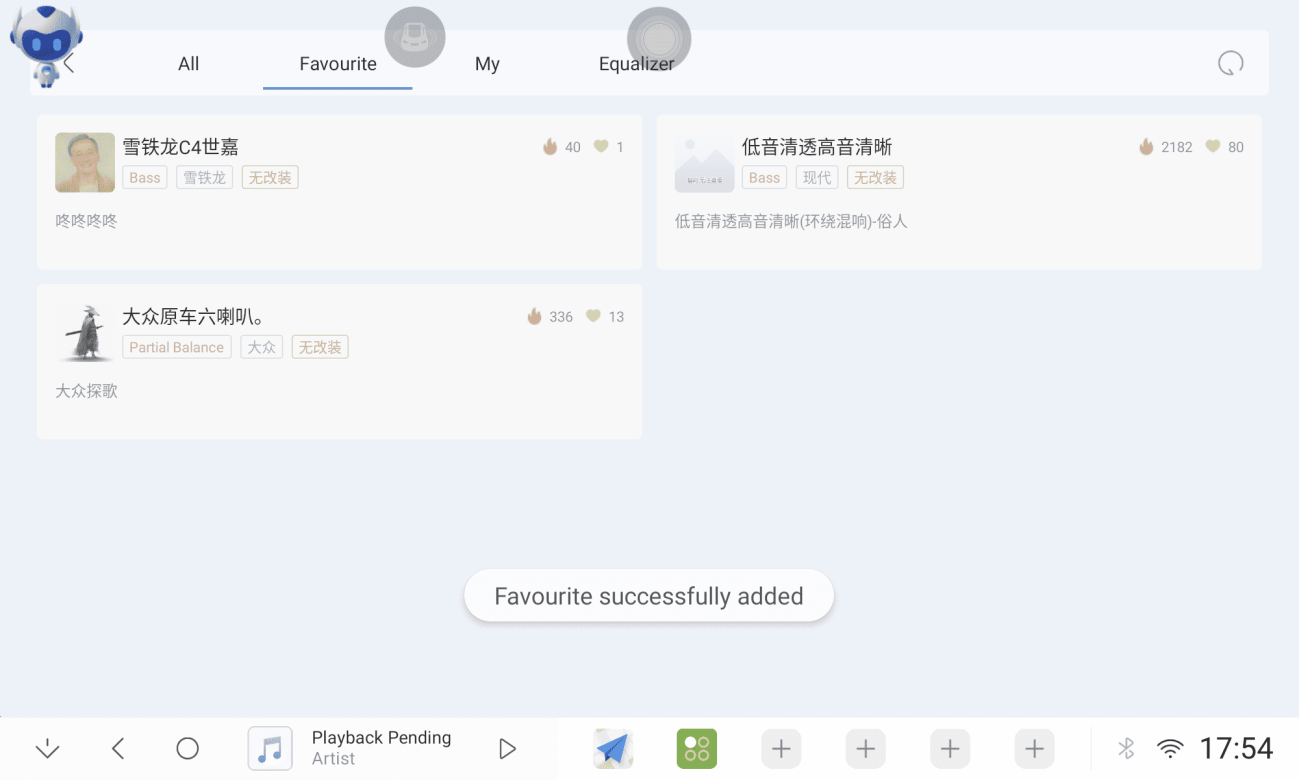
2.9.4 Favourites List
2.9.5 You can save multiple EQ programmes of your own setting.
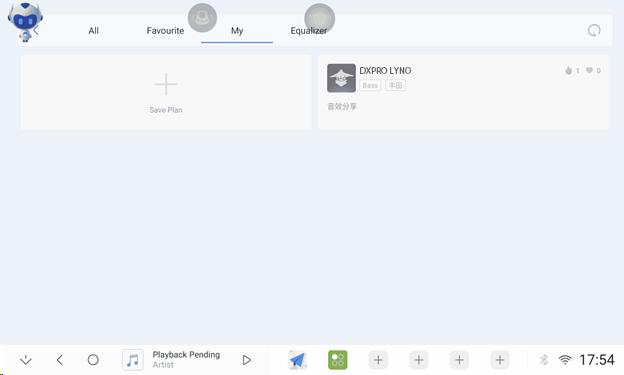
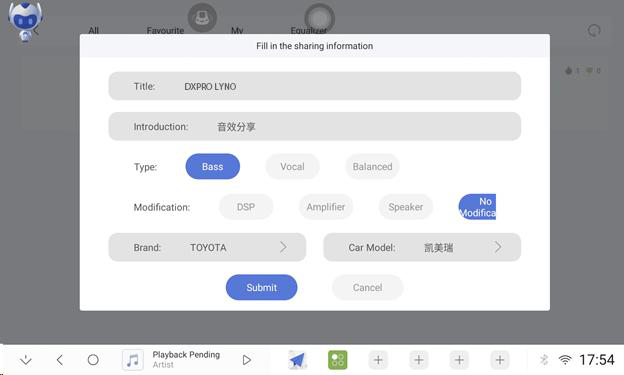
2.9.6 Sharing EQ programme
2.9.7 Equaliser
Others
3.1 Accessories
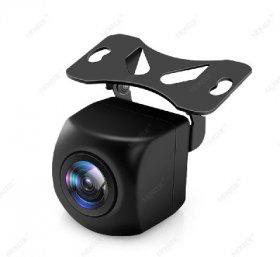
SONY 307 camera
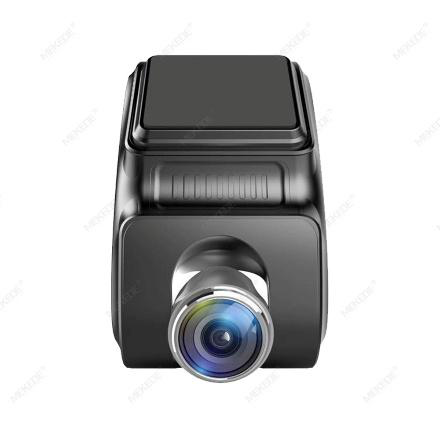
ADAS DVR
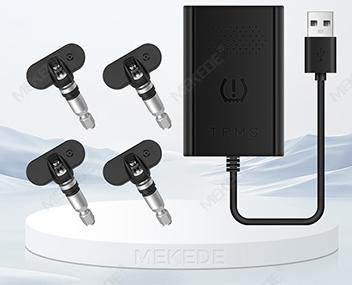
USB TPMS
Manual Complete
Thank you for using the Lyno Android Player User Manual!
This comprehensive guide covers all features and functions of your Lyno Android Player.
For additional support, please contact our customer service team.